
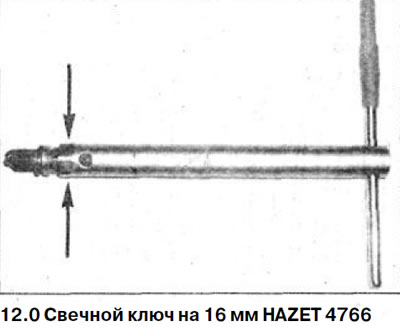
Required tools:
- long candle wrench 16 mm (e.g. HAZET 4766) with tube outer diameter 23 mm (see illustration 12.0).
Necessary materials:
- 4 spark plugs of the following specification.
Attention! Due to constant technical changes, it may be that certain types of engines require spark plugs with different parameters. To determine the desired type of candles, when purchasing them, experts require you to specify the vehicle identification number and 3 numbers of the candle code. These numbers are indicated in the registration certificate for the vehicle. They should be reported when buying spark plugs.
Removing
1. Turn off the ignition.
Attention! Do not touch high voltage parts. Persons with a pacemaker are not allowed to work on the electronic ignition system.
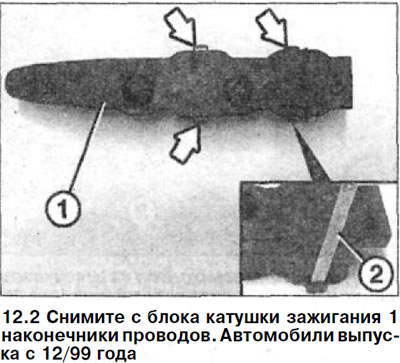
2. Vehicles manufactured since 12/99. Remove the wire ends from the ignition coil unit 1 by inserting four strips 2 10 mm wide and 3 mm thick into the slots provided for this (see arrows in illustration). Squeeze the slats to release the cover from the mount.
3. Blow out the spark plug seats with compressed air.
4. Disconnect the multi-pin plug 1 of the block 5 of the ignition coils by pressing on the locking tab 2 (see illustration).
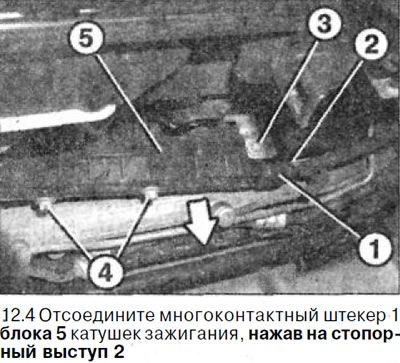
5. Unscrew the bolt 3 with a socket wrench EJU with an extension handle HAZET 919-10, as well as bolts 4 with a key E12.
6. Disconnect the block 5 of the ignition coils together with the built-in tips from the spark plugs by moving it in the direction of the arrow (see illustration 12.4).
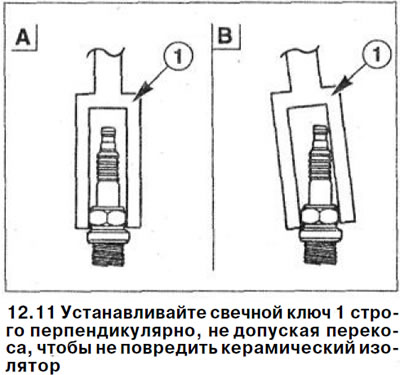
7. Unscrew the spark plugs 1 with a special spark plug wrench 2 with extension handle 3, e.g. HAZET 4766 (see illustration). In this case, the key must be installed on the candle perpendicularly, without distortions.

Examination
8. Examine the removed candle. If the spark plug electrodes are covered with oil or wet, then there is a misfire or it is caused by poor condition of the piston rings (check the compression by contacting the workshop).
9. Check the gap between the electrodes using a template.
Attention! For new spark plugs, the gap between the electrodes is usually correct.
10. Bend the side electrode to correct the gap. Perform bending by tapping on the side electrode. To bend the side electrode, use a small screwdriver, resting it on the edge of the thread, but in no case on the center electrode, otherwise it may be damaged.

Installation
11. Screw the candles by hand until they touch the cylinder head, and then tighten them with a force of 25 Nm.
Attention! Install spark plug 1 strictly perpendicular to (see illustration, part A), being careful not to skew, so as not to damage the ceramic insulator.
12. Check up ignition coils, having wrung out tips of spark plugs with a plastic wedge. Spark plug tips and coil springs must not be damaged or deformed.
13. Reinstall the spark plug tips and make sure the rubber tips are firmly seated on the tips. Nozzles must not be deformed. In the event of a loose fit of the nozzle, protection against breakdown of the spark plug insulator is not provided.
14. Establish the block of coils of ignition together with tips on candles and fix the block.
15. Connect the multi-pin plug and secure it.
16. Screw in the ignition coil block mounting bolts and tighten them with a force of 20 Nm.
17. Fix the holder of the coil unit with a tightening torque of the bolts of 8 Nm.
18. Connect and secure the crankcase ventilation hoses.
19. Reinstall the cover of the ignition coil unit and secure it with bolts. Attach the crankcase ventilation hose to the holder.
Upgrading the Thread of the Spark Plug Socket
Attention! If it turns out that the thread of the socket on the cylinder head where the spark plug is screwed in is damaged, then this thread must be renewed. For cutting new threads, BERU offers a suitable set of tools. Using a special drill, turn off the damaged thread. The cylinder head does not need to be dismantled for this. Then cut a new thread in the socket and screw in the spark plug with a special sealing insert. Inserts provide firmness of landing of candles and the required level of compression.