
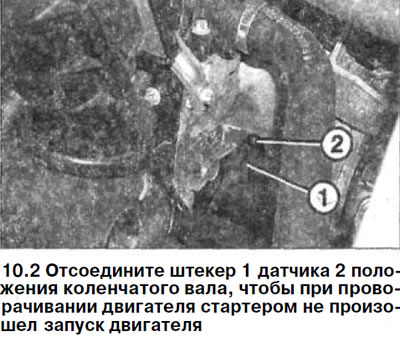
2. Disconnect the plug 1 of the crankshaft position sensor 2 so that when the engine is turned by the starter, the engine does not start (see illustration).
Attention! There is a risk of injury when jacking up the vehicle and placing it on jack stands. For this reason, first familiarize yourself with the safety measures when performing these works.
3. Place the vehicle on jack stands and remove the front engine guard (mudguard), see relevant chapter.
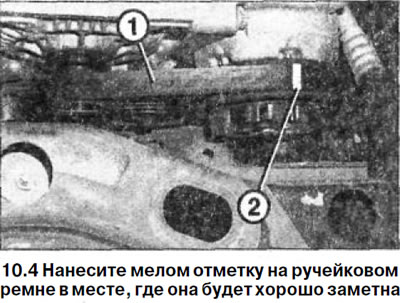
4. Mark with chalk mark 2 on the ribbed belt 1 in a place where it will be clearly visible (see arrow in illustration).
5. Check up a condition of a belt on all its length, slowly turning the engine a starter before emergence of the put mark.
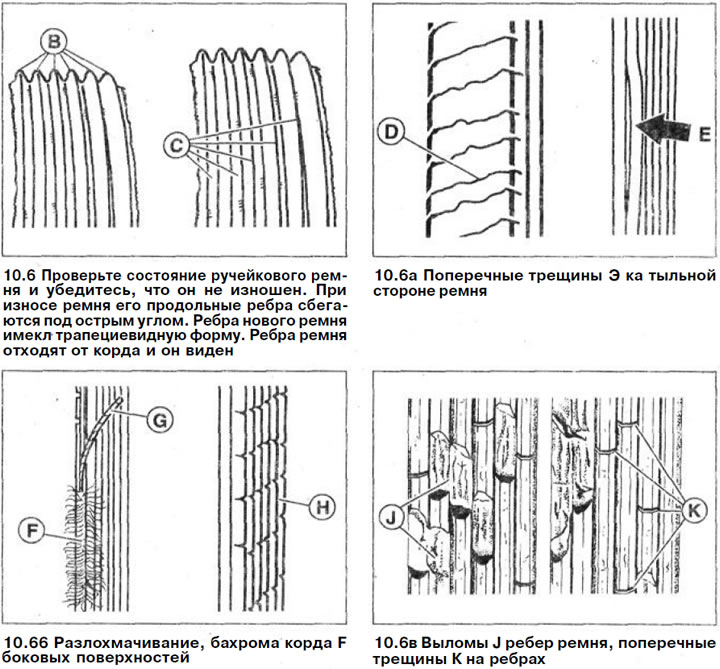
6. Inspect the ribbed belt. Make sure it is free of oil and grease. When the belt is worn, its longitudinal ribs converge at an acute angle (see part B in the illustration). The ribs of the new belt are trapezoidal in shape. The ribs of the belt move away from the cord and it is visible (see part C in the illustration). Other damage to the ribbed belt are:
- A) transverse cracks D on the back of the belt (see illustration 10.6a);
- b) detachment of the E part of the ribs (see arrow in illustration 10.6a);
- V) fraying, F cord fringe on side surfaces (see illustration 10.6b);
- G) cord breaks G (see illustration 10.6b);
- d) transverse cracks H on several ribs (see illustration 10.6b);
- e) breaks J belt ribs (see illustration 10.6c);
- and) transverse cracks K on the ribs (see illustration 10.6c);
- h) deposits between the ribs of the belt;
- And) rolling of the belt base rubber.
If there is at least one or more of the above damages, the ribbed belt must be replaced, see relevant chapter.
7. Turn off the ignition and remove the key from the ignition.
8. Inspect if there is a ribbed drive belt for the electric radiator blower fan, gradually rotating the fan.
9. Connect the plug of the crankshaft position sensor.
Attention! Disconnection of the crankshaft position sensor plug is registered by the self-diagnosis system as a malfunction. In this regard, it is recommended to contact the workshop to read and delete the fault codes.
10. Read the codes of the registered faults and delete them.