
- A) fuel hoses;
- b) cooling system hoses;
- V) brake hoses;
- G) power steering pipelines;
- d) air conditioner piping.
Search for oil leaks
With increased oil consumption, check all places where leaks are possible. To this end:
1. Unscrew the oil filler cap and check the condition of its gasket for damage and porosity.
2. Vehicles with a diesel engine. Check the fastening of the oil return hose between the cylinder block and the oil separator.
3. Check the cylinder head cover gasket.
4. Check the cylinder head gasket.
5. Check the oil filter gasket.
6. Check the gasket on the engine oil drain plug.
7. Check the oil pan gasket.
8. Check the tightness of the junction of the engine and gearbox (flywheel or gearbox shaft seal).
Since the oil usually spreads over a large area on the surface of the engine when leaking, it can be difficult to determine the location of the leak at a glance. The following search method is recommended:
9. Wash the engine. To do this, spray the engine with an aerosol cleaner and, after allowing it to act, rinse with water. If the engine is splashed with cleaner from under the vehicle, cover the generator with a plastic bag.
Attention! Engine washing should only be carried out at self-service car washes equipped with an oil separator.
10. Sprinkle outside the connecting joints on the engine and their gaskets with lime or talc.
Note: In specialized workshops, a special oil leak detection spray is used for this purpose.
11. Check the oil level again, top up if necessary.
12. Take a test drive. Since the oil liquefies when the engine is hot and is therefore released more quickly at leaks, it is best to make this trip on a high-speed road, covering a distance of about 30 km.
13. Examine the engine at the end of the test drive, illuminating it with a lantern, determine the location of the leak and eliminate the malfunctions.
Cooling system - check
14. Check the cooling system hoses for porosity by squeezing and bending them. Replace hardened or swollen hoses. The hoses must not sit too tight on the connection fittings.
15. Check up firmness of fastening of hoses collars. If necessary, replace the old clamps with new ones.
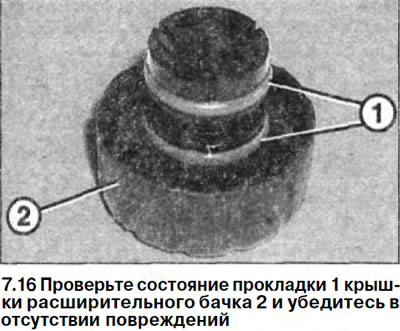
16. Check up a condition of a lining 1 of a cover of a broad tank 2 and be convinced of absence of damages (see illustration).
Attention! The cause of the coolant level drop may be an incorrectly screwed cap on the expansion tank.
17. Check the coolant itself and make sure that no oil has entered the cooling system and the liquid is not contaminated. Perceptible loss of coolant and (or) the presence of oil in it, as well as white clouds of exhaust gases with a warm engine, indicate a defect in the cylinder head gasket.
Attention! Finding a leak is sometimes difficult. In this case, you should contact the workshop, where for this there is a special device with which the cooling system is checked under pressure. In this case, you can also check the pressure reducing valve on the cover of the expansion tank.