



Vehicle heating and ventilation Mercedes G-Class (W463)

General information and safety precautions
Note: See also Part Comfort devices . The air supplied by the ventilation system to the car interior through the filter can be heated or cooled depending on the user's...
Note: See also Part Comfort devices . The air supplied by the ventilation system to the car interior through the filter can be heated or cooled depending on the user's...

Removal and installation the control panel of the heating / ventilation / air conditioning systems
Installation details of the heating/ventilation/air conditioning (HVAC) control panel (N₂2) 1. Turn on the auxiliary battery and connect it to the standard battery, then...
Installation details of the heating/ventilation/air conditioning (HVAC) control panel (N₂2) 1. Turn on the auxiliary battery and connect it to the standard battery, then...

Removal and installation the heater/air conditioner fan and its control module
Fan assembly Heater/Air Conditioner Fan Installation Details 1 - Mounting screws 2 - Fan controller wiring connector (A32n1) A32m1 — Fan drive electric motor A32n1 -...
Fan assembly Heater/Air Conditioner Fan Installation Details 1 - Mounting screws 2 - Fan controller wiring connector (A32n1) A32m1 — Fan drive electric motor A32n1 -...

Removal and installation the heater heat exchanger
Heater heat exchanger installation details 9 - Nozzle; 9a - Spring clamps; 10 - Connecting clamps; 11 - Cooling tract tubes; 12 - Heat exchanger; 13 - TORX head bolts;...
Heater heat exchanger installation details 9 - Nozzle; 9a - Spring clamps; 10 - Connecting clamps; 11 - Cooling tract tubes; 12 - Heat exchanger; 13 - TORX head bolts;...

Removal and installation the heater circulation pump
Installation details of the heating circulation pump 1. Remove the crankcase guard. 2. Drain the cooling system (see Chapter Routine care and maintenance ). 3. Remove...
Installation details of the heating circulation pump 1. Remove the crankcase guard. 2. Drain the cooling system (see Chapter Routine care and maintenance ). 3. Remove...

Removal and installation rear ventilation flaps
Except for models with special protection (code 979) Rear Ventilation Shield Installation Details 1. Remove the protective cover (1) of the rear pillar trim panel (2)....
Except for models with special protection (code 979) Rear Ventilation Shield Installation Details 1. Remove the protective cover (1) of the rear pillar trim panel (2)....

Checking the refrigerant level in the working path of the A/C system
Caution! Observe all necessary precautions related to servicing the A/C systems (see Section General information and safety precautions )! Front decorative grille...
Caution! Observe all necessary precautions related to servicing the A/C systems (see Section General information and safety precautions )! Front decorative grille...

Removal and installation of sensors of the K/V system
Caution! Observe all necessary precautions related to servicing the A/C systems (see Section General information and safety precautions )! Air humidity sensor Air...
Caution! Observe all necessary precautions related to servicing the A/C systems (see Section General information and safety precautions )! Air humidity sensor Air...

Removal and installation the auxiliary fan assembly
Using the model 463.323 as an example (engine M612) Auxiliary Fan Assembly Installation Details on Models 463.323 (1 of 2) 1 - Upper front cross beam; 2 - Power steering...
Using the model 463.323 as an example (engine M612) Auxiliary Fan Assembly Installation Details on Models 463.323 (1 of 2) 1 - Upper front cross beam; 2 - Power steering...

Removal and installation the electric motor of the ventilation flap drive
Installation details of the stepper motor (M2/4) for the ventilation flap drive 1. Disconnect the negative battery cable, then remove the instrument panel (see Chapter...
Installation details of the stepper motor (M2/4) for the ventilation flap drive 1. Disconnect the negative battery cable, then remove the instrument panel (see Chapter...
Removal and installation the stepper motor of the air circulation mode switching flap drive
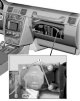
Installation details of the stepper motor (M2/5) for the air circulation mode switching damper drive 1. On models with the corresponding configuration (code ET2),...
Installation details of the stepper motor (M2/5) for the air circulation mode switching damper drive 1. On models with the corresponding configuration (code ET2),...

Removal and installation the electric motor of the mixing flap drive
Installation details of the electric motor (M2/6) for the left mixing flap drive 1. Disconnect the negative cable from the battery. 2. Remove the cover on the left under...
Installation details of the electric motor (M2/6) for the left mixing flap drive 1. Disconnect the negative cable from the battery. 2. Remove the cover on the left under...

Removal and installation of the air conditioning system evaporator and its casing
Caution! Observe all necessary precautions related to servicing the A/C systems (see Section General information and safety precautions )! Removal and installation of...
Caution! Observe all necessary precautions related to servicing the A/C systems (see Section General information and safety precautions )! Removal and installation of...

Removal and installation of the air conditioning system compressor
Petrol models Installation details of the air conditioning system compressor on gasoline models 1. Discharge the air conditioning system at a specialized service...
Petrol models Installation details of the air conditioning system compressor on gasoline models 1. Discharge the air conditioning system at a specialized service...

Removal and installation of the condenser of the K/V system
Attention! All sealing elements must be replaced! Petrol models Installation details of the K/V condenser on petrol models (with code H02) 1 - Refrigeration line to...
Attention! All sealing elements must be replaced! Petrol models Installation details of the K/V condenser on petrol models (with code H02) 1 - Refrigeration line to...

Removal and installation the expansion valve
Attention! All sealing elements must be replaced! Expansion valve installation details 9 - Bolts 10 - Expansion valve 11 — Sealing gasket 1. Remove the evaporator...
Attention! All sealing elements must be replaced! Expansion valve installation details 9 - Bolts 10 - Expansion valve 11 — Sealing gasket 1. Remove the evaporator...

Removal and installation the receiver-dryer
Attention! All sealing elements must be replaced! Details of installation of receiver-dryer K/V 1 — Receiver-dryer 2 - High pressure line service valve 3 - Fastening...
Attention! All sealing elements must be replaced! Details of installation of receiver-dryer K/V 1 — Receiver-dryer 2 - High pressure line service valve 3 - Fastening...
This section is available on: russian, bulgarian, belarusian, ukrainian, serbian, croatian, romanian, polish, slovak, hungarian
More similar sections for repairing other models
☛ Power unit: Ventilation and heating car Mercedes W203 (2000-2007)
☛ Power unit: Heating and ventilation car Mercedes W124 (1984-1995)
☛ Power unit: Heating and ventilation car Mercedes W163 (1997-2005)
☛ Electrical equipment: Heater and air conditioner car Mercedes Vito 1 (1996-2003)
Link in different formats to this section
TEXTHTMLBB Code
- General information
- Introduction to the guide
- Controls and instruments
- Driving and operation
- Maintenance
- Power unit
- Engine repair
- Cooling system
- Heating and ventilation
- Power system (gasoline)
- Fuel system (diesel)
- Exhaust system
- Ignition and control system
- Charging and starting system
- Transmission
- Automatic gearbox
- Transfer case
- Axles front and rear
- Chassis
- Brake system
- Front suspension
- Rear suspension
- Steering
- Body
- Exterior (external elements)
- Interior (internal elements)
- Doors, locks and windows
- Electrical equipment
- Equipment and devices
- Switches in salon
- Headlights and lighting
- Audio system and navigation
- Electrical circuits