
Examination
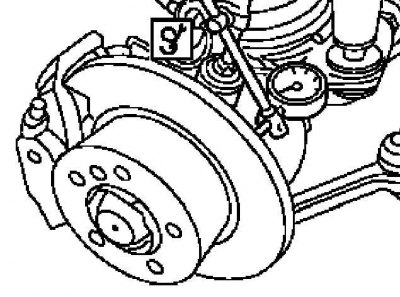
Measuring the amount of lateral runout of the brake disc (on the example of the brake mechanism of the front wheel)
1. Estimate the wheel bearing play, correct if necessary (see chapter transmission line).
2. Remove the wheels and visually assess the condition of the brake discs. If deep grooves are detected, the discs should be machined within the allowable values, or replaced (see below).
Note. The discs must also be replaced if the thickness of any of them is outside the lower limit of the allowable range (see Specifications).
3. Attach the DTI dial gauge to the hub assembly by pressing its plunger against the side of the disc.
4. Zero the meter and, by rotating the disc, determine the amount of its lateral runout.
5. Compare the measurement result with the requirements Specifications, if necessary, replace discs (see below).
Removal and installation
Attention! Brake discs must be changed as a set at the same time for both wheels of the same axle!
Front brake discs
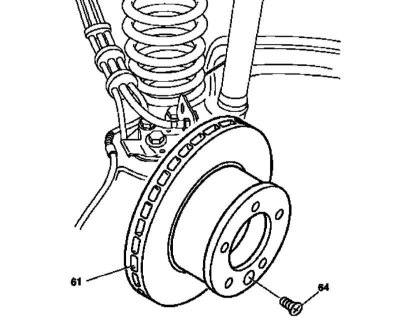
Details of installation of a disk of the brake mechanism of a forward wheel
61 - Brake disc
64 - Mounting bolt
1. Remove the brake pads (see Section Checking the condition and replacing the brake pads).
2. Remove the caliper (see Section Removal and installation of brake calipers).
3. Turn out a lock bolt (64) and remove the brake disc (61), - the bolt must be replaced without fail.
4. Installation is carried out in the reverse order - before installation, lubricate the seating surface of the disc with long-life grease type MB No. 000 989 63 51.
5. Finally, check the brake fluid level and correct if necessary (see chapter Ongoing care and maintenance).
Front brake discs
1. Remove the caliper (see Section Removal and installation of brake calipers).
2. Remove the brake pads (see Section Checking the condition and replacing the brake pads).
3. Remove the anchor shackle (6), - Prepare replacement self-locking bolts.
4. Pull back the parking brake shoes.
5. Turn out a lock bolt and remove a brake disk.
6. Installation is carried out in the reverse order.
7. Finally, check the brake fluid level and correct if necessary (see chapter Ongoing care and maintenance).