
2. Make sure you have all the necessary tools to get started. You should have enough rags or old newspapers to clean up any spilled oil. It is better to change the oil before the engine has cooled down after work - the dirt in it is in suspension and flows well along with hot oil. However, be careful not to touch the exhaust pipe or other hot engine parts when working under the machine. Wear rubber gloves to avoid burns and skin irritation when handling used oil. Access to the underside of the vehicle is greatly improved if the vehicle can be raised on a lift, driven onto a flyover, or jacked up and placed on jack stands (see "Vehicle lifting and jacking up"). Regardless of which method of lifting the vehicle is used, make sure the vehicle is level or, if at an angle, the drain hole is located at the lowest point. Where necessary, remove the mudguards from underneath the vehicle.
3. Working in the engine compartment, determine the location of the oil filter housing in the left rear corner of the engine, behind the intake manifold.
4. Place a rag or tissue paper around the base of the cabinet to catch any spilled oil.
5. Depending on the engine type, do the following.
4-cylinder engines
Models with a collapsible type oil filter
Note: New local filter housing cover and thru-bolt o-rings are required for installation. You will also need a new drain plug seal.
6 Remove the through bolt, then remove the bolt along with the oil filter housing cover. Remove the o-rings from the bolt and cover and dispose of them when installing new ones will be required (see fig. 3.6).
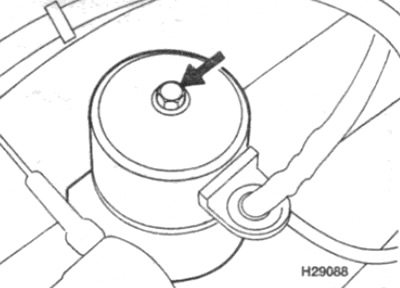
Pic. 3.6. Oil filter housing cover through bolt (shown by arrow) - 4-cylinder models with a collapsible filter
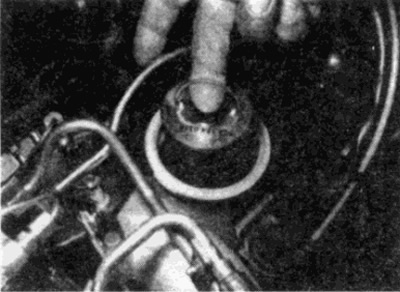
Pic. 3.7. Remove the oil filter element using the handle provided for this - 4-cylinder models with a collapsible filter
7. Remove the oil filter element from the housing (using the available handle) and dispose of it (see fig. 3.7).
8. Working from underneath the vehicle, loosen the drain plug about a pop of a turn. Position the receiver oil under the hole, and unscrew the plug completely. If possible, when unscrewing by hand on the last two threads, try to press the plug against the pallet.
When the plug is out of the threaded hole, remove it quickly so that the jet of escaping oil enters the oil receiver, and not into your sleeve.
9. Remove the o-ring from the plug.
10. Wait a while for the old oil to drain out of the crankcase, bearing in mind that you may have to move the oil receiver so that the dripping trickle gets into it.
11. After all the old oil has been drained. Wipe off the plug with a clean cloth. Replace sealing washer. Clean the area around the drain, then install and tighten the plug.
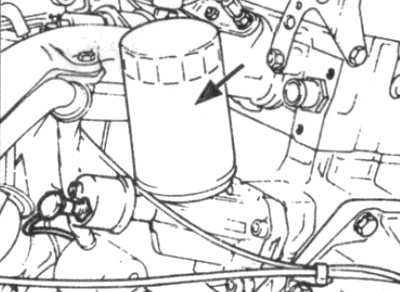
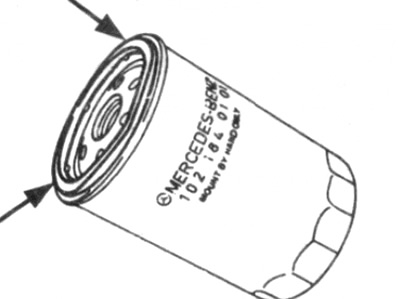
Pic. 3.20. Oil filter location (shown by arrow) - 4-cylinder models with non-separated filter
12. Remove the old oil and all tools from under the car, then lower the car to the ground (if required).
13. Wipe the oil filter housing and cover with a clean cloth. Then install the new filter element into the housing (holding the item's handle at the top). Install new o-rings and through bolt to housing cover (see fig. 3.13).
14. Install cover and tighten through bolt to specification.
15. Remove the dipstick, then unscrew the oil filler cap on the cylinder head cover. Fill the required oil into the engine (see 'Weekly checks'). To reduce oil loss, you can pour oil in a thin stream or use a funnel. First, pour half the required amount of oil, then wait a few minutes for the oil to glass down to the sump. Continue adding oil in small increments until the level reaches the bottom mark on the dipstick. Then add oil to the required level of the upper mark on the dipstick. Insert the dipstick and close the oil filler cap.
16. Start the engine and warm it up for a few minutes; check for leaks around the oil filter housing and drain plug. Note that it may take a few seconds after starting the engine for the emergency oil pressure lamp to turn off.
17. Stop the engine and wait a few minutes for the engine oil to drain into the sump. Check the oil level again and top up if necessary.
18. Where provided, install shields underneath the engine.
19. Safely dispose of old oil.
Models with non-separable oil filter
Note: A new O-ring will be required for installation.
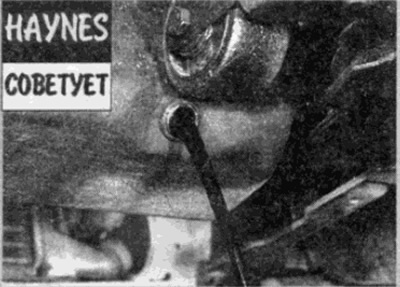
20. Using an oil filter remover, initially loosen the filter, then unscrew it by hand - be prepared to spill oil (see fig. 3.20). Drain the oil from the filter into the oil receiver.
21. With a clean cloth, wipe off the old oil and dust in the oil filter seal area on the engine. Check the old filter to make sure the rubber seal is not stuck to the housing. If it sticks, carefully peel it off.
Pic. 3.26. Apply a coat of engine oil to the filter seal (shown by arrows)
22. Apply a thin layer of engine oil to the O-ring of the new filter, then wrap it in the housing. Tighten the filter firmly by hand - do not use tools.
23. Follow the steps described earlier in paragraphs 8 -19 for a collapsible filter, skipping paragraphs 13 and 14.
6-cylinder engines
Note: A new O-ring will be required for installation.
24. Using an oil filter remover, loosen the filter, then unscrew it by hand. Drain the oil from the filter into the oil receiver.
25. Wipe off old oil and dust from the oil filter seal area on the engine with a clean cloth. Check the old filter to make sure the rubber seal is not stuck to the housing. If it sticks, carefully peel it off.
26. Apply a thin layer of engine oil to the O-ring of the new filter, then wrap it in the housing (see fig. 3.26). Tighten the filter firmly by hand - do not use tools.
27. Perform the steps described earlier in paragraphs 8-19 for a 4-cylinder engine, skipping paragraphs. 13 and 14 (see fig. 3.27).
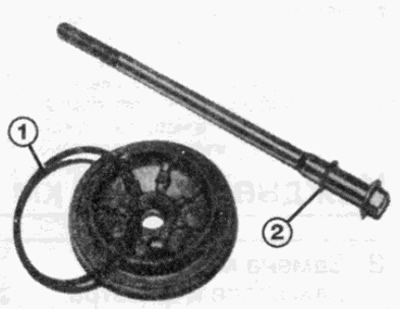
Pic. 3.13. Install new O-rings on the housing cover (1) and through bolt (2) - 4-cylinder engine with a collapsible filter
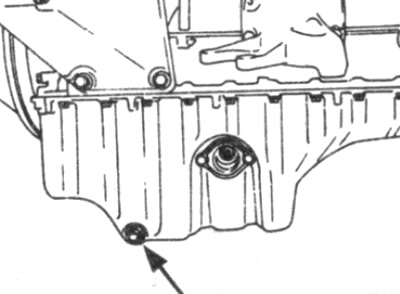
Pic. 3.27. drain plug (shown by arrow) - 6-cylinder engine