
2. If the marks on the high voltage wires are not visible, label them from 1 to 4, according to the cylinder numbers (The 1st cylinder is located on the engine from the side of the gearbox). Remove the wires from the spark plugs by holding the end of the wire, not the wire itself. Otherwise, the tip may come off the wire (see fig. 4.2).
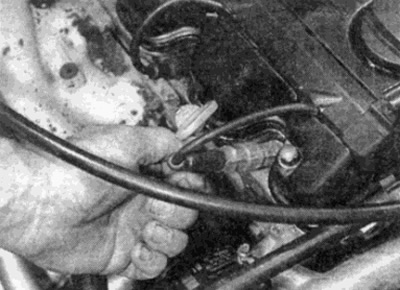
Pic. 4.2. Removing high voltage wires from spark plugs
3. To prevent dirt from entering the cylinders, it is recommended to clean the spark plug sockets with a clean brush, vacuum cleaner or air jet before turning out the spark plugs (see fig. 4.3).
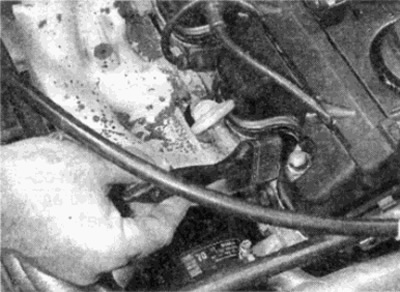
Pic. 4.3. Sweep away the dust from the recesses under the candles with a brush
4. Turn out candles, using a candle socket wrench. Keep the socket wrench aligned with the spark plug - in case of misalignment, the porcelain insulator may be damaged (see fig. 4.4). After removing another candle, carefully inspect it.
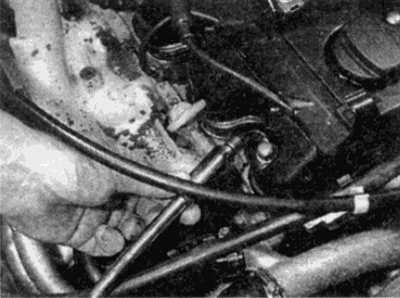
Fig.4.4. Loosening the spark plug
5. Inspection of candles will determine the condition of the engine. If the internal insulator of the spark plug is white and clean with no deposits, the engine is running lean or the spark plug is too hot (a hot plug transfers heat from the electrodes slowly, a cold plug transfers heat quickly).
6. If the electrode and the internal insulator of the spark plug are covered with a hard black layer, this means that the mixture is too rich. If the spark plugs are covered with black oil deposits, this most likely means that the engine is worn out or running too rich.
7. If the inner insulator is covered with a thin layer of light brown deposits, the mixture is normal and the engine is in good condition.
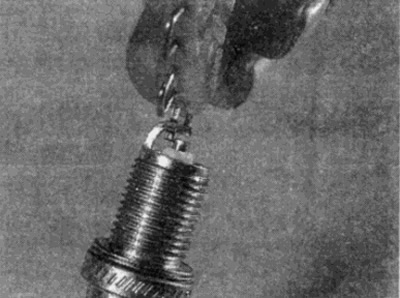
8. Important for the correct operation of the engine is the spark gap between the spark plug electrodes. If the gap is too large or too small, then the power of the spark, and with it the efficiency, is significantly reduced. The required gap values \u200b\u200bare given in section "Technical data" at the beginning of this chapter.
9. To set the gap, measure it with a flat feeler gauge, and then bend the outer electrode to the required value (see fig. 4.9). The gap is set correctly if the probe of the correct size passes between the electrodes with friction. Never bend the center electrode, as this may break the internal porcelain insulator and the spark plug will have to be discarded.

Pic. 4.9. Determination of the gap in the spark plug with a flat feeler gauge
10. Spark plug gap adjusters are available from most auto parts stores or spark plug manufacturers (see figure 4.10).
Pic. 4.10. Set the gap between the electrodes in the spark plugs by carefully bending the outer electrode using an adjusting tool
11. Before installing candles, make sure (see Haynes advises), that tips (at the end of the candle) tightly screwed on, and the outer surface and threads of the candles are cleanly rubbed.

It is often difficult to properly insert the spark plug into the head hole without damaging the threads. To facilitate this task, put a piece of flexible hose on the top horses of the candle. The flexible hose works like a wrench with a universal joint and helps to easily align the threads of the spark plug with the threads in the head. With mutual misalignment, the hose will slip and prevent the threads in the head from being damaged.
12. Remove the rubber hose (if they were used) and tighten the spark plug to the required torque (see technical data). Install the remaining spark plugs in the same way.
13. Connect the high voltage wires in the correct order, and install all the parts removed to improve access to the spark plugs.