
Note: The hub should not be removed before the bearings have been replaced because the inner race of the bearing is pressed into the steering knuckle and removing the hub will always damage the bearing. A press is required for disassembly and assembly. If it is not available, you can use the large vise on the workbench and spacers (type large sockets for socket wrenches). The inner clips are pressed into the hub. If the inner race remains on the hub when it is pressed out of the steering knuckle, a bearing puller with sharp jaws will be required to remove it.
Removing
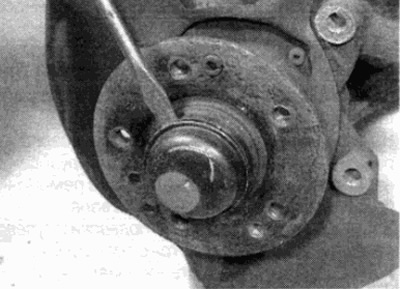
1. Remove the front brake disc as described in Chapter 9. On models with ABS, also remove the front wheel sensor.
2. Remove the grease cap from the center of the hub. If the cap is damaged during removal, it must be replaced (see fig. 3.2).
Pic. 3.2. Remove the grease cap from the center of the hub...
3. If necessary, remove the radio interference spring from the center of the shaft axis (see fig. 3.3).
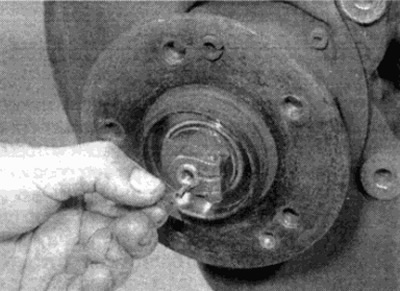
Pic. 3.3....and remove the radio interference spring from the hub shaft
4. Loosen the pinch bolt of the hub nut, then loosen and unscrew the nut from the shaft (see fig. 3.4, a, b). Remove thrust washers (where they are installed).
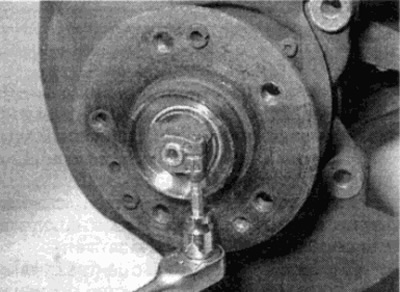
Pic. 3.4, a. Loosen pinch bolt...

Pic. 3.4, b....and unscrew the hub nut
5. After that, the hub assembly can be removed from the steering knuckle. If the hub is tight on the shaft, a puller will be required to remove it.
6. If the inner race remains on the hub when it pops out of the steering knuckle, a sharp-edged bearing puller will be required to remove. When the clip is removed, remove the hub cuff.
7. Check up an axis of a rotary fist. If damage is found, replace (see paragraph 4).
Disassembly
8. Remove the inner race from the outer bearing.
9. If necessary, carefully pry off the oil seal from the back of the hub with a lever and remove the inner race of the inner bearing.
10. Support the front of the hub and knock out the inner race of the outer bearing using a hammer and a drift passed from the back of the hub.
11. Turn the hub over and, similarly, knock out the outer race of the inner bearing.
12. Thoroughly clean the hub, removing all traces of dirt and grease. Polish off any burrs or burrs that may interfere with assembly. Check for cracks, wear or other damage. If found, replace. On models equipped with ABS, check that the sensor ring is in good condition.
13. When assembling, apply a small amount of lubricant (Mercedes-Benz recommends CASTROL LMX) on the contact surfaces of the outer race of the inner bearing and the hub. Distribute the grease into the grooves of the inner bearing.
14. Reliably support a nave and attach to a nave an external race of the internal bearing. Using a tube gasket that only rests on the outer edge of the yoke, push the yoke all the way, making sure it enters the hub perpendicularly.
15. Turn the hub over and install the inner race of the outer bearing in the same way.
16. Install the inner race of the inner bearing. Install the lip seal on the back of the hub, making sure the sealing lips are facing in, and press it in perpendicularly.
17. Fill the hub about two-thirds full of grease, then install the outer bearing inner race.
Installation
18. Lubricate the edge of the rear hub seal and position the hub on the steering knuckle shaft.
19. Install thrust washer (where provided) and tighten the hub nut.
20. Rotate the hub by tightening the hub nut to press it onto the steering knuckle axle. When the hub is properly seated, adjust the clearance in the hub bearing as described in paragraph 2 and, tighten the hub nut pinch bolt to the specified torque.
21. At the adjusted backlash in the bearing of a nave, remove a micrometer.
22. Install radio interference spring (where it is installed) to the center of the axle shaft.
23. Install the cap on the hub and hammer it in perpendicularly.
24. Install the brake disc and, where necessary, the front wheel ABS sensor as described in chapter 9.