



Contents: Removal ↡ Installation ↡
Note: New upper shock mount nuts will be required for installation.
Removal
Warning: A spring compressor must be purchased. Commercially available adjustable spring compressors are recommended for this operation. Any attempt to remove the spring without a compressor will likely result in damage or injury.
1. Place chocks under the rear wheels, apply the parking brake, then raise the front of the vehicle with a jack and securely support it on stands (see "Lifting the car with a jack and placing it on supports"). Remove the corresponding wheel.
2. Place the spring compressor on the spring and compress it to release the upper and lower cups.
3. Place a jack with a block of wood under the lower control arm and raise the jack to securely support the arm.
4. Loosen and remove the nuts of the upper shock absorber support.
5. Carefully lower the lower control arm so that the spring and upper cup can be removed (see fig. 6.5).
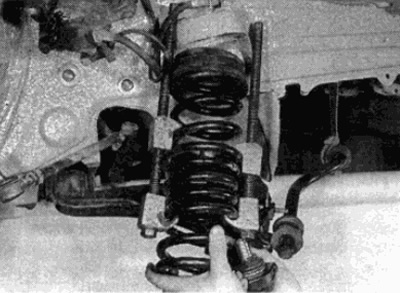
Fig. 6.5. Remove the spring and the upper spring cup together with the spring compressor
6. Check the condition of the spring. If it is worn or damaged, replace it. If you find that the upper cup is damaged or destroyed, replace it.
Installation
7. Check that the lower arm spring seat is clean, then install the upper seat onto the spring and install the spring in place.
8. Position the lower end of the spring against the stop on the lower control arm cup. Align the upper spring cup with the support on the body and carefully lift the arm, aligning the upper shock absorber support with the body (see Fig. 6.8, a, b).
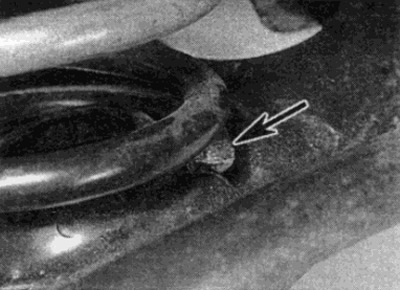
Fig. 6.8, a. Place the lower end of the spring in the limiter (shown by arrow) on the lower arm cup
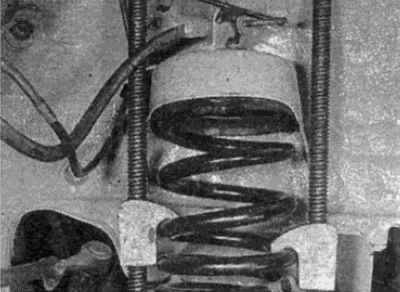
Fig. 6.8, b. Align the upper cup with the support on the body and carefully lift the lower arm
9. Make sure the spring is positioned correctly, then install new nuts onto the upper shock mount and tighten them to the specified torque.
10. Remove the jack from under the lower arm, then carefully release the spring compressor, making sure the lower and upper ends of the spring are positioned correctly.
11. Install the wheel, then lower the vehicle to the ground and tighten the wheel bolts to the specified torque.