
Elimination of damage from small impacts
Many suppliers advise to use to remove small potholes (formed from impacts of small objects, the size of a pinhead) scratch polish that is rubbed in by hand. An alternative to it is varnish, which is applied with a brush and fills in the potholes much more effectively. For ordinary paint and varnish coatings, you can also use special wax pencils to match the color of the car. However, a layer of pencil wax only lasts a few washes, after which it must be reapplied. The designation of the varnish and the color code of the car can be found on the plate, which is located on the cross member under the hood.
Repairing damaged paintwork
Damage to the paintwork should not be ignored, as under adverse conditions such as moisture and heat, corrosion can begin after a few days. Therefore, repair damage to the paintwork as soon as possible. If rust has been spreading unhindered for months or years, you will recognize it by swelling, which indicates the appearance of holes in the body metal. In this case, only restoration work on the body will help, which is not described in this Manual.
Essential Tools for Repairing Paint Damage
To repair damage to the paintwork, you must have:
- sticky tape;
- newspapers or film;
- sanding block made of wood or cork for grinding along the plane;
- sandpaper of different numbers;
- spatula and putty; hardener; spray-applied putty for leveling irregularities;
- primer;
- cover varnish in the color of the car;
- lacquer cleaner, preservative and polish.
Elimination of damage from stone impacts
1. If raised edges form around the lacquer blemish, remove them with a fine needle. If rust has formed, carefully remove it with a penknife. Apply rust remover to the area and wait about an hour.
2. Treat damaged areas with gasoline or thinner, dry well.
3. Apply a small amount of primer with a brush or fingertip in a thin layer. Wait for the primer to dry.
4. Using the tip of your finger or a small plastic knife, apply a small amount of putty to the pothole, without touching the varnish, and allow it to dry. Keep a rag and thinner ready to remove putty stains from varnish immediately.
5. If you applied too much putty, attach a piece of #0 sandpaper to the end of the pencil and rotate the pencil to carefully remove the excess putty.
6. Spray some nail polish into the nail polish cap and wait 1 minute. Apply slightly dried varnish with a fingertip or a thin brush to the damaged area in a very thin layer.
7. When the polish is completely dry (in summer after about 2, and in winter - after 5 days), treat the restored areas with polishing preparations, and the edges, if necessary, with a lacquer thinner.
Polishing small scratches
1. Clean damaged areas with gasoline or thinner. If the damaged area has acquired a color that differs from the lacquer coating, wipe it off with a polishing agent or lacquer thinner. If possible, this polishing zone should not extend too far beyond the edges of the discolored varnish.
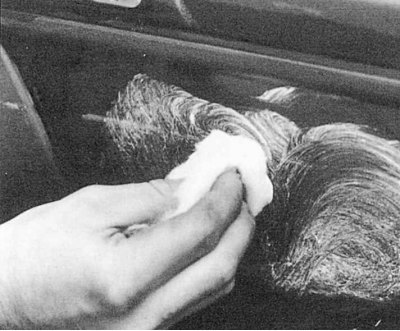
Pic. 3.23. Removing small scratches or streaks with sanding paste or lacquer cleaner
2. If the edges of the scratch are rough, sand these areas with damp velvet sandpaper (grain size - no more than 600) to smoothness or remove with grinding paste (pic. 3.23) or lacquer cleaner if there is still a layer of top coat left. Remember to constantly moisten the sandpaper.
Attention! Do not remove the top coat.
3. Polish the damaged area with a mild polish. In this case, paint particles from the varnish coating surrounding the damaged area will be distributed into a scratch.
4. Apply a preservative to the treated area.
5. If you are concerned about the gloss of the coating, then after all work is completed, polish your entire car.
Removing severe scratches
1. If there are severe scratches on bumpers, fenders or doors, remove these parts from the body before restoring the varnish coating - this will make it easier to treat damaged areas.
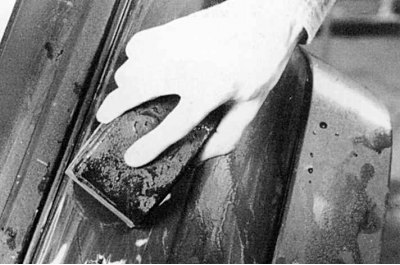
Pic. 3.24. Attaching sandpaper to a sanding block
2. Sand the damaged surface evenly with sandpaper (grit - 80 or 100). You can also fix the sandpaper on the sanding block (pic. 3.24). Sand the scratched surface with uniform movements in one direction. Constantly dip the bar into the water to clean it of paint residues. If rust has formed, sand the area down to metal, apply a rust converter and leave for an hour.
3. Clean and degrease the area with gasoline or thinner and allow to dry.
4. Mix putty and hardener. Putty connects the damaged area with the adjacent varnish.
Attention! Work with putty quickly as it hardens within minutes. Therefore, for work, prepare small amounts of putty. Treat irregularities with a spray putty.
Pic. 3.25. Applying the putty mass in uniform thin layers
5. Apply putty (pic. 3.25) evenly in several thin layers. (If this is your first time working with a trowel, practice applying putty on an old piece of metal before proceeding with the main steps). After about an hour, the layer will harden.
6. Grind irregularities dry with sandpaper (grit - 240). For fine sanding, use damp velvet sandpaper (grit 400) and sand without pressure.
7. If nicks are visible, spray putty on, allow to cure and finish with damp sandpaper (grit - 600).
8. Before applying varnish, remove sanding dust.
How the professionals paint
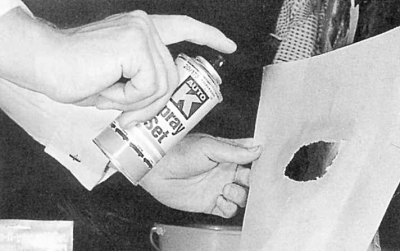
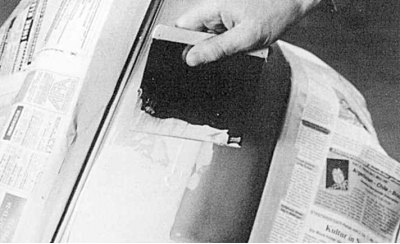
Pic. 3.26. A method for isolating an unpainted surface when applying varnish from a spray can
Cover the area around the area to be treated with masking tape (waterproof and stretchable), film or newspaper. You can also cut a hole the size of the area to be treated in a large sheet of paper (pic. 3.26), then you will not paint over the excess.
Attention! When applying varnish, toxic fumes are formed, so take care of good ventilation of the workplace.
Apply a primer as a finely porous base for the topcoat (filler), which is sold as a spray. Work carefully - irregularities are not eliminated when applying subsequent layers, but rather increase. Let the primer dry and sand to a uniform finish with damp sandpaper (grit - 600). Rinse off sanded residue.
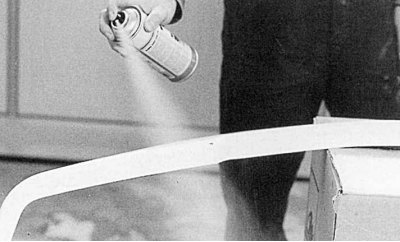
Pic. 3.27. How to apply top coat from a spray can
Apply top coat evenly from a can (sold as a spray) (pic. 3.27) several layers. The distance from the spray can to the surface to be treated should be 20-30 cm. Run a stream of varnish over the treated surface evenly, do not interrupt and do not describe ovals - this will reduce the formation of sagging. Before applying varnish, soak the can in hot water for a while (without heating it to a temperature of more than 40°C). This measure will increase the internal pressure in the can and the outgoing stream of varnish will be thinner, stronger, and the applied layer will be smoother.
Edges of adhesive tape (newspapers or films), adjacent to the surface to be treated, bend and also carefully treat with topcoat. This will make the color transition invisible.
When the polish is completely dry (in summer after 2 days, in winter - after 5), treat the restored area with a polishing agent, and the edges with a lacquer thinner.
If you are concerned about the shine of the coating, after all work is completed, polish your entire car.
Removing paint and varnish
Residues of paint, varnish and solvents are special wastes that are removed in special ways, as well as dirty brushes, rags and spray cans. It is advisable not to throw them away with normal household waste.