
2.0L engine
Attention! If the valve control parts are to be used again, they must be reinstalled. To avoid confusion of parts, make a panel to store them.
Removing
1. Remove the cylinder head and lay it on wooden planks so that the valves are supported from below.
2. Remove the oil seals.
3. Tilt the cylinder head aside and remove the valves from the guides.
4. Clean the valves.
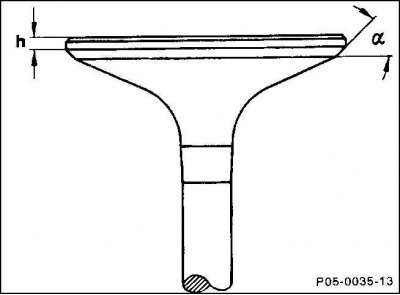
5. Valves with burned-out poppets, too low height (h) valve discs, worn or scratched stems should be replaced. limit value (h) see valve dimensions table.
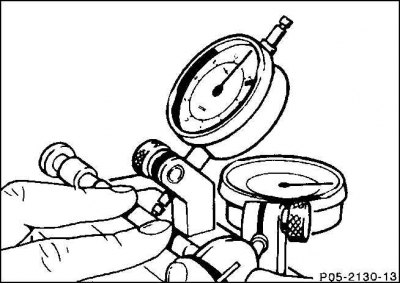
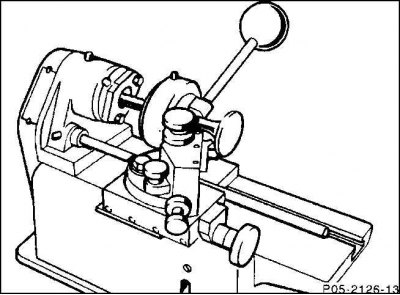
6. The repair shop can check the valve stem for runout and rework the valve seat angle. Maximum runout of valve stem and valve seat: 0.03 mm.
Attention! In all valve processing operations, it should be borne in mind that the angle of the valve head is a = 45°+ 15°. Note: The valve stem and valve stem for 2.2/2.5 l engines have 3 annular grooves.
Installation
1. Before installing the valve, check the valve guides and, if necessary, modify the valve seat.
2. Clean the valve stem where the stem parts fit.
3. Lightly coat the valve stem and valve guide with engine oil and install the valve.
4. Install new oil seals.
5. Install the valve spring.
6. Install all other valves, do not confuse intake and exhaust valves.
7. Install the poppet pusher.
8. Install the cylinder head.
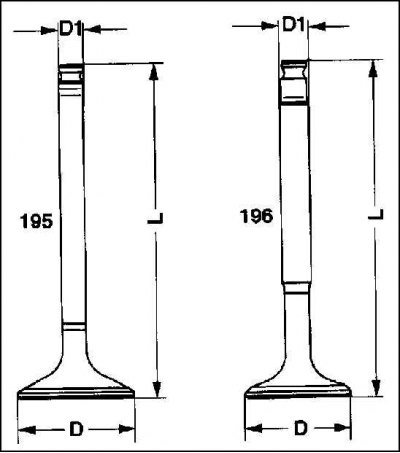
Valve sizes
Inlet valve (195) | Exhaust valve (196) |
2.0L engines | |
D = 37.9 - 38.1 mm | D = 34.9 - 35.1 mm |
D1 = 7.97 - 7.955 mm | D1 = 8.960 - 8.945 mm |
L = 106.4 mm | L = 106.4 mm |
h (new) = 1.75 - 2.05 mm | h (new) = 1.75 - 2.05 mm |
h (limit) = 1.6 mm | h (limit) = 1.6 mm |
2.2 / 2.5 L engines | |
D = 29 mm | D = 26 mm |
D1 = 6 mm | D1 = 6 mm |