
Removing
1. Remove the hydraulic fan clutch.
Attention! The union nut has a left-hand thread.
2. Remove the fan shroud.
3. Remove the V-ribbed belt.
4. Pry out the locking cover of the tension roller with a screwdriver.
5. Unscrew the tension roller.
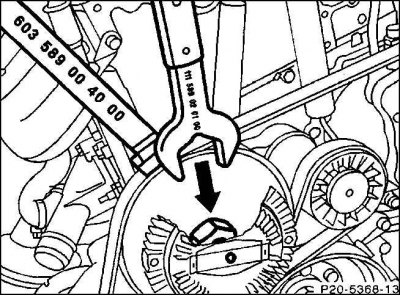
6. 2.0L engine: Unscrew the coolant pump pulley.
7. Unscrew the shock absorber of the belt tensioner.
8. Detach the tension spring.
9. Unscrew the cone bolt from the spring tension lever after depressing the locking cap.
10. Remove the spring tension lever, at the same time make sure that the O-ring and washer are intact.
Installation
1. Install the spring tension lever with O-ring and washer and tighten to 100 Nm.
Attention! Clean the threads with a wire brush before installation and coat with sealant (thread needs to be degreased).
2. Insert the locking cap.
3. Attach the tension spring.
4. Tighten the tensioner shock absorber at the top with a torque of 25 Nm, and at the bottom with a torque of 20 Nm.
Attention! If you install a new shock absorber, be sure to first remove the air from it. To do this, in the mounting position, move the piston rod back and forth several times.
5. 2.0L engine: Torque the coolant pump pulley to 10 Nm (hex socket bolt) or 15 Nm (torsion bolt).
6. Screw the tension roller with a torque of 25 Nm (engine 2.0 l) or 30 Nm (engine 2.2/2.5 l). Insert the locking cap.
7. Install the ribbed V-belt.
8. Install the fan shroud.
9. Install the hydraulic fan clutch.