
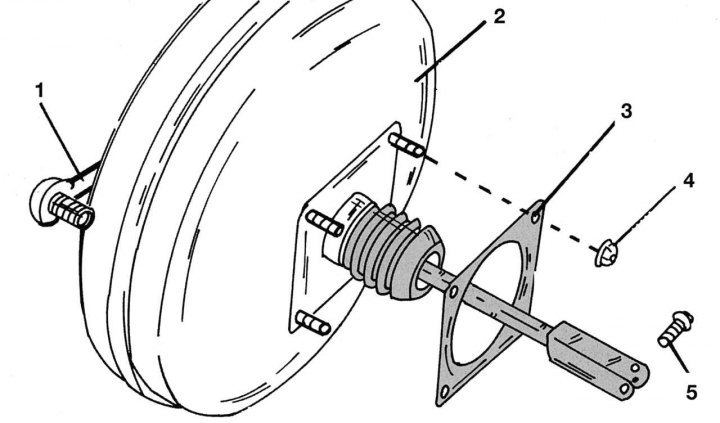
Pic. 300. Vacuum brake booster: 1 - vacuum hose; 2 - amplifier; 3 - gasket; 4 - nut, 25–28 Nm; 5 - pusher finger
The work on removing the amplifier is in many ways similar to the work described above on removing the main brake cylinder, especially since the latter must be removed before dismantling the amplifier. When working, be guided by Fig. 300.
After removing the main brake cylinder, remove the cotter pin and remove the pin 5 of the pusher, unscrew the fastening nut 4 from the pedal compartment. Remove the gasket on the back side 3.
Assembly is carried out in the reverse order. When installing, be careful not to pinch the brake fluid level indicator wire. Tighten the fastening nuts 4 with a torque of 25-28 Nm.
After starting the engine, check the operation of the amplifier as described above.
Sometimes brake fluid from the master cylinder seeps into the booster. If, after removal, it is determined that there was more than 100 ml of brake fluid in the amplifier, the amplifier must be replaced.