
Clutch Master Cylinder Pusher Adjustment
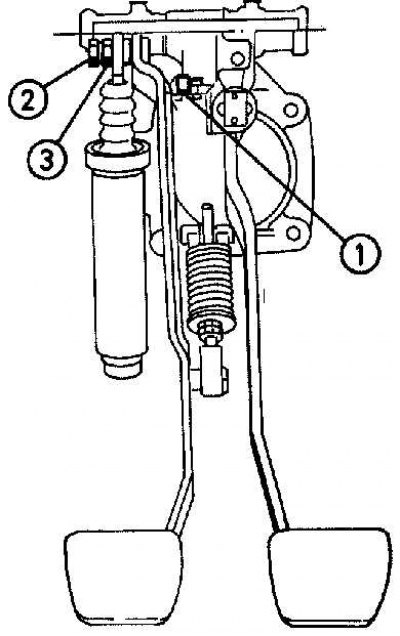
1 - metal plates with dimensions of 60x20x1 mm; 2 - screw; 3 - adjusting screw
1. To access the clutch slave cylinder, raise the front of the vehicle and support it on stands. Using a clean syringe, draw out half of the fluid from the appropriate chamber of the brake reservoir.
2. Insert several metal strips measuring 60x20x1 mm between the upper clutch pedal travel stop and the rubber cushion (see picture).
3. Remove the dust cap and clean the dirt around the clutch slave cylinder bleeder port.
4. Install the tube on the bleeder fitting, and connect the other end of the tube to special equipment for removing air under pressure.
5. Loosen the bleed screw half a turn with a wrench.
6. While working inside the vehicle at the pedals, loosen the clamping screw located on the pushrod eccentric adjusting screw on the clutch pedal.
7. The assistant should constantly monitor the level of brake fluid in the reservoir of the brake system.
8. Slowly turn the eccentric adjusting screw until the brake fluid level begins to rise. Then slowly turn the adjusting screw back until the brake fluid level remains in place.
9. In this position, secure the adjusting screw by tightening the clamping screw.
10. Remove the metal strips previously inserted between the upper clutch pedal travel stop and the rubber pad. In this case, the level of brake fluid in the reservoir should rise.
11. Tighten the bleeder screw and disconnect the hose and special equipment to remove air under pressure. Install the dust cap on the bleed valve.
12. Add brake fluid to the reservoir of the brake system.
13. Start the engine and check clutch operation.
14. Install the lower instrument panel trim on the driver's side.