
Removing
1. Remove the decorative panel under the instrument panel.
2. Remove the retainer 1 securing the master cylinder 2 to the support axle 3 (see fig.6.6a,b).
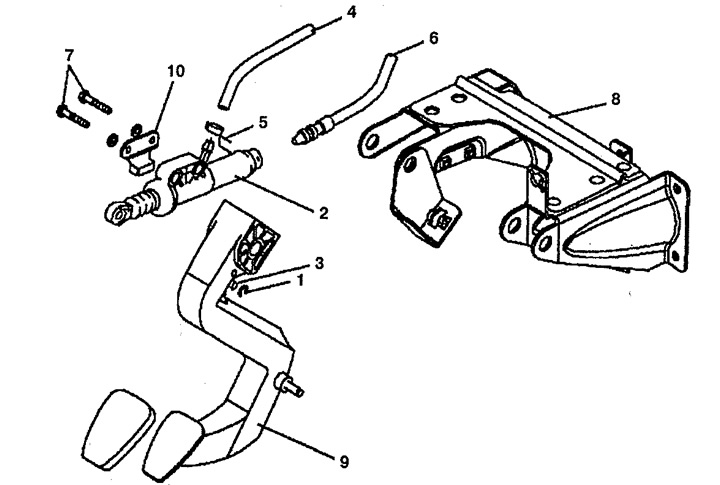
Pic. 6.6 a. Clutch Master Cylinder (left hand drive vehicles):
1. Retainer,
2. Master cylinder,
3. Support axle,
4. Hydraulic line from the clutch reservoir,
5. Collar,
6. Hydraulic pipeline,
7. Bolt,
8. Pedal mounting bracket,
9. Clutch pedal,
10. Limiter.
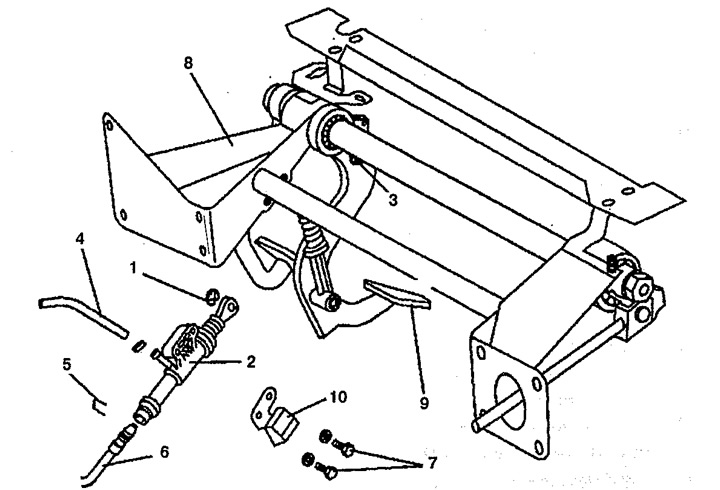
Pic. 6.6 b. Clutch Master Cylinder (right hand drive vehicles):
1. Retainer,
2. Master cylinder,
3. Support axle,
4. Hydraulic line from the clutch reservoir,
5. Collar,
6. Hydraulic pipeline,
7. Bolt,
8. Pedal mounting bracket,
9. Clutch pedal,
10. Limiter.
3. Remove the left deflector.
4. Disconnect the brake line 4 attached to the brake reservoir.
5. Remove the clamp 5 that secures the hydraulic line 6 to the main cylinder 2 and then disconnect the hydraulic line 6.
6. Turn off bolts 7 fastenings of the main cylinder 2 to an arm 8 fastenings of pedals.
7. Remove master cylinder 2.
Installation
8. Installation is made in an order, the return to removal. Insert clamp 5 into master cylinder 2 and then connect hydraulic line 6. Check the condition of pipelines and protective covers. Bleed the hydraulic clutch.