
Washer fluid reservoir
1. Remove fluid from the windscreen washer reservoir.
2. Disconnect the electrical connector from the washer pump. Carefully remove the pump from the washer reservoir. Check the condition of the pump O-rings for damage or wear and replace if necessary.
3. Disconnect the electrical connector from the fluid level sensor.
4. Unscrew nuts and bolts of fastening and remove the windscreen washer reservoir. Rinse the tank with clean cold water.
5. Installation is made in sequence, return to removal. Fill the tank with liquid and check its tightness.
Washer pump
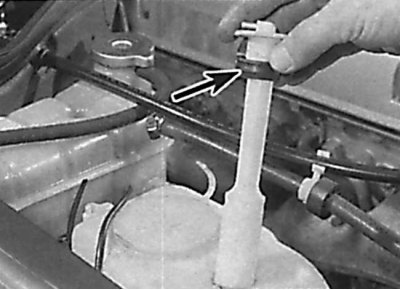
The location of the windshield washer pump at the base of the tank
1. Disconnect the electrical connector and hose from the washer pump (see fig. The location of the windshield washer pump at the base of the tank).
2. Using care, remove the washer pump from the reservoir and remove the pump O-ring. Rinse off fluid spills with cold water.
3. Installation is made in sequence, return to removal. Check the condition of the O-ring and replace it if necessary. Pour fluid into the windshield washer reservoir and check for leaks.
Liquid level sensor
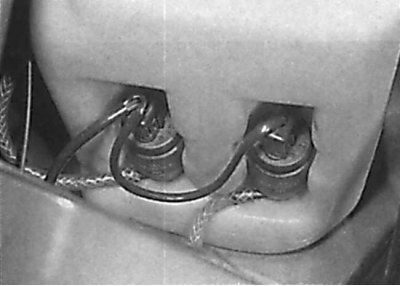
Disconnecting the electrical connector from the liquid level sensor

The location of the sealing ring of the liquid level sensor
1. Disconnect the electrical connector from the liquid level sensor and, being careful, remove the sensor from the tank. Remove the sensor o-ring and wash off any fluid leaks with cold water (see fig. Disconnecting the electrical connector from the liquid level sensor, Location of the sealing ring of the liquid level sensor).
2. Installation is made in sequence, return to removal. Check the condition of the sensor O-ring and replace it if necessary. Pour fluid into the windshield washer reservoir and check for leaks.
Windshield washer jets
1. Open the hood and from the inside of the hood, remove the cover to access the back of the jet.
2. Disconnect the washer hose from the jet. If available, disconnect the electrical connector from the jet.
3. Release the fastening bracket and, being careful, remove the jet from the hood.
4. Install the jet on the hood and connect the hose and, if present, the electrical connector to it. Close the hood and check the operation of the jet. Adjust the direction of the liquid jet with a needle inserted into the nozzle. Fluid should be applied to the windshield from one nozzle just above the center, and from the second nozzle just below the center of the windshield.
Headlight washer jets
Removing the headlight washer jet

1. Reinstall the headlight wiper blade in its original position, then remove the wiper arm cover. Remove the nut from the wiper arm shaft and remove the arm.
2. Release the washer jet from the wiper arm, then disconnect the hose from it and remove the jet (see fig. Removing the headlight washer jet).
3. Installation is made in sequence, return to removal. Check that the washer jet is securely fastened to the wiper arm.