
Since some parts can be detached from below the car, four stable stands are needed, which are also used to support the jack. Before working in the engine compartment, protect the fenders of the vehicle with a cover. The front hood cannot be removed when the engine is removed.
The engine can also be dismantled without the gearbox. At the same time, the points marked (*), do not need to be performed. Support the gearbox with a repair jack and a wooden spacer, then loosen the engine/gearbox connecting bolts and press the engine away from the gearbox with a pry bar.
Depending on the year of manufacture and vehicle model, electrical wires, vacuum and coolant hoses can be routed differently in the engine compartment. Before disconnecting the corresponding wire, mark it with adhesive tape. The dismantling of a 4-cylinder engine is described below; when dismantling a 6-cylinder engine, proceed according to the meaning.
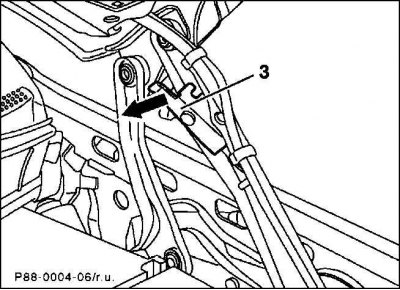
1. To open the hood, pull the support lever (3) on the left hood support in the direction of the arrow and lift the hood slightly until the lock lever is released. Remove the lock lever from the right hood support and place the hood upright.
Attention! The left locking lever should be locked into the upper retainer.
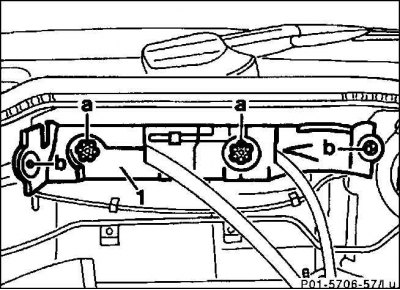
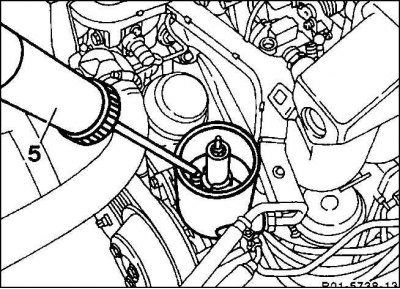
2. Peel off the cover (1) from the front wall of the body. To do this, unscrew the knurled nut (A) and release the knurled rivet (b).
3. Disconnect the ground wire from the battery (–).
Attention! This erases the anti-theft code of the radio.
4. Disconnect the positive cable from the battery that runs from the battery connector to the engine, pull it through the baffle and lay it on the engine.
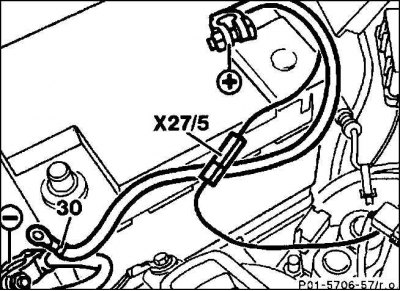
5. Disconnect plug connection (Х27/5) oil pressure switch.
6. Unscrew the wire (30) from the socket.
7. If there is an air mass meter, remove it.
8. Disconnect all vacuum hoses that go to the engine. For example:
- hose (And) vacuum regeneration valve;
- vacuum hose to the right of the intake pipe;
- brake booster vacuum hose from intake pipe.
9. Disconnect the throttle cable.
10. Briefly open the fuel tank cap and relieve excess pressure in the fuel system.
11. Disconnect all electrical wires leading to the engine. To facilitate subsequent installation, pre-mark the wires with adhesive tape. For example:
- disconnect the plug connection from the lambda probe on the front wall of the body;
- 2.2 l: dismantle the cover of the control device behind the front wall of the body, first remove the plastic cover of the wire connector;
- 1.8/2.0L: Remove the multi-pin connector and crankshaft position sensor and vacuum line from the PMS;
- disconnect individual wires from the block on the left wing, having previously removed the cover from the block;
- disconnect the plug connection from the tempomat;
- unscrew the cable "masses" from the holder of the hydraulic block;
- air conditioning: disconnect the electrical wire from the air conditioning compressor.
12. Disconnect the cable connector and remove the wires from the holders.
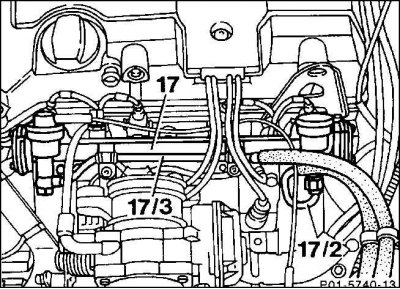
13. Fuel pipelines (17/2) And (17/3) mark with adhesive tape and remove from the fuel distributor (17). Disconnect hoses with clamps first.
Attention! Place a rag underneath as fuel will leak out.
14. Use a suitable syringe to remove the hydraulic oil from the power steering reservoir.
15. Unscrew the hoses and close with stoppers.

16. Unscrew the recirculation hose (28) and high pressure hose (29) for servo steering. On vehicles with height adjustment, the high-pressure hose is additionally unscrewed (26) and oil pipeline (27) for double pump.
17. Raise the car.
18. Remove the bottom trim of the engine compartment.
19. Remove the hydraulic clutch fan.
20. Drain the coolant from the radiator.
21. Disconnect the cylinder head coolant hoses at the rear and from the coolant pump at the front. First loosen the hose clamps and disconnect completely.
22. Remove the radiator.
Attention! For vehicles with air conditioning, install the protective cover on the condenser immediately after removing the radiator.