
Removing
1. Remove the camshaft timing chain cover as described in paragraph 6.
2. On a carbureted engine, remove the fuel pump as described in Chapter 4A.
3. Remove the camshaft sprocket as described in paragraph 8.
4. Using quick-drying paint or a scraper, mark the camshaft sprocket and corresponding drive chain link.
5. On single chain models, pull off the bottom guide rail.
6. If necessary, rotate the auxiliary shaft so that the shaft lock bolt is visible through the holes in the sprocket.
7. Working through the hole in the sprocket, remove the retainer bolt, then remove the auxiliary shaft retainer (see fig. 9.7, a, b).
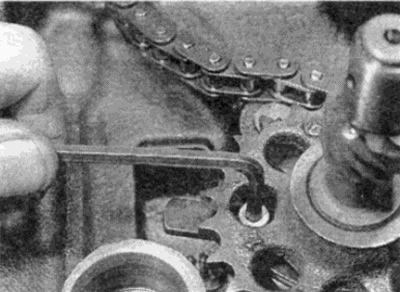
Pic. 9.7, a. Loosen the auxiliary shaft fixing bolt...
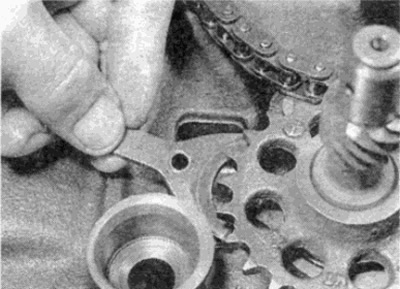
Pic. 9.7, b... and remove the lock
8. Separate the drive chain from the sprocket, then remove the auxiliary shaft from the cylinder block (see fig. 9.8).
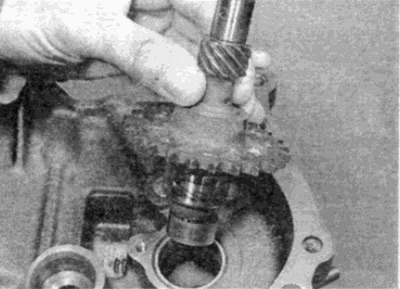
Pic. 9.8. Removing the auxiliary shaft
Examination
9. Check for wear or damage to the shaft surfaces (especially on the leading surfaces of the fuel pump and distributor). If defects are found, replace the shaft.
10 Check sprocket teeth for wear. Each tooth forms a reverse letter "V. If worn, the stressed side of each tooth will be slightly concave when compared to the other side of the tooth (those. the teeth will look like a hook). If the teeth are worn, the sprocket should be replaced.
Installation
11. Insert the shaft into place in the cylinder block, then install the retainer and tighten the retainer bolt to the required torque.
12. Put the chain on the auxiliary shaft sprocket.
13. Where provided, install the lower rail guide.
14. Make sure the marks on the chain and crankshaft sprocket are aligned before removal. Install the camshaft sprocket as described in paragraph 8.
15. On carbureted models, install the fuel pump as described in Chapter 4A.
16. Install the camshaft drive chain cover as described in paragraph 6.