
Removing
Note: This operation involves disconnecting the fuel lines - refer to the precautions outlined in the paragraph 1 and in the section "Safety first!" at the beginning of this guide.
1. Disconnect the negative battery terminal.
2. Place a container under the fuel pump and cover the surrounding parts with absorbent cloths. Loosen the clamps and disconnect the fuel supply and drain lines from the fuel pump. Mark the position of each hose.
3. Turn away nuts of fastening and remove washers, then lift the petrol pump (see fig. 4.3). Be prepared to quickly clean up any spilled gasoline.
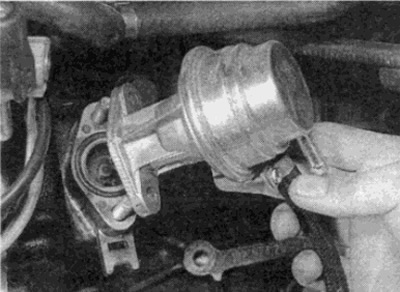
Pic. 4.3. Removing the fuel pump
4. Remove the pusher and then remove the insulating spacer (see fig. 4.4, a, b).
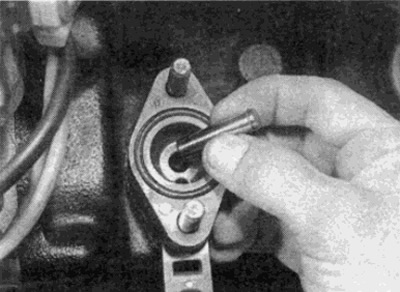
Pic. 4.4, a. Remove pusher...
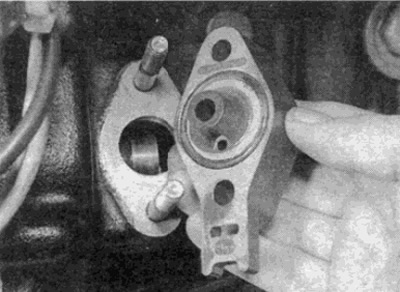
Pic. 4.4b....and then remove the insulating spacer
5. Check the condition of the O-rings on the insulating spacer. If the track is damaged or broken, the spacer assembly must be replaced as O-rings are not supplied separately.
Installation
6. Installation is carried out in the reverse order. At the same time, remember that the pusher must be inserted so that the latch is facing towards the fuel pump. Before installing the pump, make sure that the plunger moves freely in the hole in the insulating spacer.