
Warning: This operation must be carried out in a well ventilated area.
Removing
1. Before starting work, empty the gas tank. This is best done after waiting until almost all gasoline is used up as a result of normal operation. Residues should be sucked out through the filler neck by siphoning or using a hand pump.
2. Park the vehicle on a level surface and place chocks under the front wheels. Raise the rear of the vehicle with a jack and place it securely on jack stands (see "Jacking up the car and placing it on stands").
Warning: It is not recommended to use a viewing hole; Gasoline vapors are heavier than air and can easily collect on pit floors, creating a potential hazard.
3. Disconnect the negative battery terminal.
4. Operating from the bottom of the car, disconnect the supply and drain fuel lines, ventilation hose from the bottom of the gas tank. Label the hoses so they can be reinstalled correctly. Plug open gas tank and hose openings to reduce spillage of gasoline and to prevent dirt from entering the fuel system.
5. Remove the large rubber grommet from the gas tank.
6. Operating from the luggage compartment, unfasten the holders and move the mat back. Unfasten the buttons and holders, then remove the gas tank panel (see fig. 6.6, a, b).
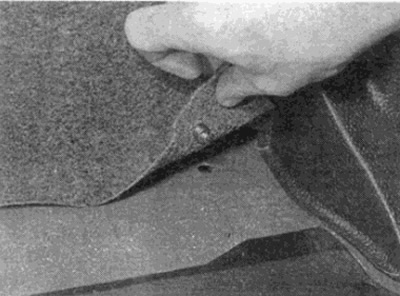
Pic. 6.6, a. Unfasten the buttons...
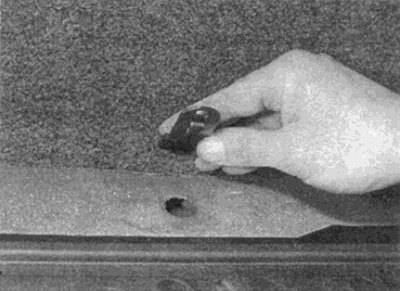
Pic. 6.6b....and gas tank panel holders
7. Referring to the description in Chapter 4, disconnect the plug from the fuel level sensor assembly connector. Release the wire from the holders.
8. Turn away nuts of fastening of a gas tank, slightly raise a gas tank and remove a drain hose. Note how the drain hose is routed so you can install it the same way. Separate the filler neck from the body and remove the sealing ring (A) and sleeves (see fig. 6.8).
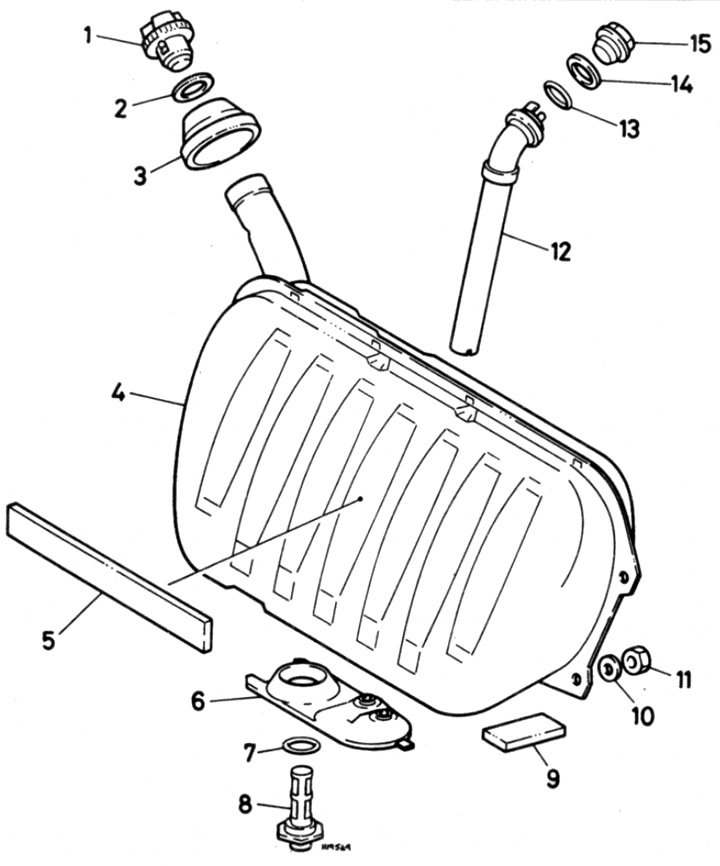
Pic. 6.8. Gas tank and related parts
1 fill cap
2 O-ring
3 Sealing sleeve
4 Gas tank
5 Back padding strip
6 Closing rubber sleeve
7 Strainer seal
8 Filter
9 Bottom padding strip
10 Washer
11 Nut
12 Fuel gauge assembly
13, 14 O-rings
15 Sensor assembly nut
9. Lift the gas tank up, pull it back towards you and remove the gas tank from the luggage compartment. Remove the padding strips if they are loose.
10. Turn out the mesh filter from a gas tank and remove a sealing ring. Use clean gasoline to remove all traces of deposits. Using a new O-ring, install and tighten the strainer securely.
11. If sediment or water is found in the gas tank, remove the fuel gauge sensor as described in paragraph 5, and rinse the tank with a small amount of clean gasoline.
If the gas tank is significantly corroded or leaking, it should either be repaired by a specialist or replaced.
Warning: Do not attempt to repair the gas tank yourself by welding or soldering. The gas tank may contain an explosive mixture of air and gasoline vapours.
Installation
12. Installation of the gas tank is carried out in the reverse order. Consider the following points:
- A) Where provided, tighten all fasteners to the correct torque.
- b) Check that the padding strips are correctly installed.
- V) Check that the fuel tank drain hose is routed as it was before removal.
- G) Check that the sensor plug is securely connected to the connector.
- d) Take a test drive and make sure that there are no gasoline leaks around the removed parts.