
Removing
Note: The camshaft cover must be removed together with the high voltage wires and the ignition distributor cover. Do not attempt to remove the high voltage wire covers from the camshaft cover. Installation may require a new gasket and/or seal.
1. Disconnect the negative battery terminal.
2. Remove the air cleaner as described in Chapter 4.
3. Where provided, disconnect the ventilation hoses from the camshaft cover. Similarly, where provided, release all hoses and wires from the holders and remove from the work area (see fig. 4.3, a. b).
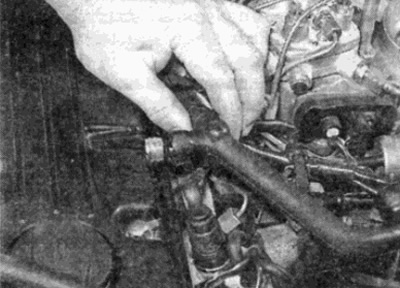
Pic. 4.3, a. Disconnect the ventilation hose...
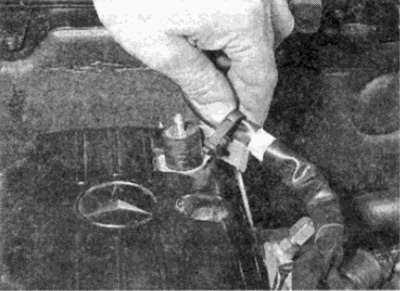
Pic. 4.3b....and release the wire from the holders on the camshaft cover
4. Check that the high voltage spark plug wires are numbered and if not, label the wires (cylinder No. 1 is located on the side of the camshaft drive chain).
5. Separate the covers of the high voltage wires from the camshaft cover and remove the wires together with the covers, clean the top of the engine (see fig. 4.5). Lay the wires and covers on the engine from the side of the ignition distributor.
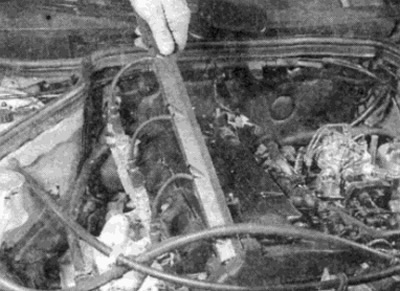
Pic. 4.5. Unfasten the high voltage wire covers from the camshaft cover
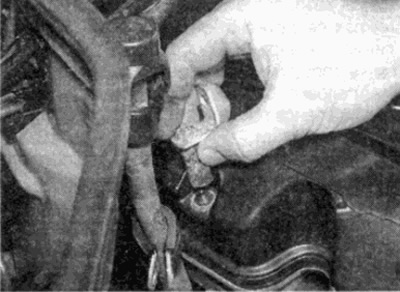
6. On models with an automatic transmission, unscrew the bolts and release the transmission dipstick tube from the bracket on the rear mounting bolt, then unscrew the bolts and remove the cover from the cylinder head (see fig. 4.6, a-c). If the lid is stuck, try rocking it by hand and, if necessary, lightly tap with a wooden mallet - be careful as the lid is easily damaged.

Pic. 4.6, a. Loosen the bolts and remove the transmission dipstick from the bracket
Pic. 4.6b....then unscrew the fastening bolts...
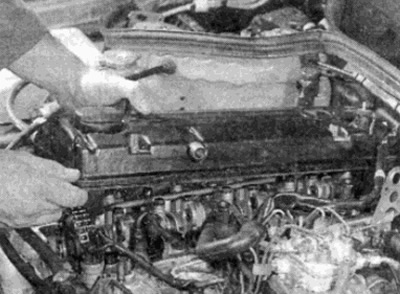
Pic. 4.6, c....and remove the camshaft cover
7. Remove the gasket and, where provided, remove the sealing discs, along with the seals, from the slots at the front and rear of the cover.
Installation
8. Check the condition of the gasket and, where provided, the seals on the sealing discs. Replace if necessary. The seals on the sealing discs must be positioned correctly and the seal joint must lie flat (no bend) around the disk.
9. Install the gasket into the grooves on the camshaft cover, starting from the front and rear.
10. Install the cover on the head block, making sure that the gasket is seated correctly, then tighten the mounting bolts.
11. Gradually tighten the bolts to the required torque in the order shown in fig. 4.11.
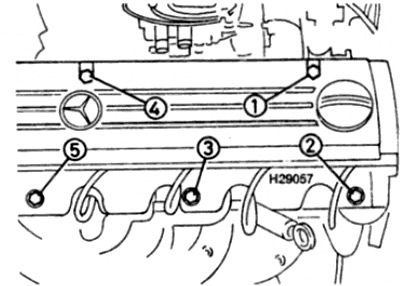
Pic. 4.11. Camshaft cover bolt tightening sequence
12. Install the high voltage wires and covers on the camshaft cover and connect the wires to the appropriate spark plugs.
13. Where required, connect the ventilation hose and fasten the wires and hoses with holders.
14. Install the air cleaner.
15. Connect the negative battery terminal.
16. Start the engine and check for leaks from under the cover.