



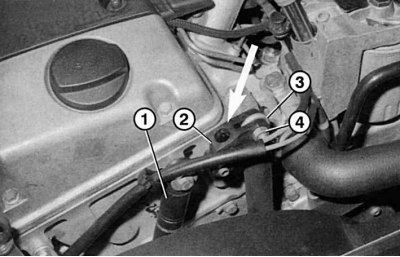
Fig. 4.24. Auxiliary drive belt tensioner: 1 – vibration damper; 2 – tensioner; 3 – spring; 4 – nut
The auxiliary drive belt has several V-shaped grooves on the working side to prevent the belt from slipping. Depending on whether the car is equipped with air conditioning or not, the belt has different positions and running patterns. First, determine exactly which belt is used in your car. The tension of the auxiliary drive belt is not checked; on all engines it is automatically maintained by a roller with spring adjustment (Fig. 4.24). On pre-chamber engines, an additional vibration damper is installed on the tensioner lever. The auxiliary drive belt has a long service life.
Sequence of works


"30,000 km every year"
1. Turn off the ignition.
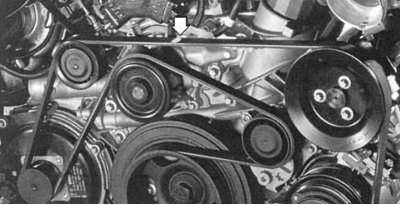
Fig. 4.25. Setting the correct belt position
2. Mark the accessory drive belt with chalk in a clearly visible place (Fig. 4.25).
3. Put the gearshift lever in neutral, set the car's parking brake. Turn the crankshaft with a 27 mm socket wrench until a chalk mark appears on the belt. Rotate the engine clockwise only!
4. Turn the crankshaft completely several times.
5. Check the outer surface of the belt. It should be replaced if you find the following defects:
- uneven wear marks on the edges of the belt;
- porous surface or formed "fringe";
- cuts on the belt;
- traces of oil or grease.
Publication taken from an online resource: www.mercedesman.ru