
Sequence of work
1. Lower the glass.
Pic. 11.23. Removing the door sill trim with a suitable wide tool
2. Remove the protective trim on the door sill (pic. 11.23). Place a cloth to protect the body.
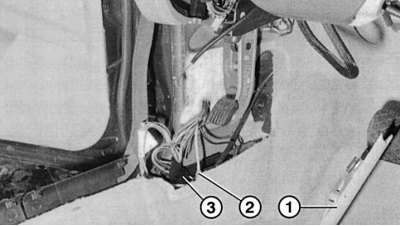
Pic. 11.24. After removing the side trim (1) legroom provides access to vacuum (2) and electric (3) connectors
3. Remove the footwell side trim (pic. 11.24). To do this, carefully remove the screw plug and unscrew the Phillips screw.
4. Disconnect sockets of electroconducting and a vacuum hose.
5. Remove the door stop plug. Remove the TORX bolt on the door pillar.
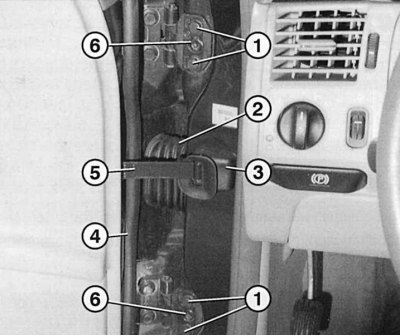
Pic. 11.25. Hinges and fastening elements of the front door to the body: 1 – bolts of fastening of loops on a forward rack; 2 - folding sleeve for wiring; 3 - plug and seal of the door stop; 4 - door seal; 5 - door stop; 6 - TORX bolt for adjusting the door
6. Remove two bolts 1 (pic. 11.25) each hinge on the door pillar. Have an assistant hold the door away from the rack.
7. Remove the foldable arm from the rack and disconnect the multi-pin connector.
8. Remove the door.