



Contents: Removal ↡ Installation ↡
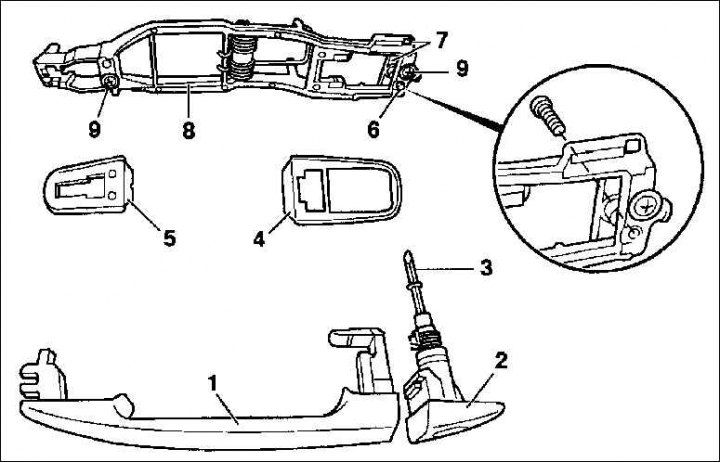
1. Door handle; 2. Lock cylinder guide; 3. Pivot rod; 4. Gasket; 5. Gasket 6. Hexagon socket head bolt 4mm; 7. Bolt retaining bracket; 8. Support bracket; 9. Screws
Removal
1. Remove the door seal at the height of the door lock groove.
2. Loosen the Allen bolt (6) by about 4 turns using a 4 mm socket wrench through the hole in the door. The Allen bolt is secured against falling out by the holder (7).
3. Pull the guide (2) first backwards and then outwards.
4. Pull the door handle (1) with the gasket (4) back out of the support bracket and remove. The support bracket can, if necessary, be removed from the inside of the door, but to do this, the door trim must be removed.
5. Remove the gasket (5).
Installation
Door lock
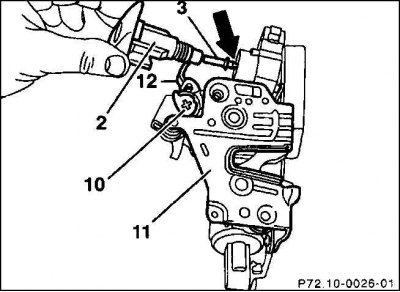
2 – lock cylinder guide; 3 – rotary rod; 10 – eccentric adjusting screw; 11 – door lock; 12 – control lever
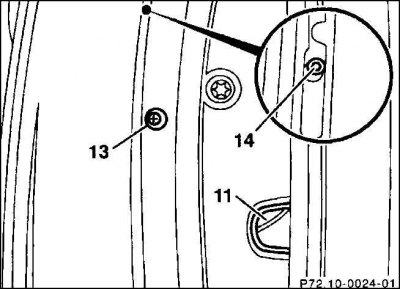
11 – door lock; 13 – hole for eccentric adjusting screw; 14 – hole for hexagon socket screw
1. Set the eccentric adjusting screw (10) outward, making it easier to install the door handle.
(Original article is on the portal: «MercedesMAN»)
2. Install the door handle with the gasket and insert it into the control lever (12) of the door lock.
3. From the rear, insert the lock cylinder guide (2) and also insert the rotary rod (3) into the door lock control.
4. Secure the door lock with an Allen bolt.
5. Adjust the gap between the handle (1) and the control lever (12) using the eccentric screw (10) with a Phillips screwdriver through the hole (13) on the front side of the door. The gap should be between 1 and 3 mm.
6. Insert the door seal and check the door operation.