
Removing
1. Disconnect the negative cable from the battery.
2. Drain the coolant.
3. Empty the air conditioning system.
4. Remove grille 2 (see fig.2.99).
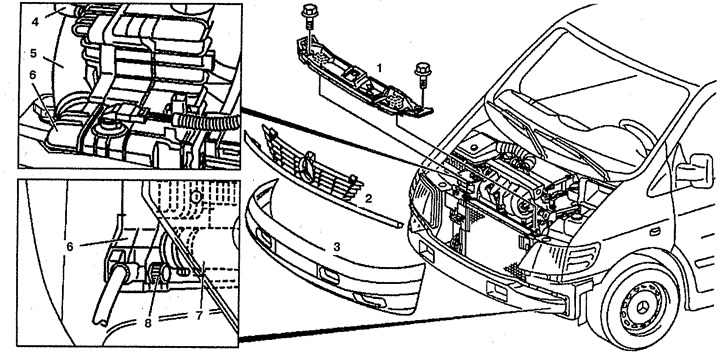
Pic. 2.99. Removing the radiator:
1. Upper cross beam,
2. Radiator grille,
3. Bumper,
4, 5, 7. Coolant pipes,
6. Radiator,
8. Drain valve.
5. Remove the top cross beam 1.
6. Disconnect the coolant pipes 4, 5, 7 from the radiator 6.
7. Disconnect the coolant pipes 9 from the radiator 6 (see fig.2.100).
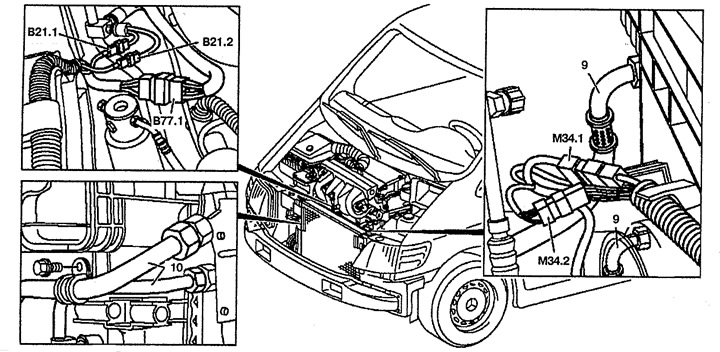
Pic. 2.100. Disconnecting the electrical wiring from the radiator:
9. Automatic transmission coolant pipe,
10. Tube of the cooling system.
B21.1, B21.2. Air conditioning pressure sensor connector,
Q77.1. Connector high / low pressure sensor in the air conditioning system,
M34.1, 34.2. Wiring connectors for cooling fan motors.
8. Disconnect wiring connectors M34.1 and 34.2 from fan motors.
9. Disconnect connectors B21.1 and 21.2.
10. Disconnect connector B77.1.
11. Disconnect the coolant pipes 10 from the air conditioner condenser.
12. Remove the radiator with the condenser up.
Installation
13. Installation is made in an order, the return to removal. Insert the heatsink with 6 fingers (arrows) in holes 11 (see fig.2.101).
14. Correct the fluid level in the automatic transmission.
15. Check for leaks in the cooling system.
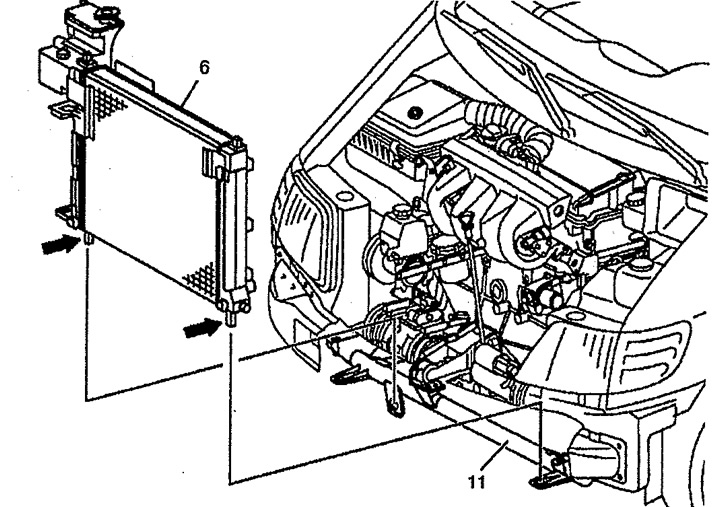
Pic. 2.101. Removing the radiator:
6. Radiator,
11. Radiator retainer.