
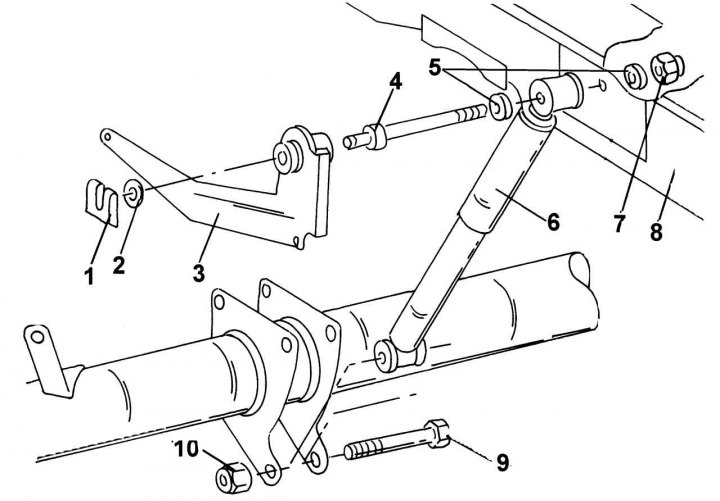
Pic. 254. Rear shock absorber mount: 1 - spring clip; 2 - washer; 3 - regulator drive lever; 4 - fixing bolt; 5 - washer; 6 - shock absorber; 7 - hex nut, 75–80 Nm; 8 - longitudinal beam; 9 - hex bolt; 10 - hex nut, 65–70 Nm
The shock absorbers are fixed on top with a nut, on the bottom with a nut and bolt. The bolt on top also serves to attach the brake pressure regulator lever. The arrangement of details of fastening of the back shock-absorber is shown in fig. 254.
Before removing, raise the bridge with a jack to compress the shock absorber. Next, you need to proceed as follows:
- unscrew the lower shock absorber mount to the bridge;
- remove spring clip 1 (see fig. 254) fastening the lever 3 of the regulator drive and remove the washer 2. Then remove the lever from the bolt;
- holding the bolt 4 with a wrench, unscrew the nut 7 on the other side. Remove the washer and knock out the bolt;
- to check the shock absorber, clamp it in a vertical position in a vice and «pump» it by pressing the stem several times. The shock absorber should have a uniform compression or rebound resistance over its entire travel length. Availability «failures» indicates the need to replace the shock absorber.
Installation is carried out in the reverse order, taking into account the following tightening torques (N·m):
- upper shock absorber mount - 75-80;
- lower shock absorber mount - 65–70.