



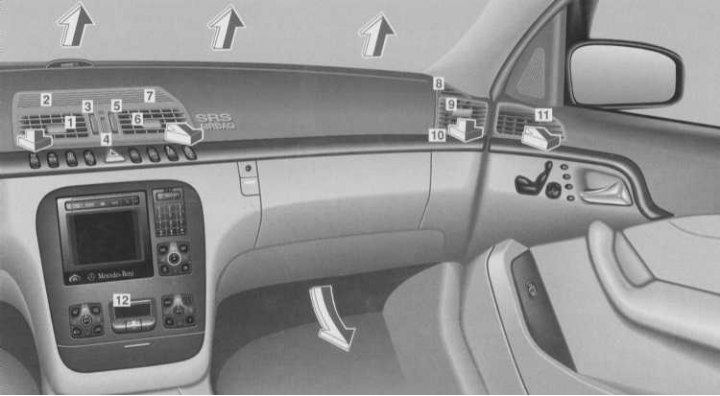
Automatic air conditioner
- 1 - Left adjustable deflector
- 2 - Fixed middle left deflector
- 3 — Air supply regulator for the middle left deflectors
Opening: turn the regulator upwards.
 : Adjustable middle deflector fully open,

 : The middle deflectors are open.
- 4 — Regulator of temperature of air coming out of the middle deflectors
To decrease the temperature: turn the regulator in the direction of the blue marking.
Automatic mode: turn the control knob to A. The control lamp above the control knob lights up. The air supply and temperature of the middle deflectors are automatically adjusted.
- 5 — Air supply regulator for right middle deflectors
Opening: turn the regulator upwards.
 : Adjustable middle deflector fully open.

 : Adjustable and fixed middle deflectors are open.
- 6 - Adjustable middle right deflector
- 7 - Fixed middle right deflector
- 8 — Side window defroster
- 9 - Adjustable side deflector
- 10 — Air supply regulator for side deflector
Opening: turn the regulator outwards.
 : The side deflector is fully open.

 : The side deflector and the door deflector are open.
- 11 — Deflector on the door
- 12 — Display and keyboard
Note: For good ventilation to prevent drafts, lock the handle of the ventilation deflectors (1, 6, 9) in a certain position.
Display and keyboard
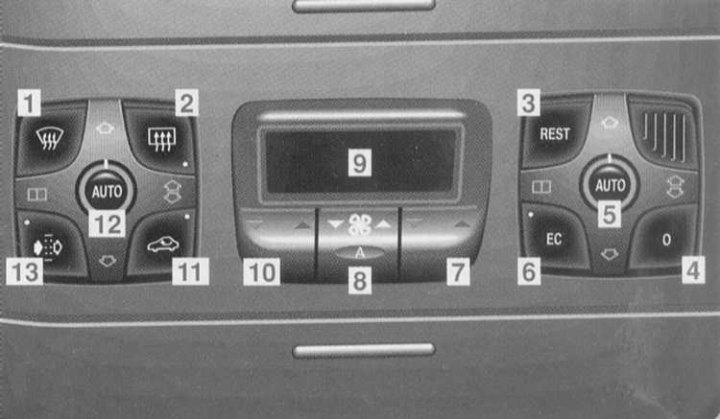
- 1 - Defrosting the glass
- 2 — Rear window heating system (below in this Section).
- 3 — Engine residual heat utilization mode
- 4 — On/Off.
- 5 - Air distribution for the right side (automatically, manually)
- 6 - Economy mode (without cooling)
- 7 - Temperature rocker switch, right
- 8 — Air supply toggle switch (automatically, manually)
- 9 — Display
The display indication is carried out depending on the external lighting: black numbers on a light background (during the day), or vice versa, light numbers on a black background (at night).
- 10 - Temperature rocker switch, left
- 11 — Air circulation mode
- 12 - Air distribution for the left side (automatically, manually)
- 13 - Activated carbon filter
In automatic mode, the automatic air conditioner cools or heats depending on the intensity of the sun, the outside temperature and the desired temperature in the car. When using the "Engine residual heat mode" function, the car's interior can also be heated or ventilated when the engine is off.
If economy mode is selected
 the cooling system is not working.
The set temperature should only be changed in small steps. The automatic air conditioner can be set for the left and right sides separately.
The set temperature is reached as quickly as possible and maintained constant.
General recommendations for automatic air conditioner
There is a risk of accident!
Visibility may be significantly reduced due to fogging of the glass if modes other than those recommended by us have been selected.
The dust filter completely traps pollen and dust particles up to a certain size.
If the interior of the car is heated by the sun, it should be quickly ventilated before starting the trip.
The storage compartment between the front seats can be ventilated. Storage compartment ventilation on the center console under the armrest (below in this Section).
Note: The air vents in the space between the rear seatback and the rear window must not be blocked.
Keep the air intake slits on the hood free of snow.
Condensation may form on the underside of the vehicle.
When the refrigerant leaks, the air conditioner compressor automatically switches off to protect against damage. The cooling system no longer works. Economy mode
 cannot be switched off. In this case, contact one of the maintenance stations "Mercedes-Benz" to check the automatic air conditioner.
Environmental protection notice!
The automatic air conditioner uses R134A refrigerant. This refrigerant does not harm the ozone layer.
The main position of the controls is in automatic mode
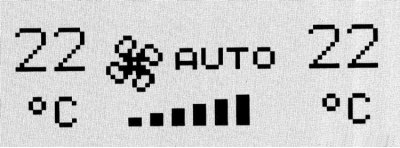
There are 3 options for automatic mode:
- Automatic air supply mode
- Automatic air distribution mode left and right
- Automatic mode of the middle deflectors
We recommend that you enable all 3 automatic mode functions:
- Air supply and distribution are regulated automatically.
- Set the temperature rocker switches on the left and right to 22°C.
- This ensures the most comfortable temperature in the car.
Automatic air supply mode: Press the air supply toggle switch to A. The display shows "AUTO"
Automatic air distribution mode: Press and lock both handles
 .
.
Symbols
 ,
,  and
and  are no longer visible.
Economy mode functions
 and the air circulation mode are switched off.
At the same time, the automatic fan mode is activated.
Special provisions - choose for short periods only
Manual air distribution control
Press the handle
 .
.
The handle extends, symbols are visible
 ,
,  and
and  .
.
Turn the handle according to the required air distribution.
 Air outlet from the center and side deflectors, door deflectors and windshield deflectors.
 Air outlet from the middle and side deflectors, door deflectors and windshield.
 Air outlet from the middle and side deflectors, door deflectors and footwell.
Return to automatic mode: Press and lock the handle
 .
.
Symbols
 ,
,  and
and  are no longer visible.
Manual air supply control
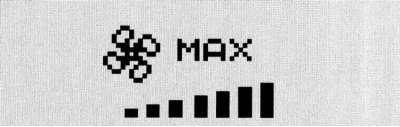
Press the air supply toggle switch up or down. 7 fan stages can be selected.
Defrosting glass
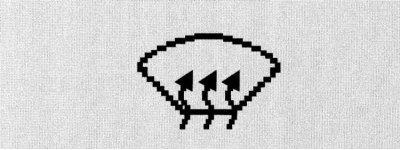
Click the button
 .
.
The display shows
 .
.
The fan switches to a higher level and heated air is directed to the defrost deflectors of the side windows and windshield.
Pressing the button again switches the previously selected mode back on.
Fogging of glass from the inside
If necessary, turn off the economy mode: press the button
 .
.
The control LED on the button goes out.
If necessary, turn off the air circulation mode: press the button
 .
.
The control LED on the button goes out.
Set the air distribution on the left and right manually upwards.
Set the air supply manually to the highest fan setting.
Increase the temperature setting.
Open the side deflectors and turn them onto the side windows.
Fogging of the windshield from the outside
Turn on the windshield wiper.
Press and lock both handles
 .
.
Symbols
 ,
,  and
and  are no longer visible.
Air circulation mode
Turn on air circulation mode:
Control LED on the button
 does not burn.
Press the button briefly
 .
.
The control LED on the button lights up.
Turning off the air circulation mode:
The control LED on the button lights up
 .
.
Press the button briefly
 .
.
The control LED on the button goes out.
Switching on the air circulation mode and activating the comfort closing:
Control LED on the button
 does not burn.
Button
 press for more than 2 seconds, the side windows and the sliding and lifting sunroof are closed. The control LED on the button lights up.
Switching off the air circulation mode and activating the comfortable opening:
On the button
 the control LED is on. The button
  press for more than 2 seconds, the side windows and the sliding and lifting sunroof move to the position they were in before closing.
If, after comfort closing, a window was manually lowered or the sliding and lifting sunroof was opened, then comfort opening does not return to the position they were in before closing.
There is a risk of accident!
When the outside temperature is below 5°C, select the air circulation mode only for a short time, otherwise the windows may fog up.
Switching from the air circulation mode to the outside air supply mode is performed automatically:
- after 30 minutes at an outside air temperature above approximately 5°C,
- after 5 minutes at an outside air temperature below approximately 5°C,
- after 5 minutes if economy mode was selected
 .
.
At high outside temperatures, the unit automatically switches to air circulation mode. After approximately 30 minutes, partial supply of outside air begins.
Activated carbon filter with air circulation taking into account the external exhaust gas content
The filter significantly reduces the concentration of harmful substances and significantly retains odors.
Automatic switching to air circulation mode occurs if the concentration of carbon monoxide (CO) or nitrogen oxide (NOx) in the outside air increases.
Air circulation mode taking into account the external exhaust gas content is not possible if the economy mode is selected

or the outside air temperature is below 5°C.
Switching on the carbon air filter and air circulation, taking into account the pollution of the outside air by exhaust gases:
Control LED on the button
 does not light. Press the button briefly
  . The control LED on the button lights up.
Switching off the carbon filter and air circulation, taking into account the pollution of the outside air by exhaust gases:
The control LED on the button lights up
 .
.
Press the button briefly
 .
.
The control LED on the button goes out.
Switching on the carbon filter and air circulation, taking into account the pollution of the outside air by exhaust gases, and activating the comfort closing:
The control LED on the button does not light. Press the button for more than 2 seconds, the side windows and the sliding and lifting sunroof close. The control LED on the button lights up.
Switching off the carbon filter and air circulation, taking into account the pollution of the outside air by exhaust gases, and activating the comfortable opening:
On the button
 the control LED is on. The button
  press for more than 2 seconds, the side windows and the sliding and lifting sunroof move to the position they were in before closing.
If, after comfort closing, a window was manually lowered or the sliding and lifting sunroof was opened, the comfort opening no longer returns to the position they were in before closing.
Function "Engine residual heat mode"
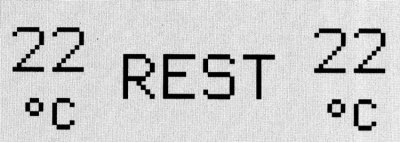
In the "Engine residual heat mode" function, heating or ventilation of the vehicle interior with the engine switched off is performed by the automatic air conditioner.
Air supply is set automatically.
Before switching on: turn the electronic key in the ignition switch to position 1 or 0 or remove it.
Activating the engine residual heat mode: press the button
 .
.
The display shows "REST".
Switching on is not possible if the battery is not sufficiently charged.
Automatic switching on:
- if the electronic key in the ignition switch is turned to position 2.
- after approximately 30 minutes (with the "Engine residual heat mode" function on the rear air conditioner activated: after approximately 15 minutes),
- if the battery voltage drops.
Note: When the operating voltage of the battery drops, the battery symbol is displayed on the automatic air conditioner display for a while until the "Engine residual heat mode" function is turned off.
When the independent heater/ventilation is switched on, the "Engine residual heat mode" function cannot be switched on.
Economy mode
Turn on: press the button
 .
.
The control LED on the button lights up.
The cooling system does not work and the air is not dried.
Pressing the button again reactivates the previously selected mode.
In economy mode, the windows may fog up, so we do not recommend this mode.
Automatic air conditioner switch on/off

Switching off: Press button 0. The display shows "0".
Air supply and circulation are switched off. It is recommended to set this mode only for a short time. Otherwise, the windows may fog up.
Turn on: press button 0 or
 or press and lock at least one handle
  .
.
Ventilation of the chest on the middle console under the armrest
There is a ventilation nozzle in the box towards the AT selector lever.
Opening: move the handle upwards.
Closing: move the handle down.
Air supply depends on:
- from the established air distribution,
- from the installed air supply,
- from the opening position of the ventilation deflectors on the instrument panel.
The air temperature is approximately the same as the air coming out of the middle deflectors. It cannot be set separately.
Note: Extremely high temperatures may occur in the chest due to the limited space. Therefore, when transporting heat-sensitive cargo, it is necessary to close the ventilation nozzle of the switched-on heating.
Do not cover the ventilation nozzle in the chest with objects.
Air deflectors in the rear of the cabin
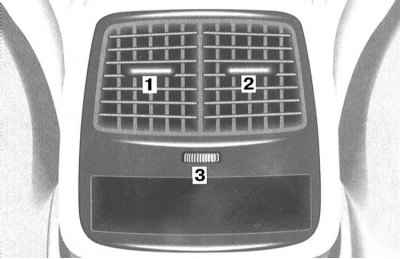
1 Adjustable center air vent in the rear, left
2 Adjustable center air vent in the rear, right
3 Control for the middle air vent in the rear of the cabin (models without air conditioning in the rear compartment)
Opening: turn the regulator to the left.
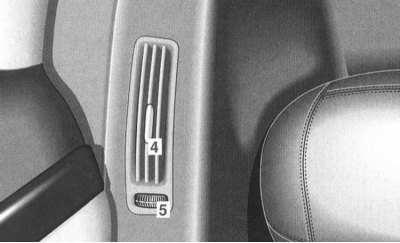
4 Adjustable side deflector in the rear compartment
5 Rear air vent control
Opening: turn the regulator towards the side window.
Air conditioning in the rear of the cabin
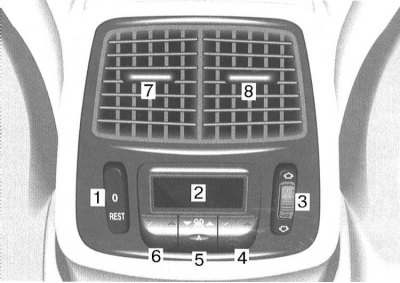
1 On/off mode for using engine residual heat (above in this Section)
2 Display. The display indication is carried out depending on the external illumination: positive - black numbers on a light background (during the day), or negative - light numbers on a black background (at night).
3 Air distribution top/bottom
4 Temperature rocker switch, right
5 Air supply toggle switch
6 Temperature rocker switch, left
7 Adjustable center air vent in the rear, left
8 Adjustable center air vent in the rear, right
Note: The rear air conditioner does not produce cooling if the button is pressedautomatic air conditioner.
When the rear seats are unoccupied (none of the seat belts are in the seat belt buckle) the temperature on both sides is automatically set to 22°C.
Basic position of controls in automatic mode
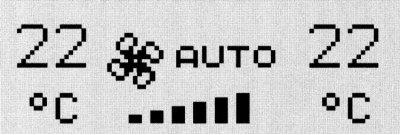
We recommend activating the automatic mode and setting the temperature left and right to 22°C. This will ensure the most pleasant temperature in the rear of the cabin.
Press the air supply toggle switch to A. The display shows "AUTO". The air supply is adjusted automatically.
Manual air supply control
Press the air supply toggle switch up or down. 7 fan stages can be selected.
Rear air conditioning control via automatic air conditioning control panel
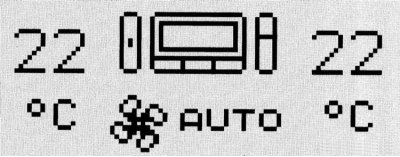
The automatic air conditioning control panel on the centre console can be used to switch off the rear air conditioning and change the fan speed and temperature settings.
To do this, on the automatic air conditioner, press the air supply toggle switch A horizontally and keep it pressed until the above indication appears on the display.
The air conditioning in the rear compartment can be switched on and off using button 0.
The fan toggle switch can be used to set the fan speed, and the temperature toggle switches can be used to set the rear air conditioner temperature.
Approximately 4 seconds after the last button press, the display indicator goes out and the automatic air conditioner switches to normal operation.
Independent heater
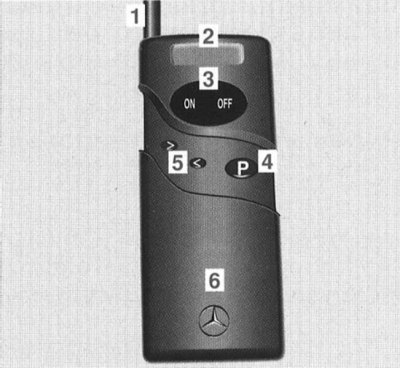
Remote control device:
1 Antenna
2 Display
3 On/Off.
4 Program call button
5 Setting buttons
6 Lid
An independent heater heats or ventilates the vehicle interior depending on the value set on the automatic air conditioner and the air temperature in the interior.
All functions of the independent heater can be called up by the remote control. The independent heater can be switched on immediately (instant heating) or program it so that it turns on automatically at the required time (software heating).
The switch on the centre console can be used to switch the independent heater on and off and reset the activated on time.
The independent heater only switches on when the coolant temperature is below 70°C.
There is a risk of fire and poisoning!
It is forbidden to turn on independent heating at filling stations and in closed rooms without an exhaust hood (for example, in garages).
Note: Under appropriate temperature and weather conditions, it may happen that the system first produces ventilation and then heating, for example. This ensures that the required temperature can be reached as quickly as possible.
To achieve the maximum range of the remote control, it is recommended to fully extend the antenna during transmission and hold the remote control vertically. Transmission continues as long as the display indicator flashes.
The maximum range of the remote control is 1000 m. In closed rooms or due to massive obstacles, the range may be limited.
The operating time of the independent heater set at the factory is 50 minutes. However, it can also be set individually. Any service station will provide information on this issue "Mercedes-Benz".
The remote control for the independent heater can be stored in the storage compartment, in front of the selector lever, in a holder.
The car is equipped with a remote control device. Each car is provided with one additional remote control device of the same design. Information on this issue can be provided by any maintenance station "Mercedes-Benz".
Before switching on
Setting the desired air temperature in the cabin using the automatic air conditioner temperature rocker switches (above in this Section). We recommend setting the temperature on the left and right to 22°C.
The independent heater automatically regulates the set temperature.
Instant on
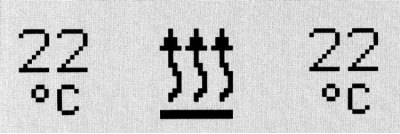
Indication on the display of the automatic air conditioner in independent heater mode.
The independent heater can be switched on using a switch on the centre console.
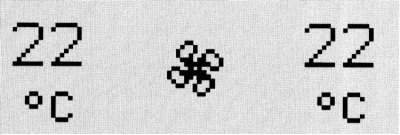
Indication on the display of the automatic air conditioner in the independent heater ventilation mode.
Switching on the independent heater with the switch:
Press the switch on the symbol
 .
.
The green indicator LED lights up and the automatic air conditioner display is activated.
Switching on independent heating/ventilation with remote control:
Press the ON button on the remote control until "On" flashes on the remote control display. The automatic air conditioning display is activated. When the independent heater is switched on, the control LED on the switch on the center console lights up.
Shutdown
The independent heater can be switched off using the remote control or the switch on the centre console.
The independent heater can be switched off by the remote control. When the electronic key in the ignition switch is turned to position 2, the ventilation system of the independent heater is also switched off.
Switching off with switch: switch on the center console press the symbol
 .
.
The green control LED goes out.
Switching off with remote control:
Press the OFF button on the remote control until "OFF" starts flashing on the remote control display. The display of the automatic air conditioning goes out. If the independent heating was previously activated, the green control LED on the switch on the center console also goes out.
Turn-on time
Three switching times can be set, of which one switching time can be activated.
Slide the cover on the remote control and press the program call button. The display shows the last called start time.
Setting the turn-on time:
Call up the switch-on time to be changed, press and hold the button
 or
or  until the required time is indicated.
Turn on software heating/ventilation
Move the cover on the remote control and press the program call button repeatedly until the display shows the required start time.
Immediately after this, press the ON button on the remote control until the switch-on time starts flashing. The yellow control LED on the switch on the center console lights up. The independent heater switches on at the required time.
Switching off software heating/ventilation
The independent heater can be switched off using the remote control or the switch on the centre console.
Switch off by switch:
Switch on the center console press the symbol R off. The yellow control LED goes out.
Switching off with remote control:
Move the cover on the remote control and press the program call button repeatedly until the display shows the start time.
Press the OFF button on the remote control until "- -: - -" starts flashing on the remote control display. The yellow control LED on the switch on the center console lights up.
Note: If the independent heater has already been switched on, it can be switched off as described in the chapter "Switching off".
[Article text obtained from the website MercedesMAN.ru]
The independent heater switches off automatically after no more than 50 minutes. The control LED goes out.
Battery charge indicator
When the operating voltage of the remote control falls below a certain limit value, "LO" appears on the display for 10 seconds after transmission when the ON, OFF or P button is pressed. The batteries should be replaced immediately.
Replacing the batteries
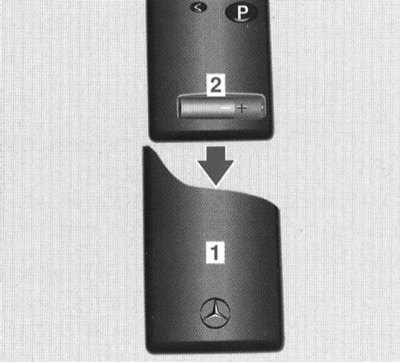
1 Lid
2 Power elements
There is a risk of poisoning!
Keep batteries away from children. If a battery is swallowed, seek medical attention immediately.
Remove cover "1" downwards, passing the locking position.
Remove the old battery.
Insert the new battery "2" in accordance with the + and - pole markings molded onto the body of the remote control device.
Slide the lid on from below.
Environmental protection notice!
Dispose of discharged batteries in accordance with environmental protection requirements.
Rear window heating system
Turn the electronic key in the ignition switch to position 2.
To turn on: Press the button on the automatic air conditioner control panel
 .
.
The control LED on the button lights up.
Note: If the rear window is icy or covered with snow on the outside, remove the ice and snow before turning on the rear window heating.
The rear window heating system consumes a lot of electricity. Therefore, it should be switched off immediately after the fogging disappears.
The rear window heating switches off automatically depending on the outside temperature and driving speed after approximately 6 to 23 minutes.
If a large number of electrical consumers are switched on or the battery is insufficiently charged, the rear window heating system may switch off.
In this case, the control LED on the button starts flashing.
When sufficient voltage is restored, the rear window heating system switches back on automatically.