



- sufficient amount of water. If dirt is removed with insufficient water, small particles of dust and sand may get on the sponge and form small scratches on the paint surface;
- a garden hose with a nozzle or at least two buckets of water;
- a hose-brush that washes away dirt with a stream of water. If you are working in washing gloves or using a sponge, hold the hose closer to the surface being treated so that more water gets to the area being cleaned. After every second or third wipe, completely immerse the washing gloves or sponge in a bucket of water and wring it out so that dirt does not accumulate in the pile or pores;
- a brush with a long handle for cleaning hard-to-reach places - rims and wheel arches;
- sponge with large pores;
- sponge for removing insects from glass;
- a large piece of natural suede for drying;
- buckets for washing with car shampoo or rinsing with a special chamois cloth for glass.
Car exterior cleaning products
Car shampoo. Helps to easily remove oil stains from paintwork.
Car shampoo with a protective composition. It has the properties of a car shampoo, but after drying it protects the paintwork and extends the period of the next polishing.
Hubcap cleaner. Removes traces of brake pad dust.
Care product for surfaces made of artificial materials. Especially for faded bumpers. Along with care substances, it contains dyes. Apply and distribute with a clean sponge. Remove residue with a soft cloth.
Sequence of works


1. Close all doors and windows.
2. Clean the wheel arches, hubcaps and thresholds. Remove any remaining dirt in two stages.
3. Wash the underbody with a jet of steam or water. In winter, be sure to clean off any dirt before washing your car. It is recommended to lift the car once or twice a year and inspect the condition of the protective coating on the underbody.
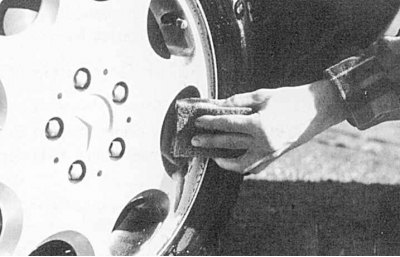
Fig. 3.5. Cleaning wheel caps
4. Steel front wheel rims require more frequent cleaning, as they collect more brake lining dust when braking. Clean the wheel caps with a special cleaner. The caps will last longer if you remove dirt from hard-to-reach places with a sponge before washing (Fig. 3.5). First remove any stuck dirt with a small sponge, then wash the caps with water under pressure.
Aluminum caps have a protective varnish coating. However, if you hit a hubcap on a curb or other obstacle, even super varnish will not help you. Scratches must be repaired immediately, otherwise they will very quickly fill with aggressive dust from the brake pads. Gray-black dust corrodes small holes in the light metal. Treat small scratches and abrasions with polishing paste for aluminum.
5. Light metal caps should be washed regularly with water and detergent. Aluminum caps are very sensitive to the effects of concentrated detergents. Wash them twice a month and they will last longer.
6. Cleaning of complex-shaped hubcaps will be easier with toothbrushes. It will also be appropriate to use protective preparations. Dust from brake pads and dirt will not penetrate through the protective preparation layer.
Caution! The protective agent must not come into contact with the brake pads or discs.
Wash your car properly
7. Spray the car with a strong stream from a hose. At a car wash, this is the "rinse" mode when washing with water under pressure.
8. Using a hose with a brush, a sponge or a washing mitt, wash the car from the roof to the bottom of the windows.
Article obtained from this portal www.mercedesman.ru
9. Apply the cleaning foam in a circular motion with light pressure. Allow the foam to act on the surfaces for a short time.
10. Rinse off the dirt with water from a hose. At the car wash, this is the usual "rinse" mode.
11. During the final rinse, clean the wheels using a hose with a brush.
12. After washing, wipe the car with a chamois cloth, otherwise the dried water will form gray spots on the paintwork.
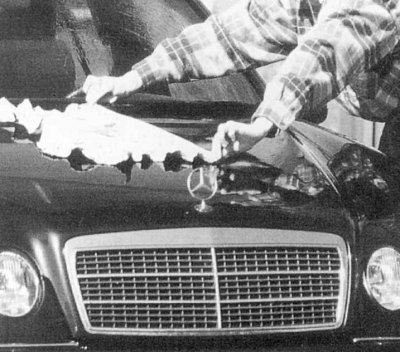
Fig. 3.6. Wiping the car with a chamois cloth
13. Then completely immerse the suede cloth in water, rinse well, wring it out, spread it on the hood and pull it towards you over the varnished surface (Fig. 3.6).
14. After each such operation, rinse and wring out the suede cloth well. Wipe hard-to-reach corners with a cotton cloth or an old suede cloth, take care of the new one - the remaining dirt will ruin it.
Make sure the glass is clean
15. When cleaning the outside of the glass, proceed in the same way as when cleaning the inside. Check the windshield for any stone chips or scratches.
16. Wipe the windshield wipers with a dry chamois leather.
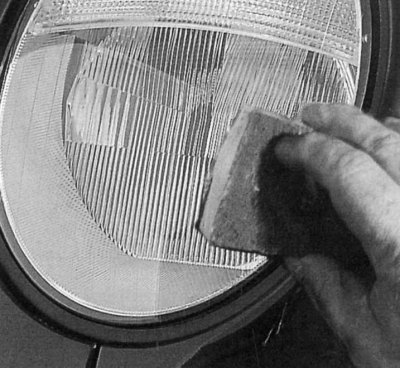
Fig. 3.7. Cleaning headlights
17. After washing, check the paintwork, headlight lenses and front bumper to see if there is any dirt left. Wipe the headlights thoroughly (Fig. 3.7) using a soap solution. If a simple soap solution does not help, use a special agent. Insects, bird droppings, pollen and traces of heavy oils and additives must be removed.
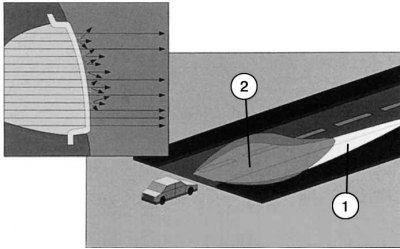
Fig. 3.8. Diagram of deflection and absorption of the headlight beam by dirt particles: 1 - clean headlights (maximum illuminated length, no reduction in intensity); 2 - dirty headlights (limitation of the length of the illuminated area, lower brightness)
18. Heavy oil and additive remover must not be applied to paintwork - it contains solvents.
Cleaning headlights
Headlight glass should be cleaned more often than the car body. Dirt particles on the glass can screen and absorb light rays, which reduces the illuminated distance and brightness of the headlights. After just an hour of driving on a wet road, the headlights are 60% dirty. At the same time, the length of the illuminated section is reduced by 35 m - a distance that is always insufficient during emergency braking. The diagram of the deviation and absorption of the light flux by dirt particles is shown in Fig. 3.8.