



1. Make sure you have written down or remember the radio lock code.
2. Disconnect the wires from the battery.
Radio with four holes on the sides of the front panel
3. Insert the staples (usually included with the radio) to remove it into the four holes and remove the radio from the center console.
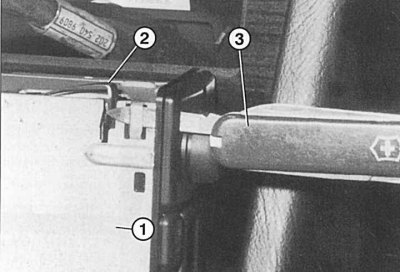
Fig. 10.13. To remove the radio (1), it is necessary to release the side springs (2) of the mount in the hole in the center console. If you do not have the necessary tool, this can be done with a knife (3) with a narrow blade, having first removed the ashtray
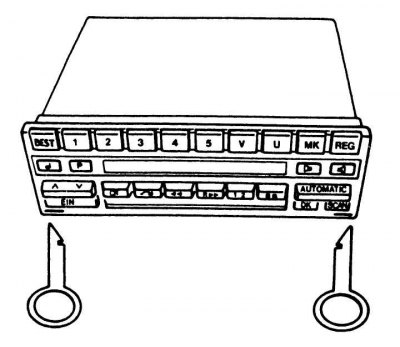
Fig. 10.14. It is much more convenient to use the supplied original removable devices instead of a knife
4. You can also use four suitable nails or pieces of wire to release the spring clips (fig. 10.13 and 10.14).
5. Pull the radio forward, if necessary, additionally remove the ashtray and press through the hole from below.
Radio with slots in the lower corners
6. Insert the removable devices into the holes. The side springs are pressed out. If necessary, the springs can be pressed out with a thin blade of a penknife, while simultaneously pressing on the radio from behind.
7. Remove the radio from the niche.
8. Remove the connector, marking the position if necessary.
9. When installing, connect the antenna cable and contact connector to the back of the radio, push the radio in until it stops.
10. When sliding in, make sure that the mounting pin on the back of the radio is exactly in its original position.
11. Enter the radio code.