



Sequence of works


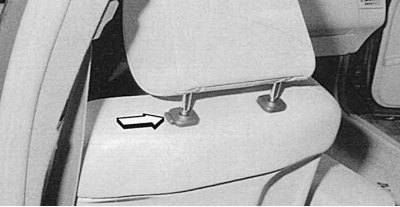
Fig. 10.23. To remove the headrest, press the lock (arrow)
1. Remove the headrests. To do this, press the locking button and pull them out of the backrest (fig. 10.23).
2. Move the seat forward.
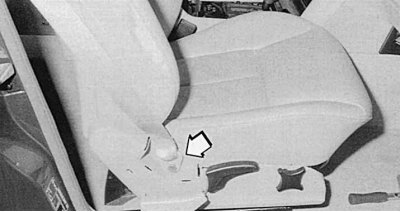
Fig. 10.24. After removing the cover of the locking mechanism, the belt can be unscrewed in the place shown by the arrow
3. Detach the seat belt retaining mechanism trim from the seat (fig. 10.24).
4. Unscrew the belt. Pay attention to the location of the rollers.
5. Remove the protective cover from the guide rails at the bottom.
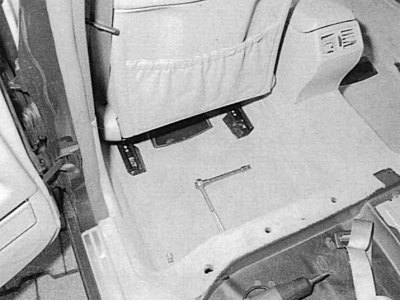
Fig. 10.25. Unscrew the seat fastening from the runners at the rear
6. At the rear, unscrew the seat from the runners. To do this, use the TORX E12 socket head (fig. 10.25).
7. Move the seat back.
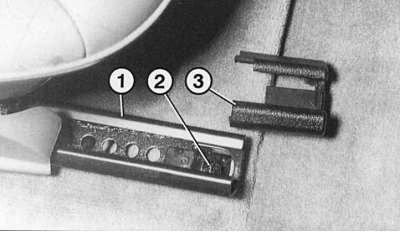
Fig. 10.26. Front part of the front seat guide rail: 1 - runner; 2 – bolt with TORX head E12; 3 – plug
(Text republished from the website: «MercedesMAN»)
8. Use a screwdriver to pry off the plugs 3 (fig. 10.26) runners and remove them.
9. Remove the TORX head mounting bolts at the front of the runners.
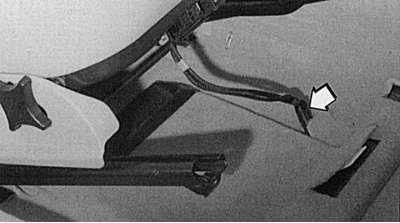
Fig. 10.27. When reconnecting the contact connector (arrow), pay attention to the reliability of the connection, otherwise there may be problems, for example in the heating system
10. Disconnect the contact connectors (fig. 10.27).
11. Remove the seat.
12. During subsequent assembly, ensure that the guide pins are installed correctly. Tighten the seat belt fastening to a torque of 35 N·m, and the seat to 50 N·m.