
Removing
Attention! If the valve control parts are to be used again, they must be reinstalled. In order not to confuse the parts, make a panel for storing them.
1. Remove the cylinder head and place on two wooden stands.
2. Remove camshafts.
3. Remove the poppet pusher.

4. Mark the valves before disassembly so that they can be reinstalled in their original positions during reassembly. To do this, number the valve plates with a felt-tip pen.
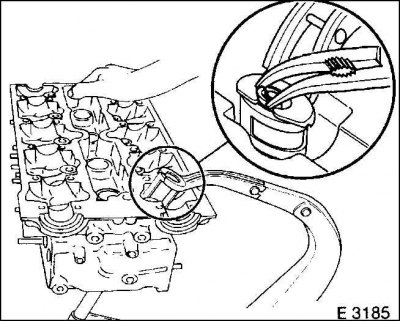
5. Remove the valves using the existing spring tensioner. At the same time, tension the springs and remove the valve stem cotters. Then release the spring and remove the top poppet and valve spring.
6. Remove the oil seals.
7. Remove the valve from the cylinder head towards the combustion chamber.
8. Clean the valve. Replace valves with burnt poppet, low poppet height, worn and scratched stem.
9. In a repair shop, the valve stem can be checked for allowable runout, which should not be more than 0.03 mm.
Warning! Exhaust valves are filled with sodium. They must not be soldered or used as work tools (like ejector): explosion hazard!
Installation
1. Before assembling the valves, check their guides, if necessary, modify the valve seats.
Attention! If a new valve is being installed, rework the valve seat just in case.
2. Remove burrs from the valve stem on the mating surface of the valve stem parts.
3. Lightly coat the valve stem and valve guide with engine oil, and insert the valve.
4. Install the oil seal.
5. Install the valve spring.
6. Then install the next valve. Do not mix up intake and exhaust valves.
7. Install the poppet pusher.
8. Install the camshafts.
9. Install the cylinder head.