



Contents: Control ↡ Adjustment ↡
Camshafts
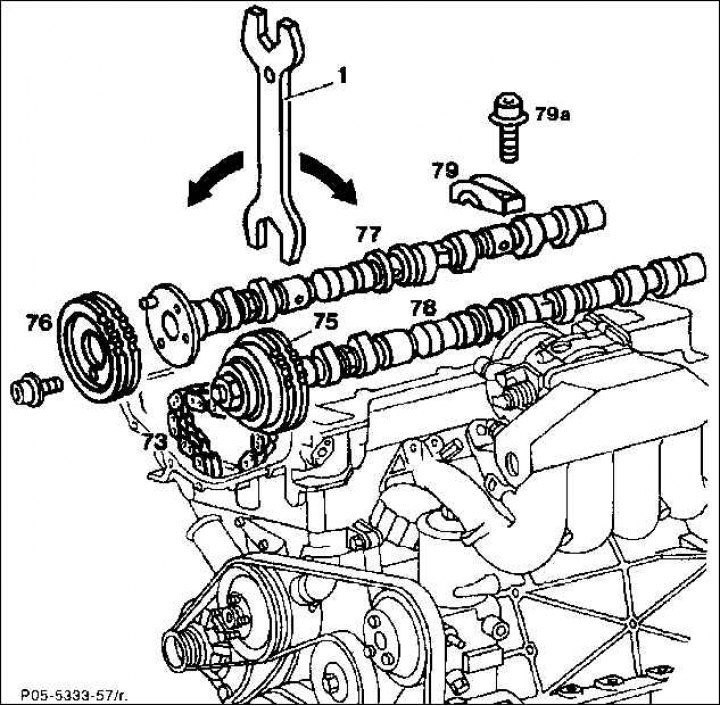
1. Wrench (for turning camshafts); 73. Control chain; 75. Intake camshaft gear 76. Exhaust camshaft gear; 77. Exhaust camshaft; 78. Intake camshaft; 79. Camshaft bearing cap; 79a. Fastening bolt
Control
1. Set cylinder 1 to 20° ATDC. Note: In this position (20° ATDC), the camshafts can be turned with the control chain removed without the valves touching the piston base.
2. Remove the cylinder head cover.
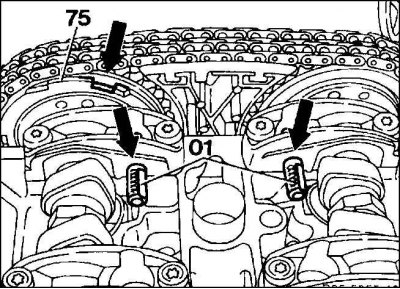
3. Fix the camshafts. To do this, insert the fixing pins (01) through the hole (arrow) in the bearing cap of camshafts 1 and 6 into the hole in the flange of the camshafts. If it is not possible to insert the fixing pins, adjust the basic positions of the camshafts.
Caution! For the 2.2L engine, turn the camshaft adjuster near the intake camshaft gear (75) to the "spat" (late) position until it stops in the direction of rotation of the camshaft (arrow).
Adjustment
1. Cylinder 1 is at 20° after TDC and the cylinder head cover is removed.
2. Remove the front covers.
3. Remove the chain tensioner.
4. Unscrew the exhaust camshaft gear using a T40 socket wrench while holding the camshaft at the hexagon. Remove the camshaft gear.
5. Remove the timing chain from the exhaust camshaft gear.
6. Turn the camshafts with a wrench until the locking pins can be inserted.
7. Install the sprocket and apply the chain.
8. Install the chain tensioner.
9. Check the basic position of the camshafts again. Repeat the adjustment if necessary.
10. Install the front camshaft covers.
11. Install the cylinder head cover.