
Checking the operation of indicator and signal lamps
1. Set the ignition key to position "2" and apply the parking brake. The following indicator lights should turn on (see fig. 1.23):
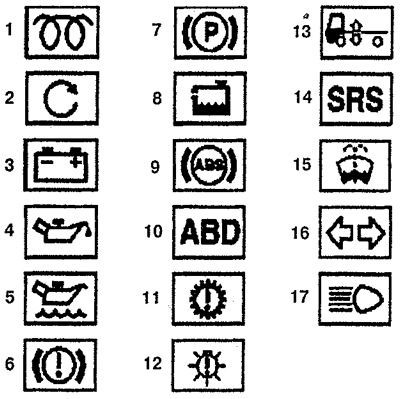
Pic. 1.23. Indicator and signal lamps.
- 1 - pre-incandescent bulb / immobilizer (diesel engines);
- 2 - immobilizer (gasoline engines);
- 3 - indicator light for recharging the battery;
- 4 - oil pressure indicator light;
- 5 - engine oil level light;
- 6 - indicator light for brake fluid level / brake lining wear;
- 7 - parking brake;
- 8 - lamp for indicating the level of cooling oil;
- 9 - ABS;
- 10 - automatic transmission control unit;
- 11 - indicator lamp or signal lamp malfunction;
- 12 - air suspension indicator light;
- 13 - airbags and fuel supply.
After a few seconds, the lights should turn off in the following sequence: Immobilizer, ABS, ABD, automatic transmission control unit, air suspension, airbags (SRS) and fuel supply. If there is a malfunction in the system, then the light will be on constantly. After the start temperature has been calculated, the pre-glow lamp goes out.
2. Start the engine. All lights, except for the parking brake light, should go off. If the coolant level is low, the fluid level in the brake system, cooling system, or windshield washer reservoir is low (15), the indicator lamps will remain lit.
3. Check other indicator lights, eg direction indicators 16, headlights 17.
Checking signal operation
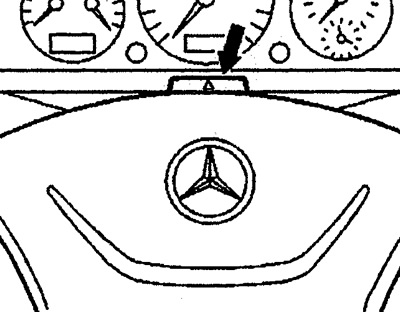
4. Press the contact plate on the steering wheel (see fig.1.23).
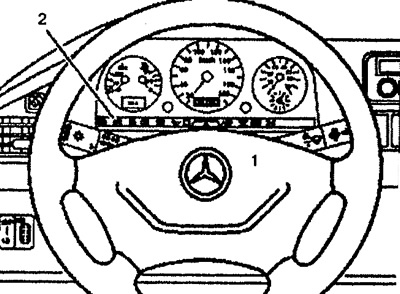
Pic. 1.24. Signal operation check.
1. steering wheel,
2. Instrument panel.
Checking the Operation of the Multi-Function Switch
5. Turn the headlight switch 1 to position
Pic. 1.25. Checking marker and parking lights.
Pic. 1.26. Checking fog lights.
6. Turn the headlight switch 1 to position
7. Turn the headlight switch 1 to position
8. Turn on the ignition.
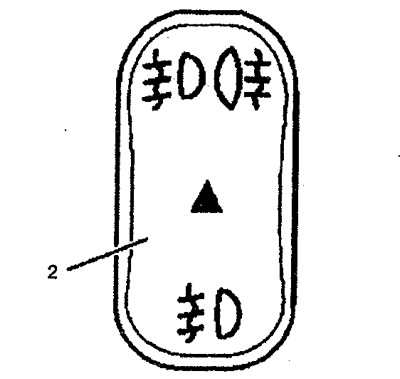
9. Move the switch to position D and E (see fig. 1.27). Check the right turn signal in position D and the left turn signal in position E.
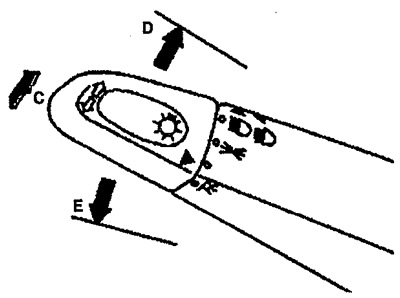
Pic. 1.27. Checking direction indicators.
10. Press the multifunction switch from position A to position C. Check for flashing high beam headlights.
11. Turn off the ignition.
12. Press the hazard switch (see fig. 1.28). Check the operation of the alarm.
Pic. 1.28. Checking the alarm.
Checking the operation of windshield wipers and washer
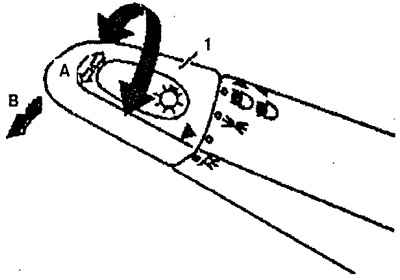
13. Check retainer A and wiper blade B (see fig. 1.29). Check the condition of the windshield retainer and rubber band. Replace if necessary.
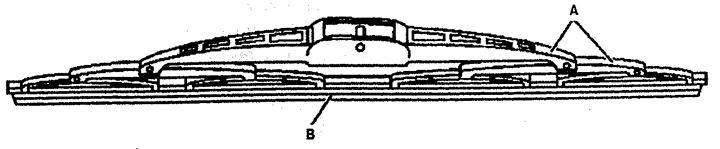
Pic. 1.29. Wiper.
14. Set the wiper switch to position "ON", move it to position "1", "2", "3", then set it to position "OFF" (see fig. 1.30). Position "1 " - Intermittent wiper operation "2" - slow windshield wipers "3" — Fast windshield wipers.
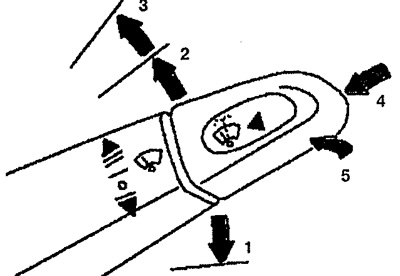
Pic. 1.30. Checking the operation of windshield wipers and windshield washers.
15. Press the tip of the right multifunction switch 4. The washer pump and the wiper should operate simultaneously. Check fluid atomization through jets.
16. Turn on the high beam headlights. Press the tip of the right multi-function switch 4. The windshield washer pump and the headlight wiper should operate simultaneously. Check fluid atomization through jets.