
Checking and adding coolant
Attention! Do not open the radiator cap if the system temperature is above 90°C. After some cooling, open the lid slowly, releasing the pressure in small doses.
1. Unscrew and remove the radiator cap 1 (see fig. 1.12).
2. Check the coolant level and top up if necessary if the coolant temperature does not exceed 50°C. The coolant level is determined by the marks on the radiator filler neck (arrow) (see fig. 1.12). Before topping up the liquid, check its anti-corrosion ability. To do this, drain some of the fluid through the radiator drain cock.
3. If the anti-corrosion ability is low, it is necessary to replace the coolant.
4. Adjust fluid level.
5. Install the radiator cap.
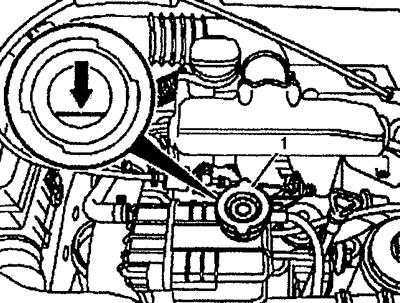
Pic. 1.12. Unscrew and remove the radiator cap (1).
Coolant replacement
6. Check the system for leaks.
7. Unscrew and remove the radiator cap 1 (see fig. 1.12).
8. Open the heating control valve.
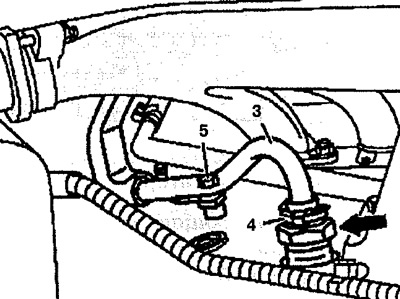
9. Drain the coolant from the system through the radiator drain cock 2 (hose can be used if necessary) (see fig. 1.13 a, b).
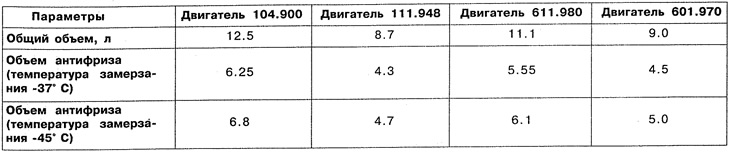
Table 1.1. The volume of engine cooling systems.
10. Drain the coolant from the system through the drain plug or engine screw plug.
11. Check the cooling system for contamination. If the cooling system is very dirty, flush it.
12. Close all drain plugs and taps.
13. Fill in the amount of coolant indicated in Table 1.1 (according to engine number).
14. Start the engine, let it run for about 1 minute and check for leaks in the cooling system.
15. Stop the engine and check the fluid level, add it if necessary.
16. Install the radiator filler cap.
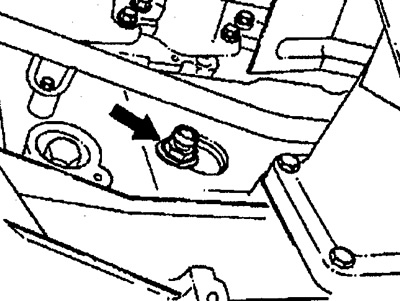
Pic. 1.13a. Drain plug on 111 and 611 engines.
Pic. 1.13b. Drain plug on 601 engine.