



When unscrewing nuts from studs, it is necessary to first clean the threaded part of the stud protruding above the nut with a metal brush in order to remove dirt and possible rust. This will prevent the nut from running through contaminated threads. Before unscrewing the nut, you need to treat the cleaned area of the thread with a rust solvent. There are many such solvents available, so always follow the directions on the included instructions for use.
In case of unscrewing bolts from welded nuts of the body, it is advisable to treat these threaded connections with rust solvent from the inside of the body. The heads of such bolts, as well as the welded nuts themselves, often come off.
Threaded screws with heads for a regular or Phillips screwdriver can also be difficult to unscrew. Phillips head screwdrivers often slip out of the slot, damaging it in the process. To eliminate such phenomena, you can use a screwdriver with a regular or Phillips head with a through metal rod that goes through the screwdriver handle, installing the screw head in the slot and tapping the metal rod protruding above the screwdriver handle with a hammer. In most cases, this method helps to loosen the threaded connection, and the screws can be easily unscrewed.
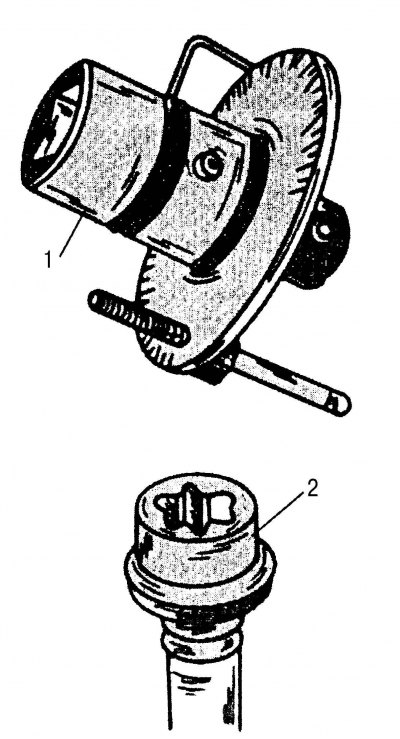
Figure 4. Angle measuring disc (top) for angular tightening of bolts and nuts. Torx head bolts and screws (bottom)
In modern automotive engineering, threaded fasteners with special heads are increasingly used, which in shape are somewhat reminiscent of cross-shaped splined heads, but nevertheless differ from them. They are called Torx heads (see figure 4). Tightening and dismantling of such fasteners is carried out using special attachments, which can be purchased in the tool kit. Ratchet wrenches, extensions and other accessories can also be used with these attachments.
Bolts with internal hexagon or internal hexagon heads can also be difficult to remove. As a first and necessary measure, the internal hexagon/polygon of the bolt head should be thoroughly cleaned of dirt and dust (for example, using a small screwdriver) so that the Allen key or multi-point key can easily enter the bolt head to its full depth. If possible, use short inserts that can be tapped with a hammer to overcome the inertial resistance of the thread before loosening begins. In some cases, however, a special Allen key is required. Sometimes, due to the short length of the wrench handle, difficulties arise when unscrewing bolts. We suggest the following solution to such difficult situations: insert the key into the head of the bolt and put an extension on its handle, for example, a suitable socket wrench. Keeping the wrench fully seated in the bolt head, begin turning it using the inserted extension. This prevents the inserted hexagon from turning in the head of a tightly seated bolt due to slipping.
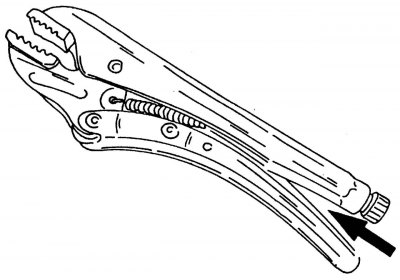
Figure 11. Pipe wrench
Small and easily accessible Allen-head bolts can be removed using a pipe wrench, one version of which is shown in the picture 11, in cases where the edges of the Allen key were brought up. Be careful when using a pipe wrench to avoid pinching your fingers.
[Article borrowed from the web portal: mercedesman]
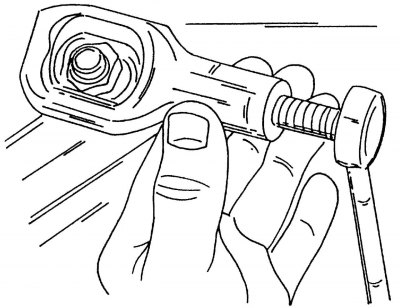
Figure 12. Using a nut splitter
Complications can also arise when loosening nuts and bolts with rounded edges due to the use of wrenches of the wrong size. Most often, this situation occurs in used cars. You can try to unscrew such nuts and bolts using a pipe (gas) wrench. Depending on the available space, such twisted nuts can be cut with a chisel or sawed with a hacksaw, running the blade along the thread. In this regard, we recommend using, if space allows, a special nut splitting device (nut splitter). Its operating principle is shown in the figure 12: When the bolt is turned, the nut is tightened until it breaks, then it is removed in two halves. The advantage of this device is that it does not damage the bolt thread.
Caution! Do not leave your fingers in the area indicated by the arrow in the figure 11, as the key handles snap into place.
Self-locking nuts are often mentioned in the manual. From the very name of the nut it follows that there is some kind of device that makes it difficult for the nut to loosen spontaneously and which is often destroyed when disassembling the connection. Therefore, all self-locking nuts cannot be reused.
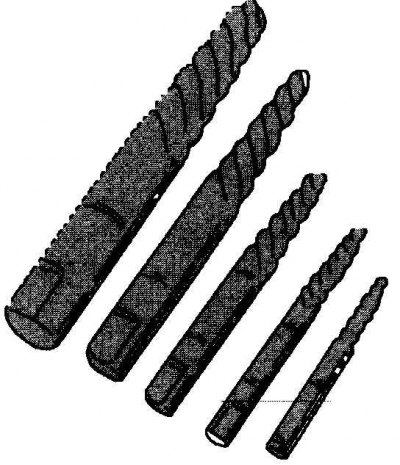
Figure 13. Left-hand extractor screws
Sometimes it happens that the head of a bolt breaks off. To extract the remaining threaded portion of the bolt from the threaded hole, you need to drill a hole in the center of the remainder of the bolt, into which a special extractor screw with a left-hand thread is screwed. Left-hand extractor screws (figure 13), which, like bolts, are screwed into prepared holes, are sold in specialized auto accessories stores. When tightening such a screw, its thread begins to cut into the body of the bolt fragment and drags it along with it, unscrewing it from the threaded hole. Another option for extracting a bolt fragment is to drill a hole with a diameter close to the diameter of the threaded hole in which the broken bolt fragment remains, and then screw a thread-cutting tap into the drilled body of the fragment.
The studs are unscrewed and screwed in using two nuts, locked one on top of the other on the threaded part.
The designed threads on aluminum parts often strip when tightening the bolts. In such cases, special threaded inserts should be used. These inserts are screwed into damaged threaded holes according to the instructions contained on their packaging, or the part with the damaged threaded hole is delivered to a service station to have a new thread cut.
Tightening torques for threaded connections
The permissible tightening torque is indicated on the threaded fasteners of all critical units and parts. To ensure the specified tightening torques, a torque wrench with replaceable heads/bits and sometimes an extension should be used. In many cases it is impossible to access a particular bolt/nut to use a torque wrench, or the tightening torque is so low that it cannot be read from the torque wrench indicator. In such cases, the tightening torque is calculated during tightening (with a lot of experience) or controlled by "feeling" the resistance of the thread. This applies primarily to threaded connections with a diameter of 6 and 7 mm.