
Removing
Removing the trim panel from the left pillar of the rear door
Removing upper trim panels rear door pillars

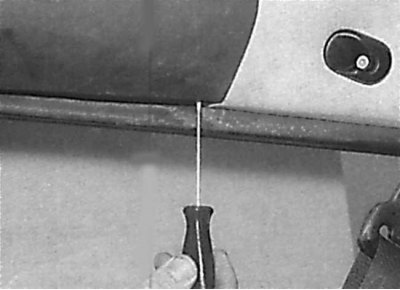
Unscrewing the front screw fixing the ceiling trim panel
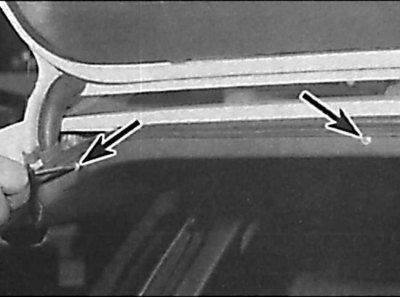
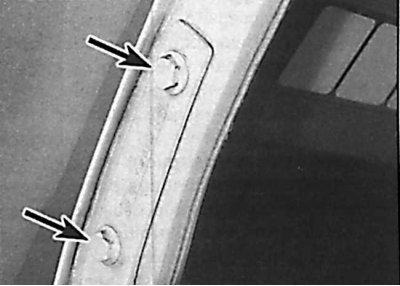
Location of the rear screws for fixing the ceiling trim panel
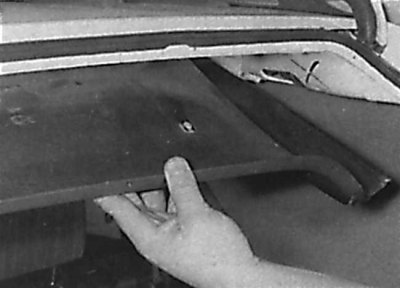
Removing the ceiling trim panel
Removing the ceiling to access the connection terminals
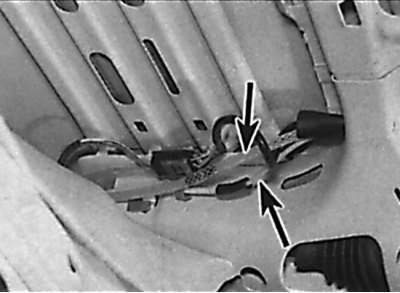
Arrangement of connecting plugs of electroconducting of a back door
Arrangement of a junction of a hose of a washer of back glass and a vacuum hose of the central lock
Arrangement of bolts of fastening of the hinge to a back door
1. Remove the ground wire from the battery.
2. Remove the luggage compartment side trim panels to access the tailgate pillar trim panel. To improve access from the left side, remove the spare wheel.
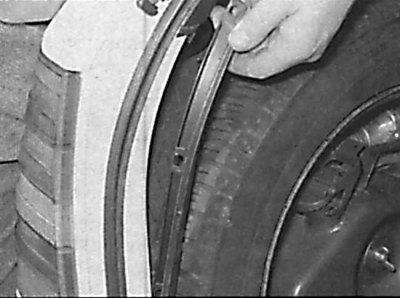
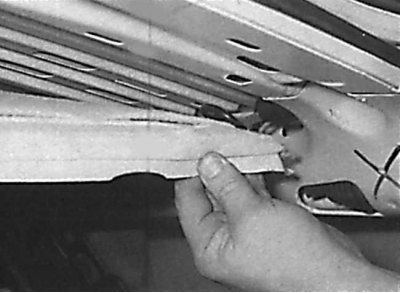
3. Release the mounting brackets and, on the left and right sides, remove the lower trim panels from the rear door pillars (see fig. Removing the trim panel from the left pillar of the rear door).
4. Remove the luggage compartment lamps from the upper trim panels of the rear door pillars, then disconnect the electrical connectors from them and remove the lamps from the vehicle.
5. Remove the screws securing the upper trim panels of the rear door pillars. To remove the panels from the mounting brackets, move them down and remove from the vehicle (see fig. Removing upper trim panels rear door pillars).
6. Remove the screws securing the rear headlining trim panel, then move the panel to the rear and remove it from the vehicle (see fig. Unscrewing the front screw fixing the ceiling trim panel, Location of the rear screws fixing the ceiling trim panel, Removing the ceiling trim panel).
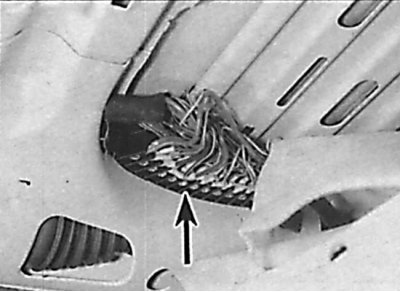
7. Remove the ceiling and move the rear door wiring terminal block to the left side of the vehicle (see fig. Removing the ceiling to access the connection terminals, Arrangement of the rear door wiring connection terminals). Label each wire, then unscrew the screws and remove the wires from the terminal block. Remove the o-ring from the body and remove the rear door wiring harness from the body so that it can be removed with the rear door.
8. Disconnect the rear window washer hose and the central locking vacuum hose and remove them from the body so that they can be removed together with the rear door (see fig. Arrangement of a junction of a hose of a washer of back glass and a vacuum hose of the central lock).
9. Using a marker or pencil, mark the position of each hinge on the tailgate.
10. Using two assistants, unscrew the bolts securing the hinges to the rear door and remove the rear door from the vehicle (see fig. Arrangement of bolts of fastening of the hinge to a back door).
11. Check the condition of the rear door hinges and replace them if necessary.
Installation
1. Installation is made in sequence, return to removal. Align the rear door hinges according to the marks made before removal. Without installing trim panels, connect the battery and check the operation of all electrical components of the tailgate. After installing the door, check that the gap around the perimeter of the door is the same everywhere, and also that the outer surface of the door is flush with the rest of the body. To adjust the gap around the perimeter of the door, loosen the door hinge bolts and, moving the door, adjust its position, then tighten the mounting bolts.