



Contents: Front door on Sedan and Estate models ↡ Front door on Coupe models ↡ Front door window lift on Sedan and…↡ Front door window lift on Coupe…↡ Rear door on Sedan and Station wagon…↡ Rear side glass on Coupe models ↡ Rear door window lifters on Sedan…↡ Rear side window lift on Coupe models ↡ Installation ↡ Front door glass on Sedan and…↡ Front door glass on Coupe models ↡ Front door window lift on Sedan and…↡ Front door window lift on Coupe…↡ Rear door glass on Sedan and Estate…↡ Rear side glass on Coupe models ↡ Rear door window lifters on Sedan…↡ Rear side window lift on Coupe models ↡
Removal the protective film from the inside of the door
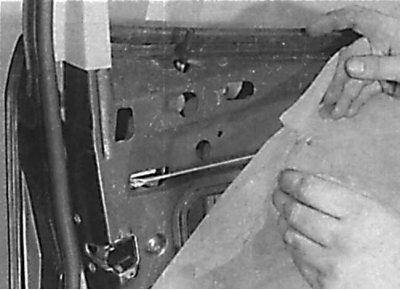
1. Remove the door trim.
2. Carefully remove the protective film from the inside of the door (see fig. Removing the protective film from the inside of the door). If the protective film is damaged when removed, replace it.
Front door on Sedan and Estate models
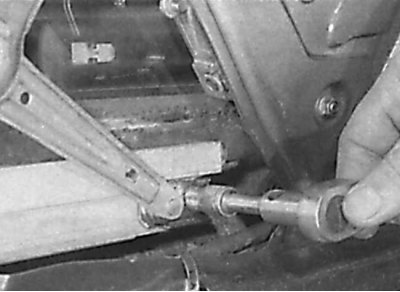
Unscrewing the nut that secures the window lifter arm to the glass guide
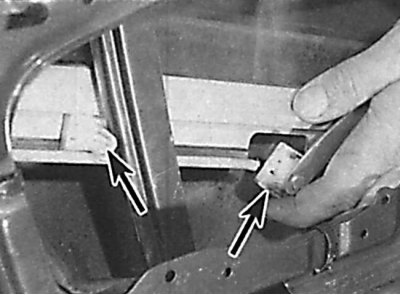
Disconnecting the door glass from the guide slider and the rear window lift slider
1. Lower the glass down until it stops so that the window regulator guide mounting nut is accessible through the opening on the inside of the door, then remove the ground wire from the battery.
2. Unscrew the nut securing the window lift arm to the glass guide (see fig. Unscrewing the nut securing the window lifter arm to the glass guide).
3. Remove the front window lift arm from the glass guide, then lift the rear of the glass and disconnect the glass from the guide slider and the rear window lift slider (see fig. Disconnecting the door glass from the guide slider and the rear slider of the window regulator).
4. Carefully lift the glass and remove it upwards from the door window. If necessary, remove the slider from the bottom of the glass guide.
Front door on Coupe models
1. Lower the glass down until it stops so that the window regulator guide mounting nut is accessible through the opening on the inside of the door, then remove the ground wire from the battery.
2. Unscrew the nut securing the window lift arm to the glass guide (see fig. Unscrewing the nut securing the window lifter arm to the glass guide).
3. Unscrew the screws securing the front glass guide at the top and bottom and remove it from the door.
4. Loosen the nuts securing the glass holder to the guide, then remove the glass from the window regulator and pull it up through the door window.
Front door window lift on Sedan and Estate models
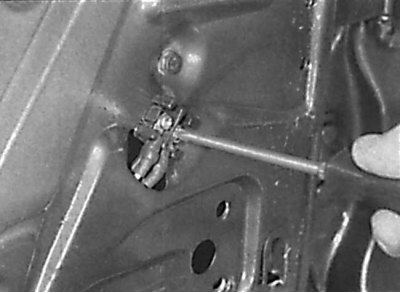
Unscrewing the screws securing the electrical wiring to the window lift motor
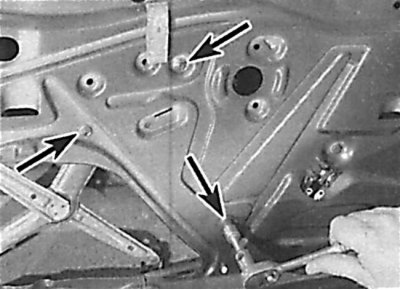
Location of window regulator mounting nuts
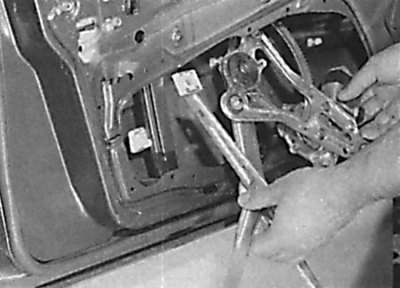
Removal the window regulator through the opening on the inside of the door
1. Lower the glass down until it stops so that the window regulator guide mounting nut is accessible through the opening on the inside of the door, then remove the ground wire from the battery.
2. Unscrew the nut securing the window lift arm to the glass guide (see fig. Unscrewing the nut securing the window lifter arm to the glass guide).
3. Remove the front window lift arm from the glass guide, then lift the rear of the glass and disconnect the glass from the guide slider and the rear window lift slider (see fig. Disconnecting the door glass from the guide slider and the rear slider of the window regulator).
4. Lift the glass up as far as it will go, then use adhesive tape to secure the glass in this position to the door.
5. On models with power windows, mark the location of each wire, then remove the screws and disconnect the wires from the window motor (see fig. Unscrewing the screws securing the electrical wiring to the window lift motor).
6. Remove the nuts and bolts securing the window regulator and remove the window regulator through the opening in the inner part of the door, releasing the upper slider from the guide in the door (see fig. Location of window regulator mounting nuts, Removing the window regulator through the opening on the inside of the door).
Front door window lift on Coupe models
Attention! When installing the window regulator, it is necessary to use a rivet gun and new rivets.
1. Lower the glass down until it stops so that the window regulator guide mounting nut is accessible through the opening on the inside of the door, then remove the ground wire from the battery.
2. Unscrew the nut securing the window lift arm to the glass guide (see fig. Unscrewing the nut securing the window lifter arm to the glass guide).
3. On models with power windows, mark the location of each wire, then remove the screws and disconnect the wires from the window motor.
4. Unscrew the guide mounting nuts, then remove the glass from the window regulator and pull it up through the door window frame.
5. Using a marker, mark the location of the window lift arm mounting nuts on the door, then remove the nuts.
6. Using a 6mm drill bit, carefully drill out the rivets that secure the window regulator to the door.
7. Remove the window regulator through the opening on the inside of the door.
[Information copied from the website MERCEDESMAN.ru]
Rear door on Sedan and Station wagon models
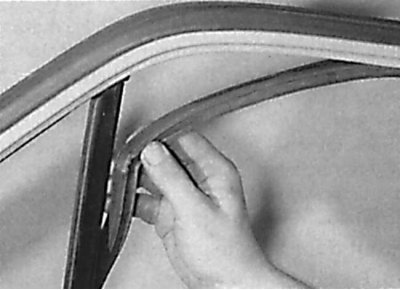
Removal the glass seal from the door window frame
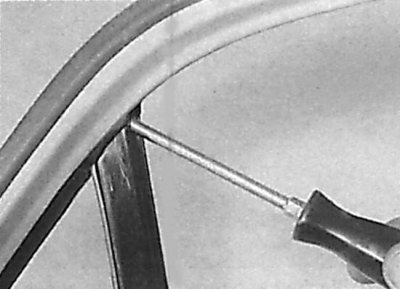
Unscrewing the upper screw securing the rear glass guide
Unscrewing the lower bolt securing the rear glass guide
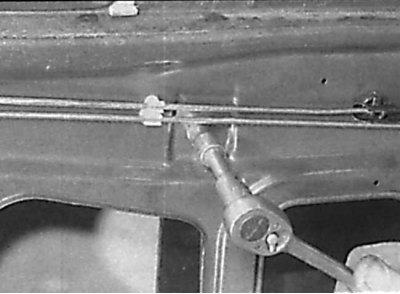
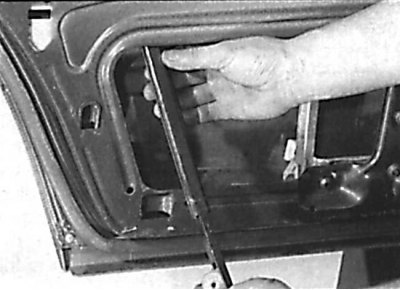
Removal the rear glass guide from the door
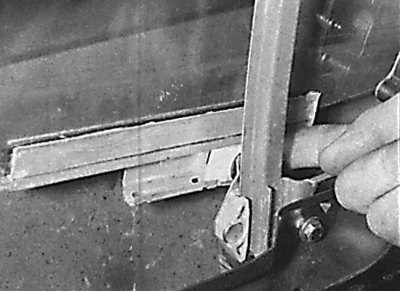
Disconnecting the glass guide from the window regulator
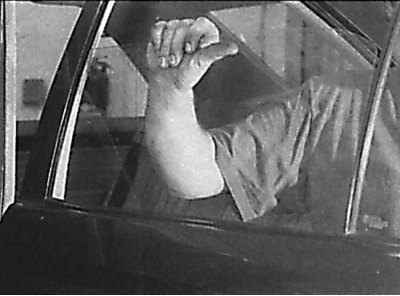
Removal the rear door glass through the door window frame
1. Lower the glass so that the guide is accessible through the opening on the inside of the door, then remove the ground cable from the battery.
2. Carefully remove the glass seal and pull it out of the door window frame (see fig. Removing the glass seal from the door window frame).
3. Unscrew the bolt located at the bottom and the screw located at the top of the rear glass guide mount. Move the guide down and remove it from the door (see fig. Unscrewing the upper screw securing the rear glass guide, Unscrewing the lower bolt securing the rear glass guide, Removing the rear glass guide from the door).
4. Turn the glass and disconnect the glass guide from the window regulator, then lift the glass up and remove it from the door window frame (see fig. Disconnecting the glass guide from the window regulator, Removing the rear door glass through the door window frame).
Rear side glass on Coupe models
1. Remove the front seat belt retractor drum.
2. Remove the upper glass seal from the body.
3. Carefully remove the protective film from the body to access the window regulator and glass. If the protective film is damaged, it must be replaced.
4. Lower the glass to a position where the nuts securing the glass to the window regulator are accessible through the door openings.
5. Unscrew the nuts securing the glass to the window regulator and remove the glass from the car.
Rear door window lifters on Sedan and Estate models
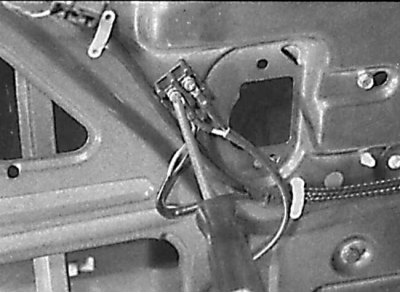
Unscrewing the screws securing the electrical wiring to the window lift motor
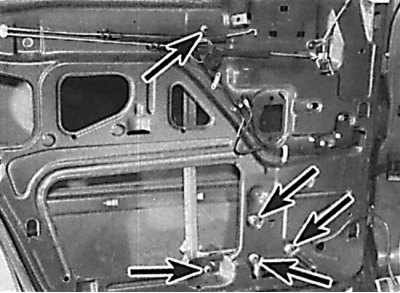
Location of nuts and bolts securing the window regulator to the door
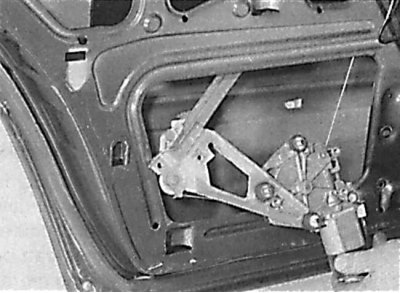
Removal the window regulator through the opening on the inside of the door
1. Lower the glass to a position where the glass guide can be accessed through the door opening, then remove the ground wire from the battery.
2. Tilt the glass in the door and remove the glass guide from the window lifter arm. Lift the glass all the way up and use adhesive tape to secure it in this position.
3. On models with power windows, mark the location of each wire, then remove the screws and wires from the window motor (see fig. Unscrewing the screws securing the electrical wiring to the window lift motor).
4. Unscrew the bolt and nuts securing the window regulator and remove the window regulator through the opening on the inside of the door (see fig. Location of nuts and bolts securing the window regulator to the door, Removing the window regulator through the opening on the inside of the door).
Rear side window lift on Coupe models
1. Remove the rear side glass from the body.
2. To access the window regulator, unscrew the screws and remove the support plate from the body.
3. Remove the cover from the back of the window switch. Note the location of each wire and disconnect the window motor wires from the switch. Remove the wiring harness from its mounting brackets so that it can be removed with the window regulator.
4. Unscrew the bolts and remove the armrest mounting plate from the body.
5. Carefully remove the rear portion of the molding and caps to access the window regulator mounting nuts.
6. Unscrew the nuts and remove the window regulator from the car.
Installation
Front door glass on Sedan and Station wagon models
Location of the nuts securing the upper slider of the window regulator to the door
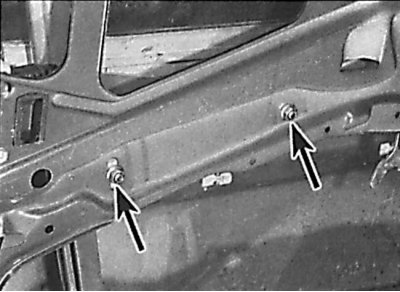
1. Installation is performed in the reverse order of removal. Check that the glass is correctly aligned with the sliders of the guide and the window lifter. Before installing the protective film, check that the glass moves easily and closes completely. Otherwise, make adjustments by loosening the nuts securing the upper slider of the window lifter to the door and adjusting the position of the slider.
Front door glass on Coupe models
1. Installation is performed in the reverse order of removal. Check that the glass is correctly installed in the front guide. Before installing the protective film, check that the glass moves easily and closes completely. Otherwise, make adjustments by loosening the wiper arm mounting nuts and adjusting the arm position or changing the position of the glass in the window lifter clamp. If the adjustment made is insufficient, make further adjustments by loosening the guide mounting screws and moving it.
Front door window lift on Sedan and Estate models
1. Installation is performed in the reverse order of removal. Before tightening the window regulator mounting nuts and bolts, apply a product to their threads to prevent them from loosening. Before installing the protective film, check that the glass moves easily and closes completely. If adjustment is necessary, loosen the nuts securing the upper window regulator slider to the door and adjust the slider position.
Front door window lift on Coupe models
1. Installation is performed in the reverse order of removal. Use new rivets to secure the window lifter. Before installing the protective film, check that the glass moves easily and closes completely. To adjust, loosen the wiper arm mounting nuts and adjust the arm position in the grooves.
Rear door glass on Sedan and Estate models
1. Installation is performed in the reverse order of removal. Before installing the protective film, check that the glass moves easily and closes completely.
Rear side glass on Coupe models
1. Installation is performed in the reverse order of removal. Before installing the protective film, check that the glass moves easily and is completely closed. If adjustment is necessary, loosen the guide mounting nuts and change the position of the glass on the window lifter mount.
Rear door window lifters on Sedan and Estate models
1. Installation is performed in the reverse order of removal. Check that the hooks of the window lift guide are clearly installed in the grooves of the door. Before installing the protective film, check that the glass moves easily and closes completely.
Rear side window lift on Coupe models
1. Installation is performed in the reverse order of removal. Before installing the protective film, check that the glass moves easily and is completely closed. If adjustment is necessary, loosen the guide nuts and change the position of the glass in the window regulator mounts. If this adjustment is insufficient, perform subsequent adjustment by loosening the window regulator mounting nuts and changing its position.