



Contents: Removal ↡ Installation ↡
Removal
Note: Later models are equipped with quick-release vacuum hose connectors, which can be disconnected by simply moving the tips.
Central locking pump
Electrical connector and vacuum tube connection points to the hydraulic pump
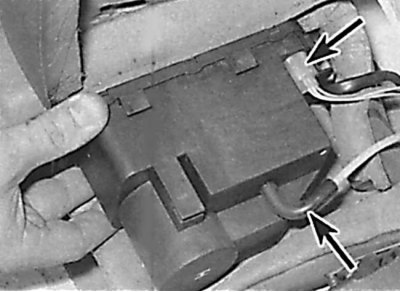
1. Remove the rear seat cushion. On Estate and Coupe models, remove the right cushion.
2. The pump is located on the right side under the rear seat cushion. To access the pump, lift the carpet and, on some models, remove the surrounding trim panels first.
3. Move the noise-absorbing cover aside, then lift the hydraulic pump, disconnect the electrical connector and vacuum pipe from it, and remove the pump from the car (see Fig. Electrical connector and vacuum tube connection points to the hydraulic pump).
Door lock actuator
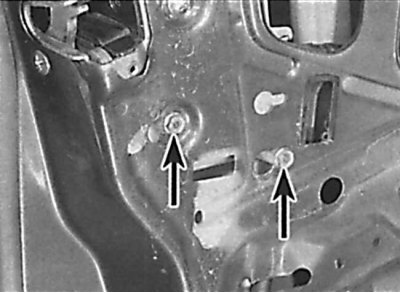
Location of bolts for fastening the actuator to the door
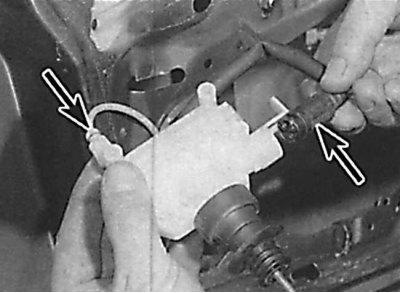
Location of the actuator connection of the electrical connector and vacuum hose
1. Remove the door trim.
2. From the inside, carefully remove the protective film. If the protective film is damaged during removal, replace it. If present, remove the protective cover of the lock.
3. Disconnect the rod from the lock or move the locking sleeve to the actuator and disconnect the lock rod from the actuator.
4. Unscrew the screws and remove the actuator from the door (see fig. Location of bolts for fastening the actuator to the door).
5. Disconnect the electrical connector and/or vacuum hose from the actuator and remove the actuator from the door (see Fig. Location of the connection to the actuator of the electrical connector and vacuum hose).
Fuel tank filler neck flap actuator
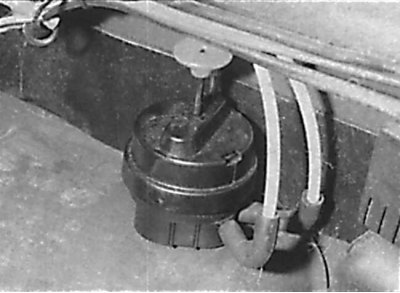
Location of the actuator of the fuel tank filler flap
1. To access the actuator, remove the right luggage compartment trim panel.
2. On early models, remove the vacuum hose from the actuator, then remove the mounting screws and remove the actuator.
3. On later models, label and disconnect the vacuum hoses from the actuator, then release the retaining clip and remove the actuator (see Fig. Location of the actuator of the fuel tank filler flap).
Trunk lid lock actuator
Removal the tailgate lock actuator
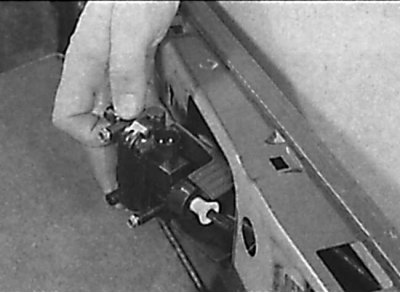
1. Open the trunk lid, then remove the ground cable from the battery.
2. Carefully release the clips and remove the rear luggage compartment trim panel. The luggage compartment trim panel has a special cover, after removing which you can only adjust the position of the trunk lock.
3. On models with central locking, disconnect the trunk lock rod from the central locking actuator. To do this, move the locking sleeve to the actuator and disconnect the rod.
4. Unscrew the screws and remove the trunk lid lock actuator together with its rear cover. If necessary, remove the rear cover from the actuator.
Rear door lock actuator
Location of the mounting screws and the actuator rod of the rear door lock
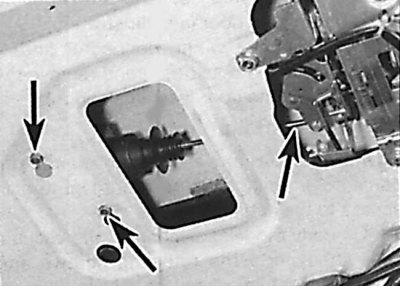
Removal the rear door lock actuator
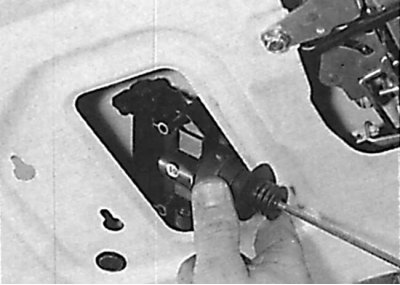
1. Open the rear door, remove the clips securing the lower part of the rear door trim panel and remove the panel. To remove the clips, first unscrew the central screws from them.
2. Pull up to remove the rear door lock button trim cover, then release the inner panel and remove it from the rear door.
3. Disconnect the rod from the lock or move the locking sleeve to the actuator and disconnect the lock rod from the actuator.
4. Unscrew the screws and remove the actuator from the door.
5. Disconnect the electrical connector and/or vacuum hose from the actuator and remove the actuator from the door (see fig. Location of the mounting screws and the actuator rod of the rear door lock, Removing the actuator of the rear door lock).
Electronic Control Unit (ECU) on later models with remote central locking
1. The electronic control unit is located behind the hydraulic pump under the rear seat.
2. To access the ECU, remove the rear seat cushion and move the carpet to the side.
3. Disconnect the electrical connector from the control unit, then unscrew the nuts and remove the control unit from the vehicle.
Infrared receiver for driver's door on later models with remote central locking
1. Remove the lock cylinder from the driver's door.
2. On Sedan and Wagon models, remove the plug located at the top of the rear edge of the door, then disconnect the electrical connector, release the receiver and remove it from the door.
3. On Coupe models, remove the screws and the rear door trim panel. Disconnect the electrical connector, then release the retaining bracket and remove the receiver from the door.
Infrared receiver for boot lid on late models Saloon and Coupe with remote central locking
1. Remove the screws and remove the rear luggage compartment trim panel.
2. Unscrew the screw and remove the receiver mounting bracket.
3. Disconnect the electrical connector from the receiver, then disconnect the receiver and remove it from the vehicle.
Rear door infrared receiver on later models Estate with remote central locking
1. Remove the lock from the rear door.
2. Disconnect the sensor and remove it from the lock.
Installation
1. Installation is performed in the reverse order of removal. Before installing the trim panel, check the operation of the central lock. The actuator rod can be adjusted after moving the locking sleeve to the actuator and reinstalling the rod.