



Contents: Front doors ↡ Rear doors ↡
Front doors
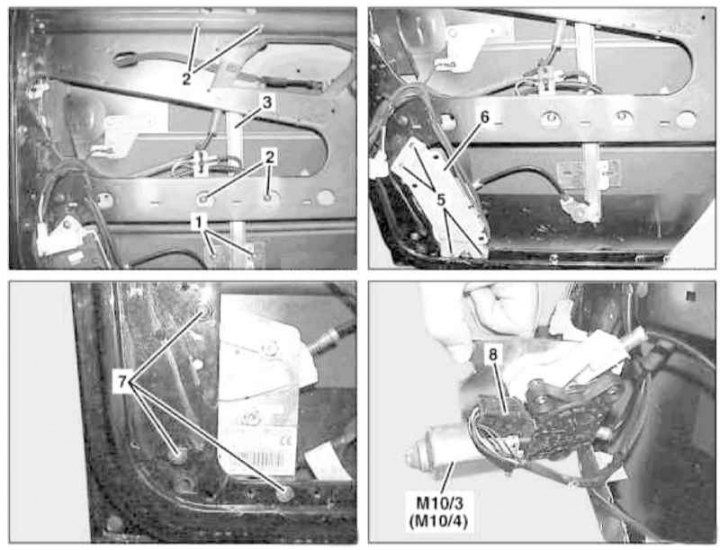
Front Door Window Regulator Installation Details
1, 2, 5, 7 - Screws; 3 - Guide; 6 - Mounting bracket; 8 - Electrical wiring connector; M10/3 - Electric motor for left door window lifter; M10/4 - Electric motor for right door window lifter
1. Remove the door interior trim panel (see Section Removal and installation interior trim of door assemblies).
2. Remove the door control module (see Chapter On-board electrical equipment).
3. Remove the insulating film cover (see Section Removal and installation interior trim of door assemblies), - the damaged pad must be replaced.
4. Having taken measures to prevent the glass from falling down, unscrew the screws (1 and 2) of the regulator.
5. Remove the screws (5) securing the mounting bracket (6).
6. Remove the screws (7) securing the drive electric motor (M10/3 or M10/4), disconnect the electrical wiring connector (8).
7. Remove the window regulator assembly from the door frame.
8. Installation is carried out in the reverse order. Before tightening the screws (1 and 2), align the guide (3) parallel to the frame and the glass relative to the window opening.
9. Finally, make sure that the drive is functioning properly and that the glass moves smoothly.
Rear doors
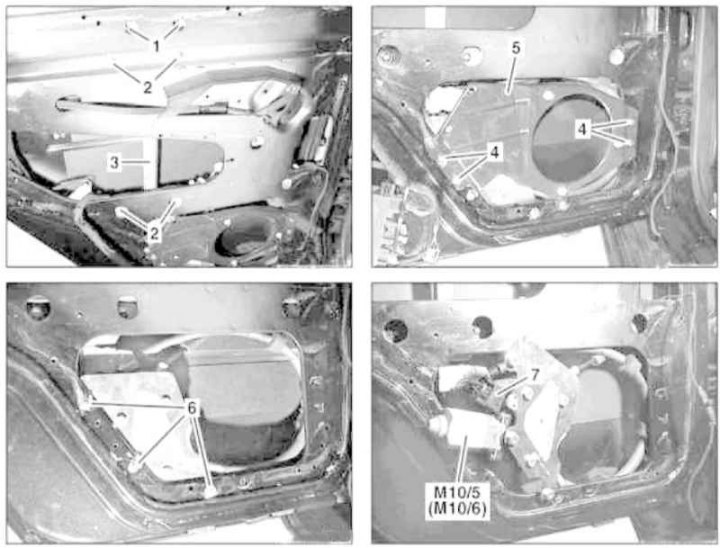
Rear Door Window Regulator Installation Details
1, 2, 4, 6 - Screws; 3 - Guide; 5 - Mounting bracket; 7 - Electrical wiring connector; M10/5 - Electric motor for left door window lifter; M10/6 - Electric motor for right door window lifter
(Original source of information: MercedesMAN.ru)
The procedure is similar to that described above for the front doors.