
Front doors
On the example of the driver's door
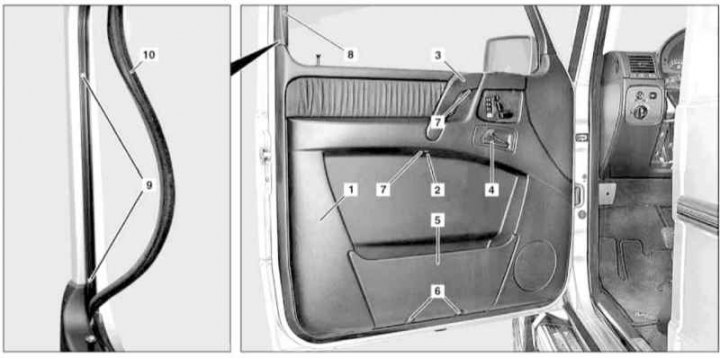
Details of installation of the panel of an internal upholstery of a forward door (1 of 2)
1 - Upholstery panel; 2 - Plugs; 3 - Handle; 4 - Internal door handle; 5 - Pocket; 6, 7 - Mounting screws; 8 - Finishing panel; 9 - Bolts; 10 - Guide felt insert
Details of installation of the panel of an internal upholstery of a forward door (2 of 2)
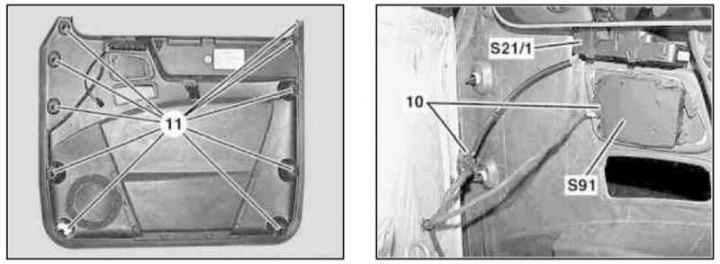
10 - Connectors; 11 - Clips; S21 / 1 - Group of power window switches on the driver's door; S91 - Power seat switch group (with setting memory)
1. Remove the inner door handle (see Section Removal and installation of internal door handles).
2. 3 On models 463.246/249, unscrew the lock handle (A).
3. Remove plugs (2) and remove the screws (7) door handle fixings (3).
4. Using a suitable wedge, separate the upholstery panel (1) from the door frame at the location of the clamps (8), evaluate the condition of the released latches, replace the broken elements.
5. Disconnect electrical connectors (10) groups of switches for controlling the operation of electric windows (S21/1) and seats (S91).
6. Evaluate the condition of the insulating film lining, if necessary, replace the latter.
Rear doors
On the example of models with a wheelbase of 2850 mm
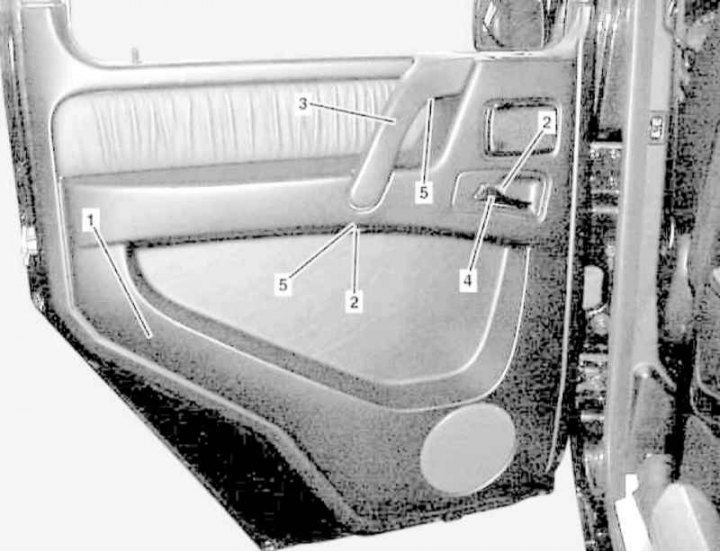
Details of installation of the panel of an internal upholstery of a back door (1 of 3)
1 - Upholstery panel; 2 - Plugs; 3 - Handle; 4 - Internal door handle; 5 - Fixing screws
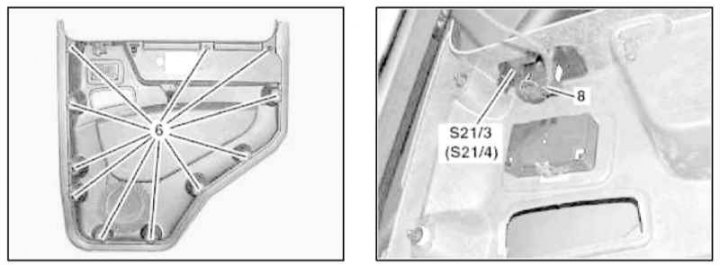
Details of installation of the panel of an internal upholstery of a back door (2 of 3)
6 - Clamps; 8 - Connector; S21 / 3 - Group of switches for controlling the power window of the left door; S21 / 4 - Group of switches for controlling the window regulator of the right door
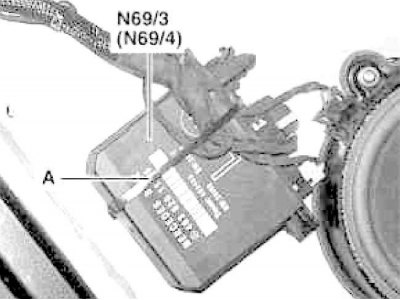
Details of installation of the panel of an internal upholstery of a back door (3 of 3)
A - Strapping; N69/3 - Left door control module; N69/4 - Right door control module
The procedure is the same as described above for the front doors. Do not forget to fix the wiring of the control module when assembling (N69/3 or N69/4) strapping (A).
Tailgate
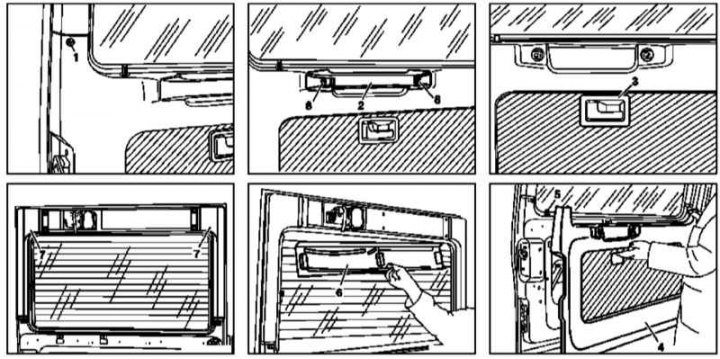
Details of installation of panels of an upholstery of a door of a back
1, 8 - Screws; 2 - Handle; 3 - Cover; 4 - The lower section of the upholstery panel; 5 - Single lock button; 6 - Upper section of the upholstery panel; 7 - Window trim panels
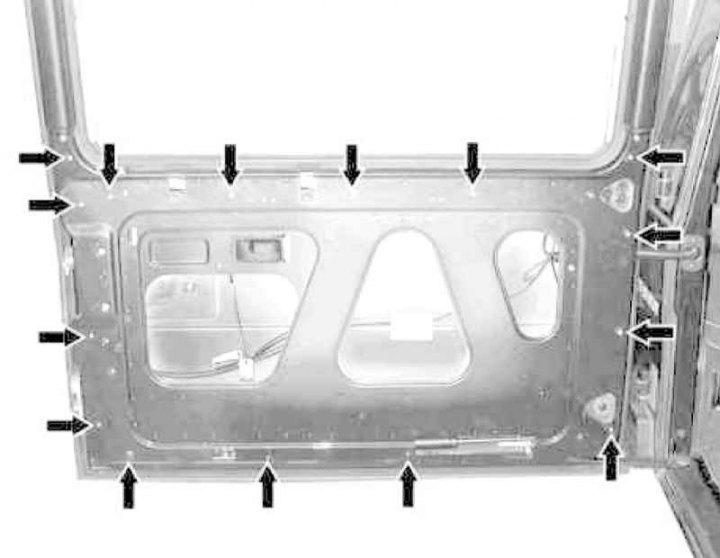
The layout of the upholstery panel fasteners
1. On models of the corresponding configuration, remove the screws (1) lower section fixings (4) upholstery panel.
2. Remove the plugs and remove the screws (8) door handle fixings (2).
3. Slightly squeezing the upholstery in the direction of the lock, remove the cover (3) inside door handle.
4. Prying with a wedge at the location of the clamps (arrows), separate upholstery panel (4) from the door frame, push the button (5) a single lock, then slide the panel up and remove it completely.
5. Release the center latches securing the top section (6) upholstery panel.
6. Unscrew the left and right window trim panels (7).
7. Evaluate the condition of the insulating film lining, if necessary, replace the latter.
8. Installation is carried out in the reverse order - the latches damaged during the release must be replaced without fail.