



Contents: Front doors ↡ Rear doors ↡
Front doors
Removal
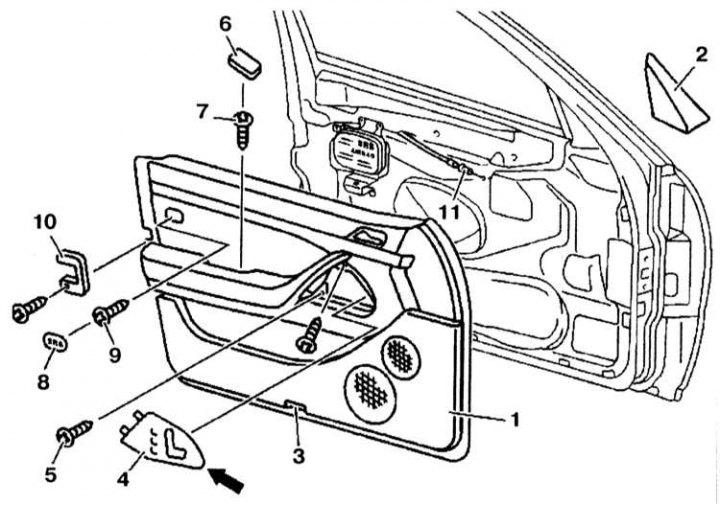
Front Door Trim Panel Installation Details
1 - Front door trim; 2 - Triangular cover of the outside rearview mirror; 3 - Door opening indicator lamp; 4 - Wooden panel; 5, 7, 9 - Bolts; 6 - Lid; 8 - SRS cover; 10 - Overlay; 11 - Control cable
1. Remove the window lift handle.
2. Remove the triangular cover (2) of the outside rearview mirror.
3. Disconnect the wiring connector from the door opening indicator light (3) and remove it.
4. Remove the wooden panel (4) (arrow).
5. Disconnect the wiring connectors from the switches and controls.
6. Unscrew the bolts (5) around the perimeter of the door opening handle.
7. Detach the cover (6) on the armrest and unscrew the bolt (7).
8. Remove the SRS cover (8) and unscrew the bolt (9).
9. Remove the cover (10).
10. Press the trim (1) into the door from the bottom, front and back.
11. Remove the trim (1) from the clips using a screwdriver and after a while remove it from the inner door panel.
12. Disconnect the control cable (11).
13. Remove the trim (1).
14. Check the film and clips on the inner door panel and replace it if necessary.
15. Check the fasteners on the trim (1) and replace it if necessary.
Installation
Installation is carried out in the reverse order of removal.
Rear doors
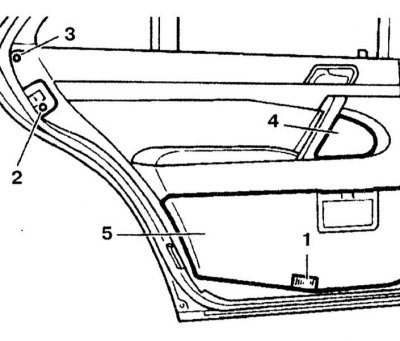
Rear Door Trim Panel Installation Details
1 - Door opening indicator lamp; 2, 3 - Bolts; 4 - Wooden panel; 5 - Rear door trim
Removal
1. Remove the door opening indicator light.
2. Loosen the bolts securing the locking plate (2) and remove it.
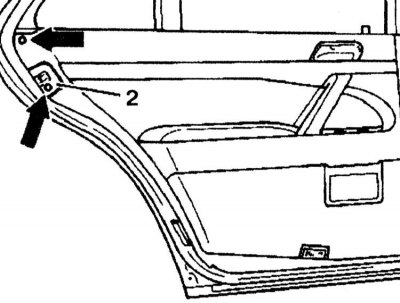
3. Detach the wood panel using tool 140 589 16 63 00 by inserting it between the wood panel and the trim on the door panel.
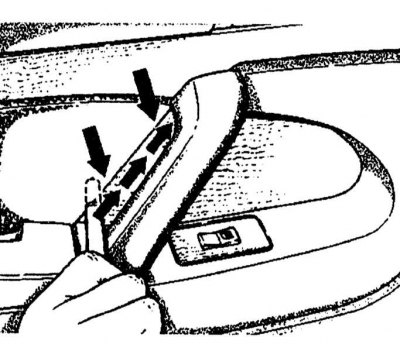
4. Remove the wooden panel.
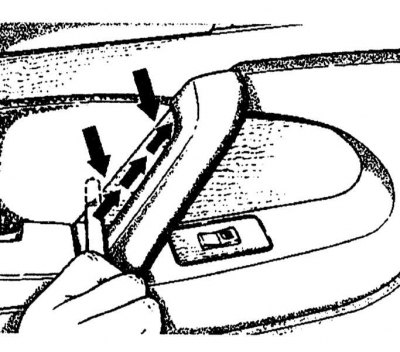
5. Remove the wooden panel.
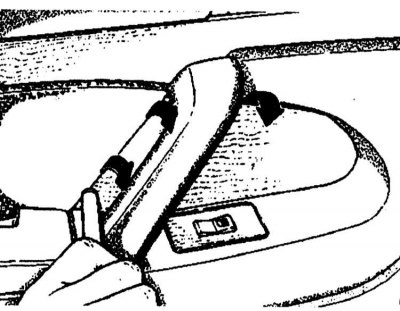
6. Unscrew the bolts around the perimeter of the door opening handle.
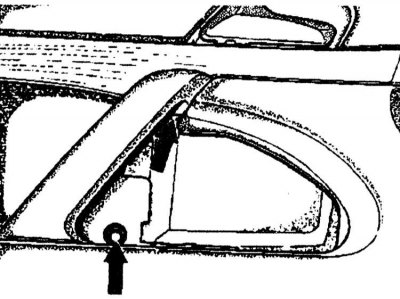
7. Press the door trim out of the door panel from the bottom, front and back using a plastic screwdriver (there are 9 clamps).
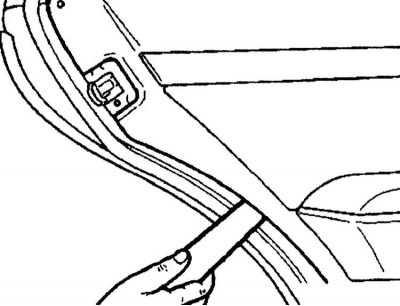
8. Starting from the front top (i) section, remove the trim panel from the channel so that it is simultaneously released from the door panel below.
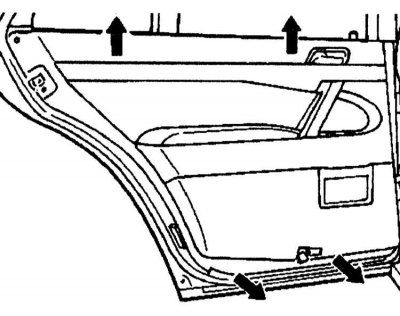
9. Disconnect the wiring connectors from the trim.
Installation
Installation is carried out in the reverse order of removal.