

Top hatch frame installation details (1 of 3)
1 - Frame; 3 - Guide tube
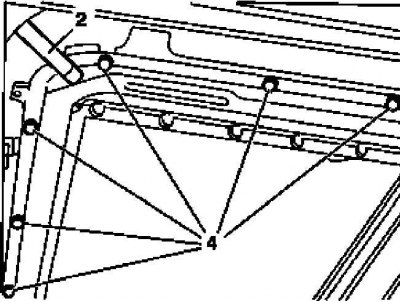
Top hatch frame installation details (2 of 3)
2 - Drainage hose; 4 - Bolts
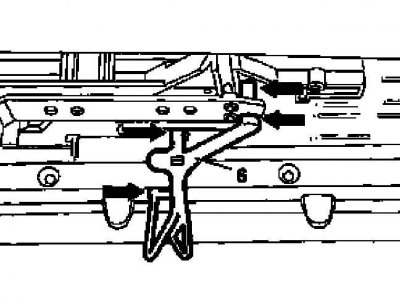
Top hatch frame installation details (3 of 3)
6 - Conductors
Removing
1. Remove the manhole cover (see Section Removal and installation of a cover of the top hatch).
2. Remove the drive cable (see Section Removal and installation of a cable of a drive of the top hatch).
3. Remove headlining (see part Salon equipment).
4. Unbolt the guide tube (3) from the frame (1) hatch.
5. Disconnect the drain hoses (2), installed in each corner of the frame.
6. Turn out fixing bolts (4) and remove the frame (1).
Installation
1. Install in the side rails and in the grooves of the hinged bracket (arrows) left and right conductors (6).
Note. Conductors should be removed only after installing the hatch cover.
2. Thread the frame (1) to its regular place, taking care of the reliability of sealing the landing gap.
3. Screw in and tighten the fixing bolts (4), then take care to connect the drain hoses correctly (2) and guide tube (3).
4. Further installation is carried out in the reverse order to the dismantling of the components - do not forget to remove the conductors after installing the cover (6).