
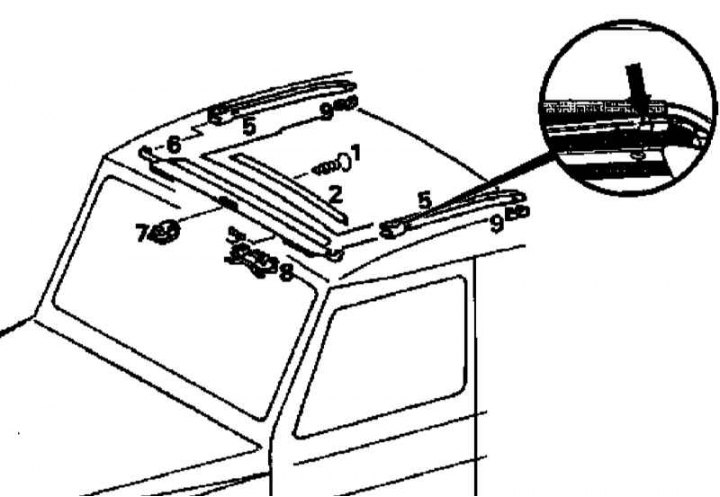
Top hatch wind deflector installation details
1 - Screw for fastening the chrome cross member; 2 - Chrome-plated cross member; 5 - Clamping bars; 6 - Wind deflector; 7, 8, 9 - Reference nodes; Arrow - Adjusting screw
1. Open the sunroof.
2. Remove the fixing screws (1) and remove the chrome bar (2).
3. Remove clamping bars (5) from anchor points (9) and pull them back, releasing the edges of the wind deflector (6).
4. Release the fender (6) from the central support (7), gently prying with a screwdriver on the left and right, remove it from the spindle assembly with supports (8).
5. Installation is carried out in the reverse order.
6. Make sure that the wind deflector is working properly - if it hits the hatch cover when retracting, correct the fit of the element using the adjusting screw (arrow).
7. If the functioning of the wind deflector (6) accompanied by a rattling sound, it should be released from the central support (7), while pressing in the area of \u200b\u200bthe location of the side supports (8), bend slightly and snap into place.
8. Finally, check that the wind deflector functions properly during a test drive at a speed of at least 100 km/h. Repeat the adjustment procedure if necessary.