



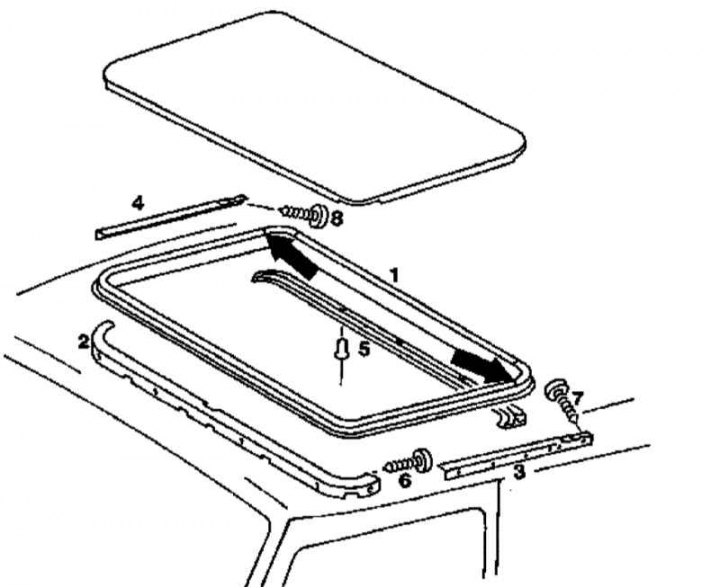
Installation details of the sealing element of the upper hatch
1 - Sealing element; 2 - Front holder; 3 - Left holder; 4 - Right holder; 5 - Rear holder; 6, 7, 8 - Mounting screws; Arrows - Sealing element joints
1. Open the hatch completely.
2. Mark the installation position of the joints (arrows) of the sealing element (1) in the roof opening.
3. Pull to release the seal (1) from the holders (2, 3, 4 and 5).
4. Remove the wind deflector (see Section Removal, installation and adjusting the upper hatch wind deflector).
Information copied from the website www.mercedesman.ru
5. Loosen the fastening screws (6, 7 and 8) and remove the front (2), left (3) and right (4) sealing element holders - the side holders should be moved back and then pulled up.
6. To remove the rear holder (5), remove the upper hatch frame (see Section Removal and installation the upper hatch frame) and drill out the rivets.
7. Installation is carried out in the reverse order - ensure that the mounting marks applied during dismantling are correctly aligned.