
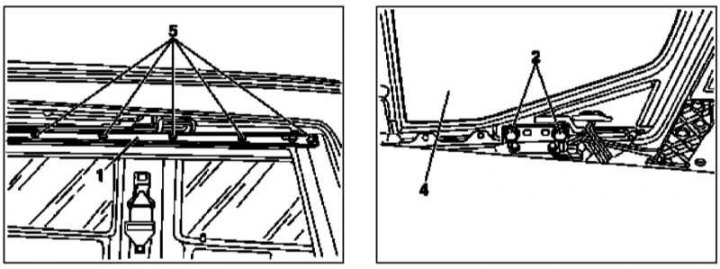
Top hatch cover installation details (1 of 2)
1 - Side skid; 2 - Fixing nuts; 4 - Manhole cover; 5 - Fixing screws
Top hatch cover installation details (2 of 2)
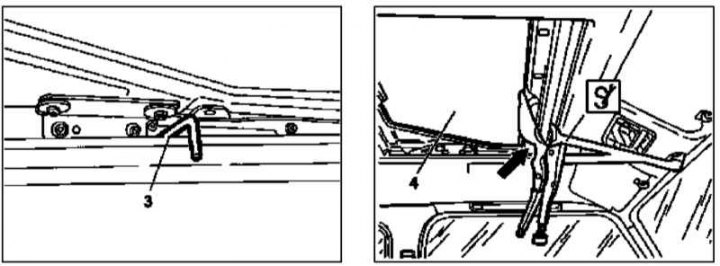
3 - Centering rod; 4 - Manhole cover; Arrow - Crimping Tool
Removing
Top hatch centering rod design
1. Remove the interior rearview mirror (see part Salon equipment).
2. Remove the inner upholstery of the cover (see Section Removal and installation of the panel of an upholstery of a cover of the top hatch).
3. Fully open sunroof.
4. Remove the fixing screws (5) and remove the left and right guide rails (1).
5. Close sunroof.
6. Give fixing nuts (2) left and right on the lid (4) hatch.
7. Push up and remove the cover (4).
8. Insert the left and right centering rods into the centering holes (3).
Installation
1. Lubricate with special paste (001 981 14 51) left and right sliding grips.
2. Fill the lid through the top (4) in the hatchway.
3. Install, but do not yet tighten, the mounting nuts (2) left and right.
4. Crimp the cover (4) using special forceps (arrow).
5. Tighten nuts (2) and remove the tongs (arrow).
6. Fully open sunroof.
7. Special paste (001 981 14 51) lubricate the guide rails (1) and screw them onto your regular ones, without completely tightening the fixing screws yet (5).
8. Remove the left and right centering rods (3) and adjust the position of the cover in the opening.
Note. It is better to entrust the adjustment of the cover to car service specialists.
9. Finally tighten the fixing screws (5) and reinstall the inner lining of the lid (see Section Removal and installation of the panel of an upholstery of a cover of the top hatch).
10. Install the rearview mirror (see part Salon equipment) and check the operation of the sunroof drive.