
Cardan shaft
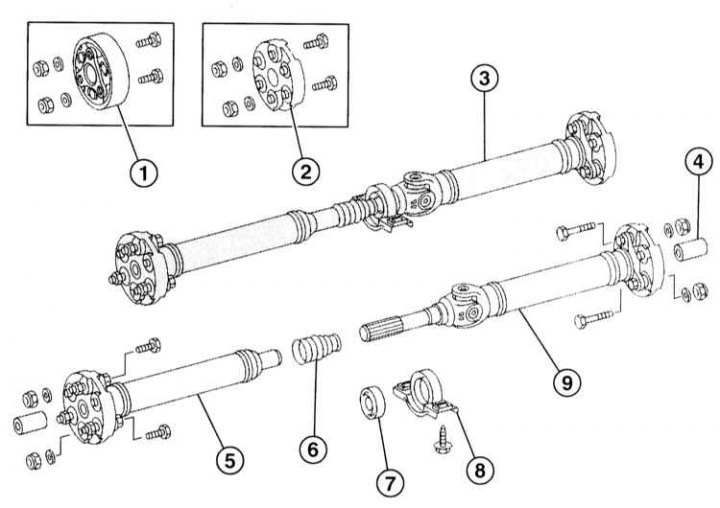
1 - Front damper; 2 - Cardan shaft flange; 3 - Cardan shaft assembly; 4 - Rear centering sleeve; 5 - Front cardan shaft; 6 - Casing; 7 - Ball bearing; 8 - Support; 9 - Cardan shaft rear
Removing
Attention! Be sure to replace self-locking bolts and nuts with new ones.
The operation of lifting and placing the vehicle on stands is dangerous! Therefore, before carrying out the operation, read Section Jacking and towing Introduction to leadership.
1. Raise and place the vehicle on stands.
2. Remove the rear of the exhaust system, refer to Section Removal, installation of the exhaust system and leak test.
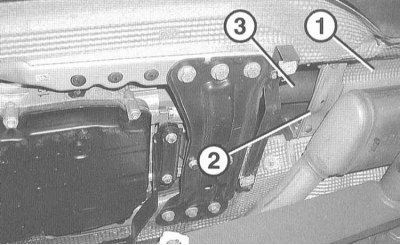
3. Loosen the fixing screws and remove the heat shield (1).
4. Diesel engine: Remove the bottom trim of the vehicle.
5. Manual transmission: Disconnect the stiffener from the central gearshift unit.
6. AT: Disconnect the stiffener (2). (3) - cardan shaft.
7. Loosen the fixing screws (1) and disconnect the front propeller shaft from the gearbox. In this case, the clutch must remain on the cardan shaft. To prevent the propeller shaft from turning, hold it with a strap wrench.
8. Disconnect the rear propeller shaft from the final drive. In this case, the flange must remain on the cardan shaft.
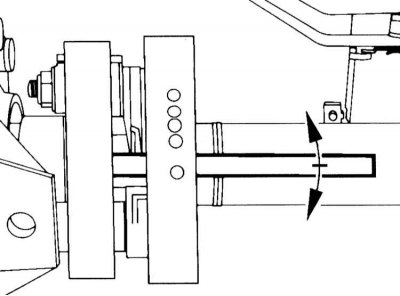
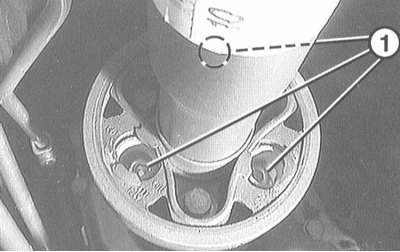
9. Loosen the guide bushings in the propshaft flanges using a cylindrical drift (W = 10 - 12 mm, length = approx. 150 mm).
Attention! Place a support under the propeller shaft so that it does not tilt at a large angle when removed. Otherwise, in particular, the protective covers can be crushed at the constant velocity joint.
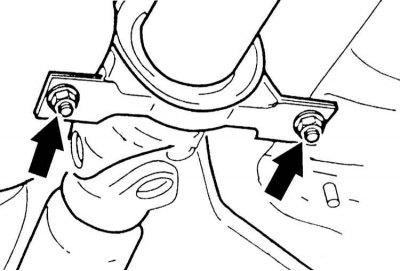
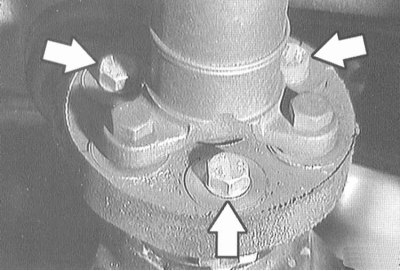
10. Turn away bolts of fastening of an intermediate support, keeping it from turning. If necessary, remove the washers from the bolts. When installing, they must be installed in their original places.
11. Remove the cardan shaft from the centering pins on the gearbox and on the final drive flange and pull the shaft back.
12. If necessary, disunite the front and rear driveshafts through splines.
Installation
1. If the front and rear driveshafts have been separated, reconnect them. At the same time, pay attention to the markings applied on both shafts. The protrusion of the front shaft must be between the two protrusions on the articulated yoke. Lubricate the spline connection with Molykote grease before assembly. Close the connection with a protective cover.
2. Fill the cavities of both centering sleeves, each with 6 g of universal grease (MERCEDES 267/0 for example «Aral Langzeitfett H» or «Elf Multi») and install the driveshaft in place.
3. Fix the intermediate support of the cardan shaft with a torque of 30Nm.
4. Fix the rear cardan shaft to the final drive with the forces specified in the Specifications.
5. Fix the front propeller shaft to the gearbox with the efforts specified in the Specifications.
6. AT: Fasten the front stiffener with a torque of 23Nm.
7. Manual transmission: Fasten the transverse stiffener to the central shift block with a torque of 23Nm.
8. Diesel engine: Reinstall the vehicle's lower trim.
9. Attach the heat shield. Replace nuts if necessary.
10. Install the rear of the exhaust system, refer to Section Removal, installation of the exhaust system and leak test.
11. Lower the car on wheels.