
Note: New front and rear propshaft coupling nuts will be required for installation.
Removing
1. Place wedges under the front wheels. Jack up the rear of the car and place it on jack stands (see "Vehicle lifting and jacking up").
2. Turn away bolts and remove thermal guards of system of release of the fulfilled gases (see fig. 7.2). Loosen the bolts and remove the bracket that mounts across the driveline tunnel so the shaft can be lowered.
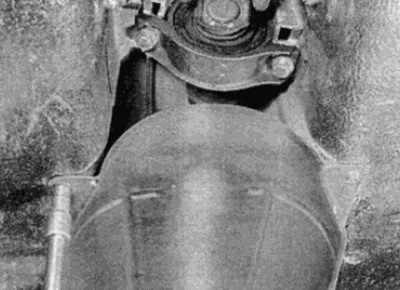
Pic. 7.2. Loosen the bolts and remove the exhaust heat shields
3. Position a wooden block jack under the transmission and raise the jack to support the assembly.
4. Turn away a nut of fastening of an arm of a back support on a transmission and bolts of fastening of a support to a body. Remove the support bracket.
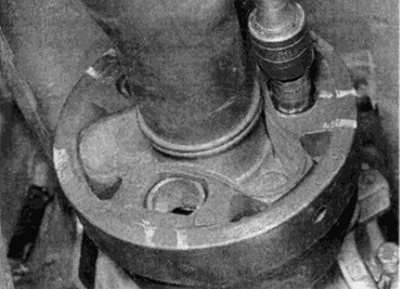
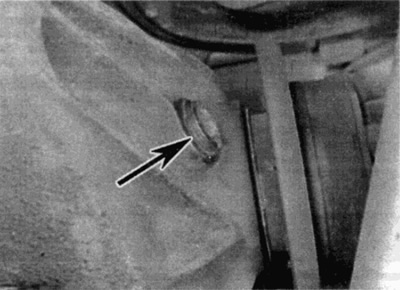
5. Using a large open-end wrench, loosen the threaded bushing nut that is located next to the thrust bearing by a couple of turns, taking care not to damage the rubber boot.
6. Apply alignment marks between the shaft coupling and the gearbox flange, then loosen and remove the nuts and bolts holding the flexible coupling to the gearbox (see fig. 7.6). Discard the nuts as new ones must be used for installation.
Pic. 7.6. Loosen the nuts and bolts securing the flexible coupling to the gearbox flange
7. Remove the nuts and lower the driveline belt bracket.
Note: On post September 1988 vehicles, the belt bracket nuts/boots are the same as the front seat belt anchors.
8. Using paint or marker, apply alignment marks between the driveline clutch and final drive flange. Remove the nuts and bolts securing the clutch to the final drive and dispose of them; when installing, you must use new (see fig. 7.8).
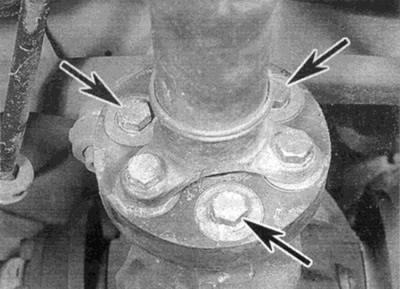
Pic. 7.8. Remove nuts and bolts (shown by arrows) fastening the clutch to the main gear
9. With the help of a partner, support the driveline and unscrew the bolts of the central bearing bracket. Move the rear of the shaft forward and disconnect the shaft from the final drive. Disconnect the front of the shaft from the gearbox and remove the assembly from under the vehicle (see fig. 7.9, a-c).
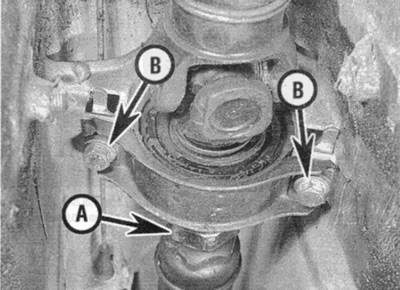
Pic. 7.9, a. Nut of a collar of cardan transfer (A) and bolts to the center support bearing bracket (IN)
Pic. 7.9b. Slide the rear of the shaft forward and separate the shaft from the final drive

Pic. 7.9, c. Disconnect the front section of the driveline from the transmission flange.
Note: Do not separate the halves of the driveline without making alignment marks. If the driveline is not properly assembled, it will be unbalanced, resulting in noise and vibration during operation. Some models already have alignment marks on the shaft: the raised mark on the front section must be located between the two marks on the rear section of the universal joint.
10. Check the condition of the rubber couplings, support bearing and universal joint as described in paragraphs 8.9 and 10. Check the gearbox flange mounting rod and the universal joint for wear. If wear or damage is found, replace.
Installation
11. On models where the shaft bushing at the end of the gearbox is bronze, lubricate the bushing with molybdenum disulphide grease. Where the bushing is not bronze, lubricate it with multipurpose grease.
12. Install the cardan transmission in place, aligning the marks made before removal and connect the shaft to the gearbox and final drive flanges. With the marks aligned correctly, install the support bracket bolts by lightly hand-tightening them.
13. Make sure that the labels are correctly aligned, insert the mounting bolts holding the rear clutch in the final drive and install new mounting nuts. Tighten the fastening nuts to the torque required by Technical Data.
14. Check that the front clutch is properly aligned with the gearbox flange and install the clutch bolts. Install new fastening nuts and tighten them to the required torque.
15. When both couplings are tightened, tighten the center support bearing mounting bolts to the correct torque.
16. Tighten the threaded bushing nut to the required torque, making sure the rubber boot remains properly seated.
17. Establish an arm of a support on a back part of a transmission and tighten bolts and nuts of fastening with demanded effort.
18. Install exhaust heat shields and brackets (if provided) and lower the car to the ground.