
Removing
The gearbox is removed from the engine compartment along with the engine.
1. Lower the engine on the front beam (see relevant chapter).
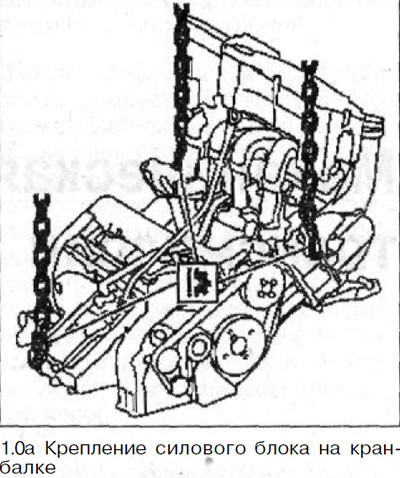
Attention! To lift the engine, run three chains on the right and left sides of the engine and oil pan. Chains should be as vertical as possible, which is possible with the help of an appropriate frame (see illustration 1.0a).
2. Raise the power block with a suitable overhead crane to relieve the suspension mounts.
3. Unscrew bolts 1 and 2 (see illustration).
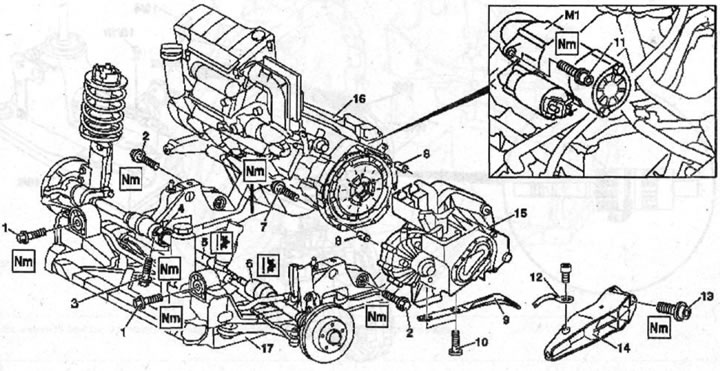
1.3 Remove bolts 1 and 2
3 - a bolt of fastening of a support/bearing of an intermediate shaft
4 - support / bearing of the intermediate shaft
5 - right drive shaft
6 - left drive shaft
7 - engine and gearbox mounting bolt
8- centering sleeves
9 - catalyst bracket
10 - catalyst bracket mounting bolt
11 - starter mounting bolt
12 - wire «masses» (-)
13 - a bolt of fastening of a support of a transmission
14 - gearbox support
15 - gearbox
16 - engine
17 - front suspension beam of the power unit
M1 - starter
4. Use a suitable screwdriver to press the shank of the left axle shaft 6 out of the gearbox (see illustration 1.3).
5. Unscrew the bolts 3 fastening the support / thrust bearing 4 of the intermediate shaft to the cylinder block (see illustration 1.3).
6. Using a suitable screwdriver, wring out the shank of the intermediate shaft 5 of the right axle shaft from the gearbox (see illustration 1.3).
7. Carefully lift the engine 16 together with the gearbox 15 and remove them from the front beam 17, carefully removing the shanks of the left axle shaft, as well as the intermediate shaft from the gearbox (see illustration 1.3). Check the condition of the circlips on the drive shafts and replace them with new ones if damaged.
8. Unscrew the bolts 10 fastening the bracket 9 of the catalyst to the gearbox (see illustration 1.3).
9. Disconnect from a support 14 of a transmission a wire 12 «masses» (-) (see illustration 1.3).
10. Unscrew the bolts 13 and disconnect the support 14 (see illustration 1.3).
11. Unscrew the bolts 11 and remove the starter M1 (see illustration 1.3)
12. Unscrew the bolts 7 and disconnect the engine 16 and gearbox 15 (see illustration 1.3).
Attention! Do not lose the centering sleeves 8 (see illustration 1.3). Before connecting the power block, make sure that the centering sleeves are in place.
13. Check the gear oil level in the gearbox. The oil level in the box is normal if it is flush with the bottom edge of the filler hole.
Attention! If the plugs of the filling and drain holes were unscrewed, then lubricate them with sealant when installing them.
14. Cars with automatic clutch. Read the codes for possible malfunctions of the automatic clutch by contacting the workshop.
The gearbox is installed in the reverse order of removal.