
Warning! Dust resulting from wear on the linings and accumulating on brake components may contain asbestos that is hazardous to health. Do not blow this dust out with compressed air or inhale it!
Do not use gasoline-based solvents to remove dust. Dust should be washed off with a special brake system cleaner or methyl alcohol in a drain container.
After wiping brake system components with a damp cloth, keep the cloth and the contents of the drain container in a closed and labeled container. In the future, if possible, try to use asbestos-free components.
Note. In addition to checks at regular intervals, the condition of the brake mechanisms should be carried out each time the wheels are removed or when signs of a malfunction appear in the system.
To ensure driving safety, the brake check procedures described below are the most important of all vehicle maintenance procedures you perform.
Signs of problems in the brake system
Disc brakes may have built-in lining wear indicators that indicate when lining wear has reached a critical level. In this case, the pads should be changed immediately, otherwise the brake discs will be damaged and they will require costly repairs.
Any of the following symptoms may indicate a potential defect in the brake system:
- a) When depressing the brake pedal, the car «leads away» one way;
- b) Brake mechanisms during braking make scraping or squealing sounds;
- c) The brake pedal has excessive travel;
- d) Brake pedal pulsing (this is normal only when the ABS system is working);
- e) Brake fluid leaks (usually on the inside of a tire or wheel).
If at least one of these signs is found, inspect the brake system immediately.
Brake lines and hoses
Note. The brake system mainly uses steel brake pipes, with the exception of flexible reinforced hoses at the front wheels and as connections at the rear axle. Regular inspection of all these lines is very important.
1. Park your vehicle on level ground and turn off the engine. Remove wheel covers. Loosen but do not remove all four wheel bolts.
2. Jack up the vehicle and place it securely on jack stands.
3. Remove the wheels (see Section Jacking and towing in Administered to this guide).
4. Check all brake lines and hoses for cracks and abrasions in their outer coating, leaks, swelling and deformation. Check the brake hoses at the front and rear of the vehicle for signs of softening, cracking, deformation, or wear due to rubbing against other components. Check all fittings for signs of leaks and make sure all bolts and brake hose clamps are secure.
5. Bend the brake hose back and forth with your hands to check for damage. Hoses should not be twisted - be guided by the colored line printed on the hose.
6. Turn a steering wheel to the right and to the left against the stop. The hoses must not touch the structural elements of the vehicle.
7. If fluid leaks or damage is found, repair them immediately. For a more detailed description of the procedure for repairing the brake system, refer to Chapter Brake system.
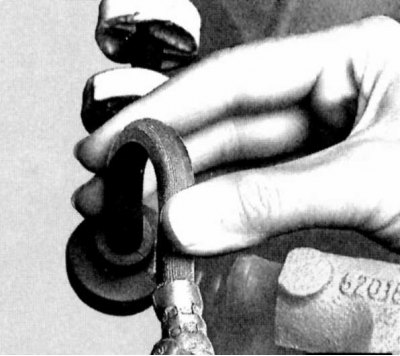
Checking the thickness of the brake pads
The thickness of the outer brake pads can be checked through the opening in the wheel rim using a flashlight. The inner shoe can be checked with a flashlight and a mirror. If you need to more accurately estimate the thickness of the pad, you should remove the wheel and measure the pad with a caliper.
Front wheel disc brake
Note. Experience shows that wheel brake pad wear on the front passenger side is greater than on the driver's side. Therefore, to check the thickness of the brake pad, it is recommended to remove the wheel from the front passenger side. Observations show that 1 mm of brake pad wear corresponds to at least 1000 km of a car's run. This rule corresponds to adverse operating conditions of the car. Under normal conditions, pad wear is significantly less. With pad thickness 10.0 mm (with backing plate) the block can still be operated for at least 3000 km.
1. Mark with paint the position of the front wheel in relation to the hub. This will bring the balanced wheel into its working position. Loosen the wheel bolts. In this case, the car must be on the ground. Raise the front of the car and place on stands. Remove the front wheel.
2. Use a vernier caliper to measure the total thickness of the metal-backed friction lining on the inner and outer brake pads.
3. The wear limit of the front pad is considered to be 7 mm thick (taking into account the substrate). In this case, the brake shoe must be replaced, see Chapter Brake system.
4. Establish a forward wheel so that the markings put at removal coincided. Do not grease wheel bolts. Install the wheel bolts.
5. Lower the car on wheels and tighten bolts crosswise.
Rear wheel disc brake
1. Check the thickness of the outer brake pad through the hole in the wheel disc, using a flashlight if necessary. The wheel disc does not need to be removed. If there is a wheel cover, it must be removed.
2. Check up an internal block by means of a lamp and a mirror.
3. The brake pad wear limit for the rear and front wheels is 7 mm thick, including the shim.
Parking brake
The simplest, and perhaps most obvious, way to test the parking brake is to park the vehicle on a steep hill with the brakes engaged and the transmission in neutral (You must be in the car during the check). If the parking brake does not keep the vehicle from rolling, it should be adjusted (see chapter Brake system).