



Sequence of works


1. Place the rear of the vehicle on stands.
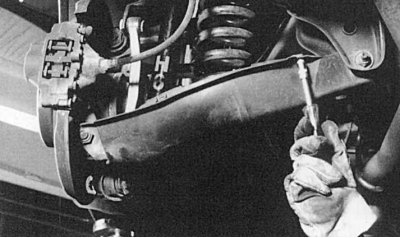
Fig. 7.14. To remove the wishbone cover, unscrew the two bolts
2. Remove the wishbone cover by unscrewing two bolts (Fig. 7.14).
3. Disconnect the brake pad wear sensor wire from the control arm.
4. From the outside, place a jack under the lever and lift the lever until the rear axle is horizontal. Make sure the vehicle is securely supported.
5. Install the clamping device on three sides of the spring so that all turns are covered, if possible.
6. Compress the spring until it can be removed from the cups.
7. Loosen the self-locking nuts on the wishbone and remove them together with the washers.
8. Lower the lever and remove the spring together with the rubber support.
9. If replacement is necessary, slowly release the spring and remove the rubber support.
10. Before reassembling, check the rubber support for wear and replace it if necessary. To facilitate reassembly, apply dishwashing liquid to the supports.
11. Clean the lower cup on the wishbone, as well as the upper seat.
12. Place the compressed spring into the lower cup so that the end of the coil engages in the cup.
13. Install the bolt with a new self-locking nut and washer on the lever and tighten it a few turns.
14. Raise the lever again with the jack until the rear suspension is horizontal.
15. Now tighten the nut on the lever to a torque of 70 Nm.
16. Unload the spring and remove the clamping device. Check the spring for proper seating in the cups.
17. Complete the installation and lower the vehicle.